Learning how to join yarn is one of those small skills that makes crochet and knitting feel so much easier. Let’s explore how to add a new ball of yarn with 3 different methods for you to choose from. Running out of yarn mid-row happens to all of us, whether you are crocheting or knitting.
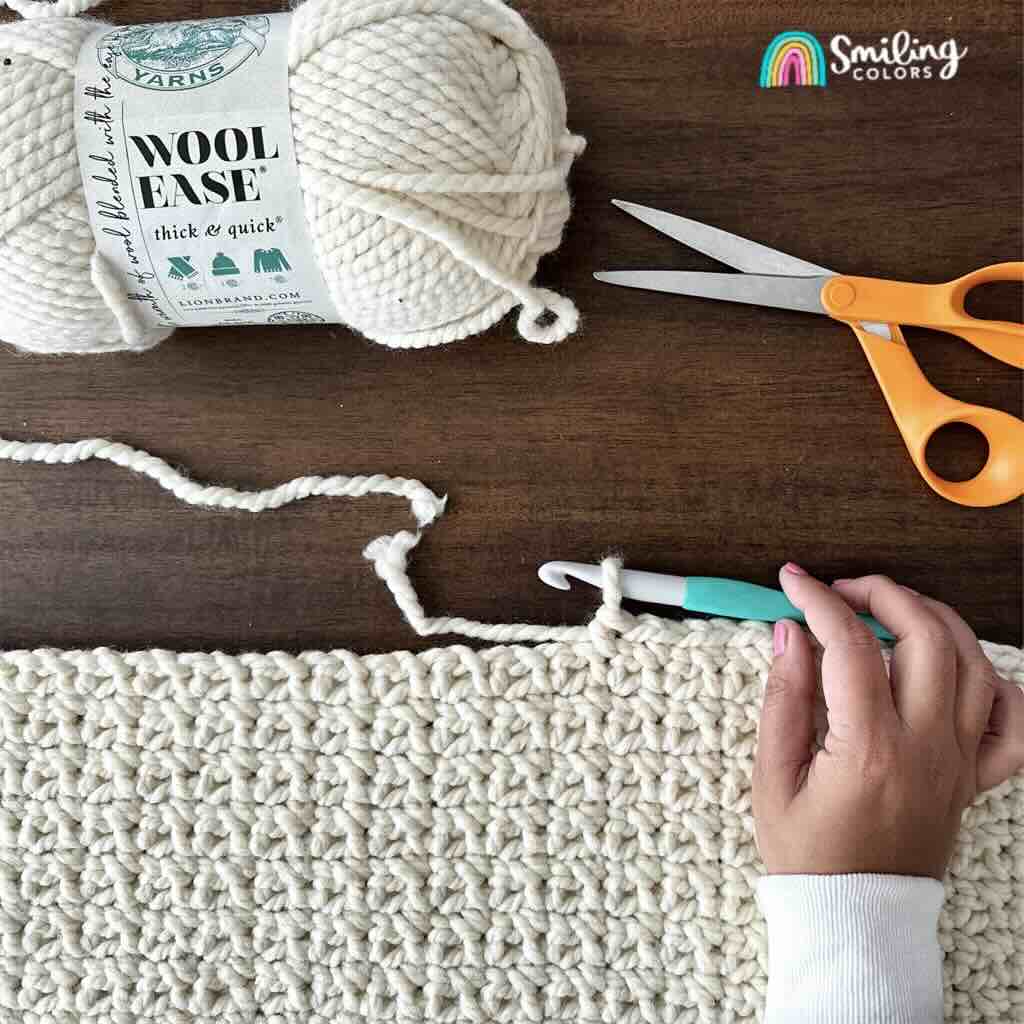
In this post, I’ll show you 3 easy yarn joining methods that work great for crochet and knitting:
- Simple Knot
- Russian Join
- Magic Knot
Each one has its place depending on your experience and how neat you want the join to look.
How to join yarn 3 ways video
Watch this video on my YouTube Channel: https://youtu.be/LivVTj0lEns
Method 1: Join Yarn with a Simple Knot
The simple knot is the easiest way to join yarn and perfect if you’re just starting out or working on casual projects. Create a double knot for a sturdier join if needed.
Important: Trim yarn ends close only after pulling the knots tightly together
How make a simple knot join:
- Stop working when you have about 6 inches of yarn left.
- Place the new yarn alongside the old remaining tail.
- Tie a tight knot, then tie a second knot for extra security.
- Trim the excess later or weave in the ends.
Method 2: Russian Join
The Russian join creates a strong, clean join without knots. For this method you will need a few extra tools. It takes a little practice but gives a polished finish.
Tip: This method works best with medium to bulky yarn where the join can really blend in.
You will need a plastic yarn needle or any other needle you might have that can thread your yarn.

How to make the Russian Join:
- Thread the new yarn onto a yarn needle. Insert the needle back into the yarn itself
- Weave in and out, creating a small loop.
- Thread old yarn tail onto yarn needle. Pull needle through the new yarn loop from step 2
- Thread old yarn back into itself, by weaving in and out as in step 2. Gently pull both yarns to tighten the join.
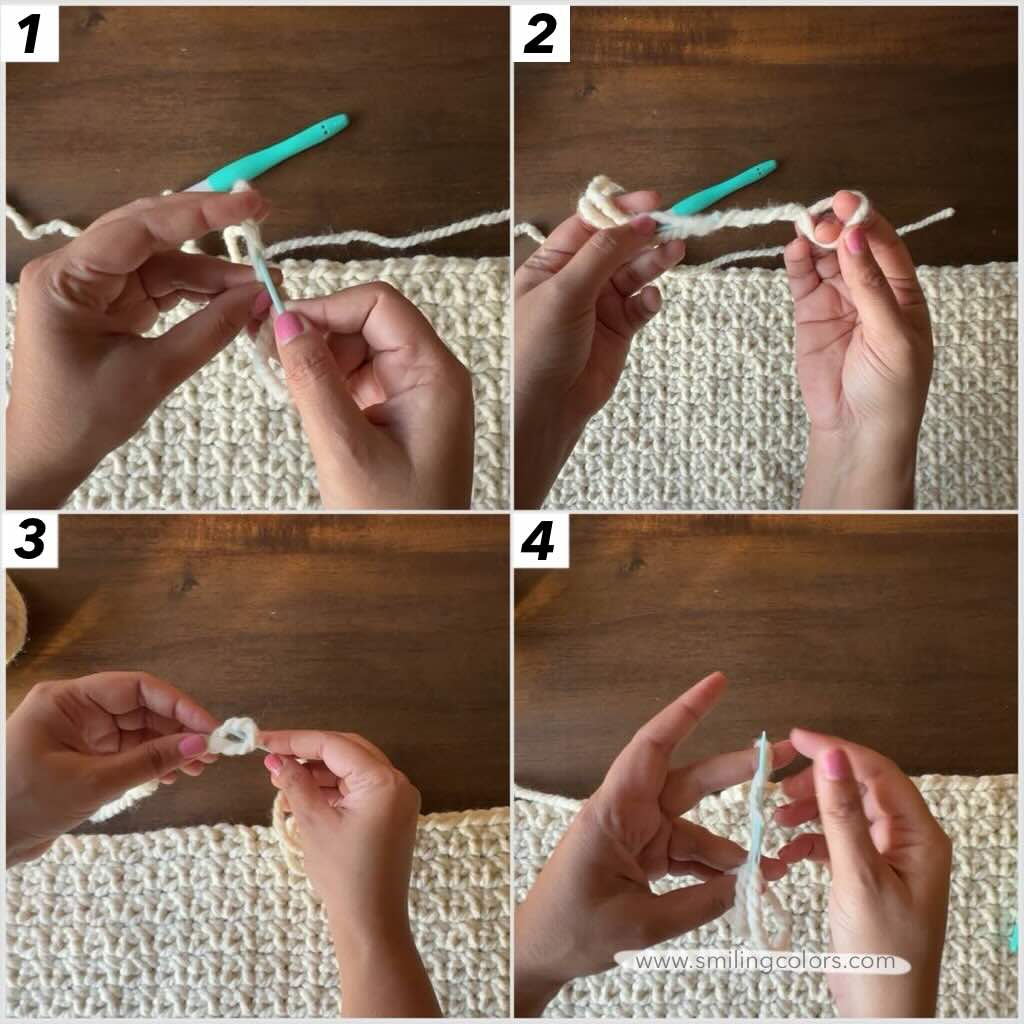

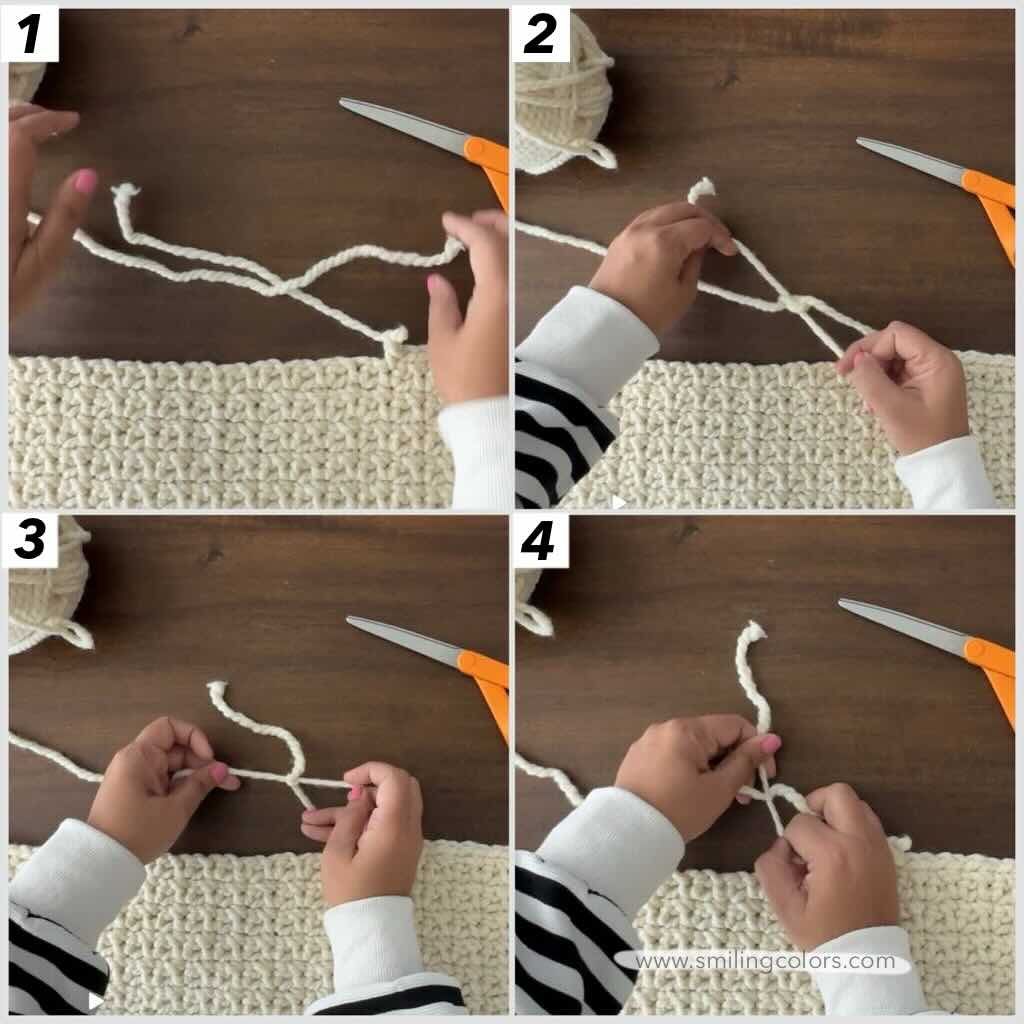
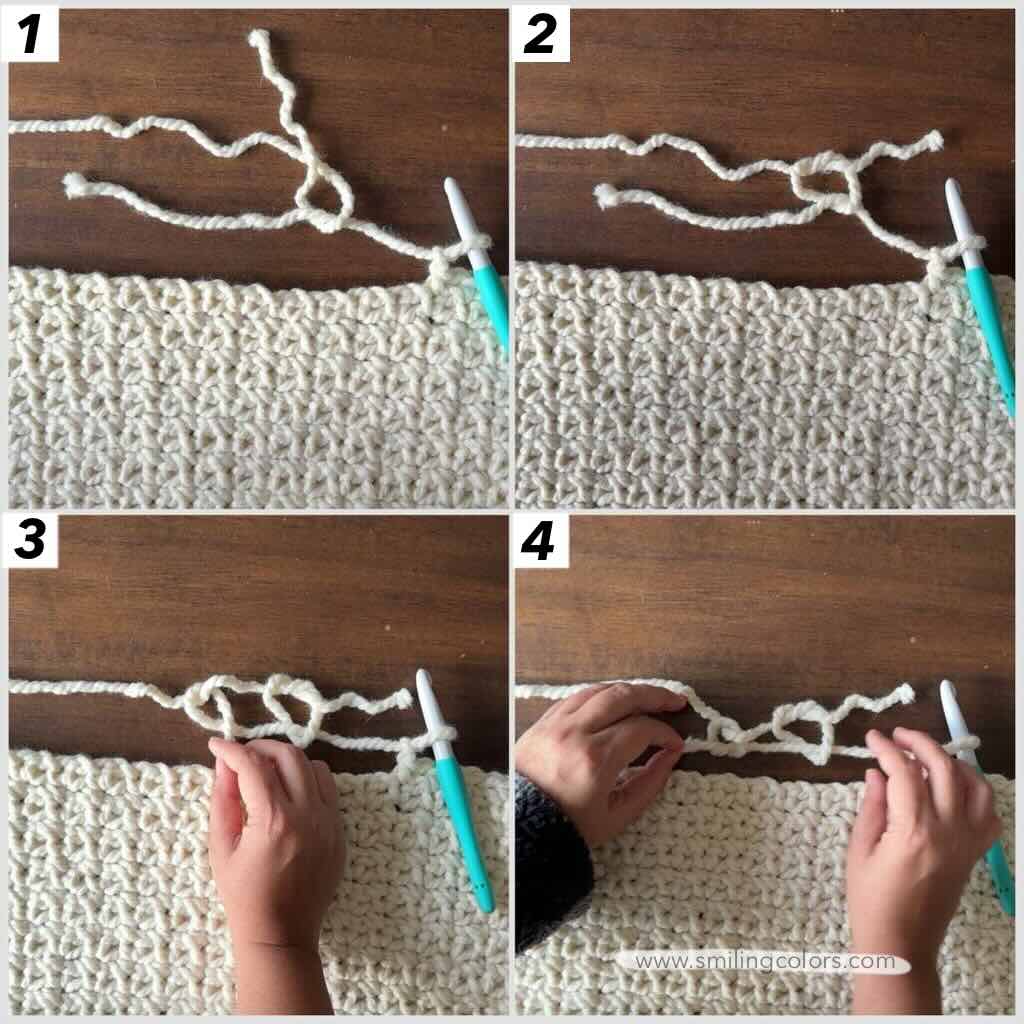
Method 3:Magic Knot
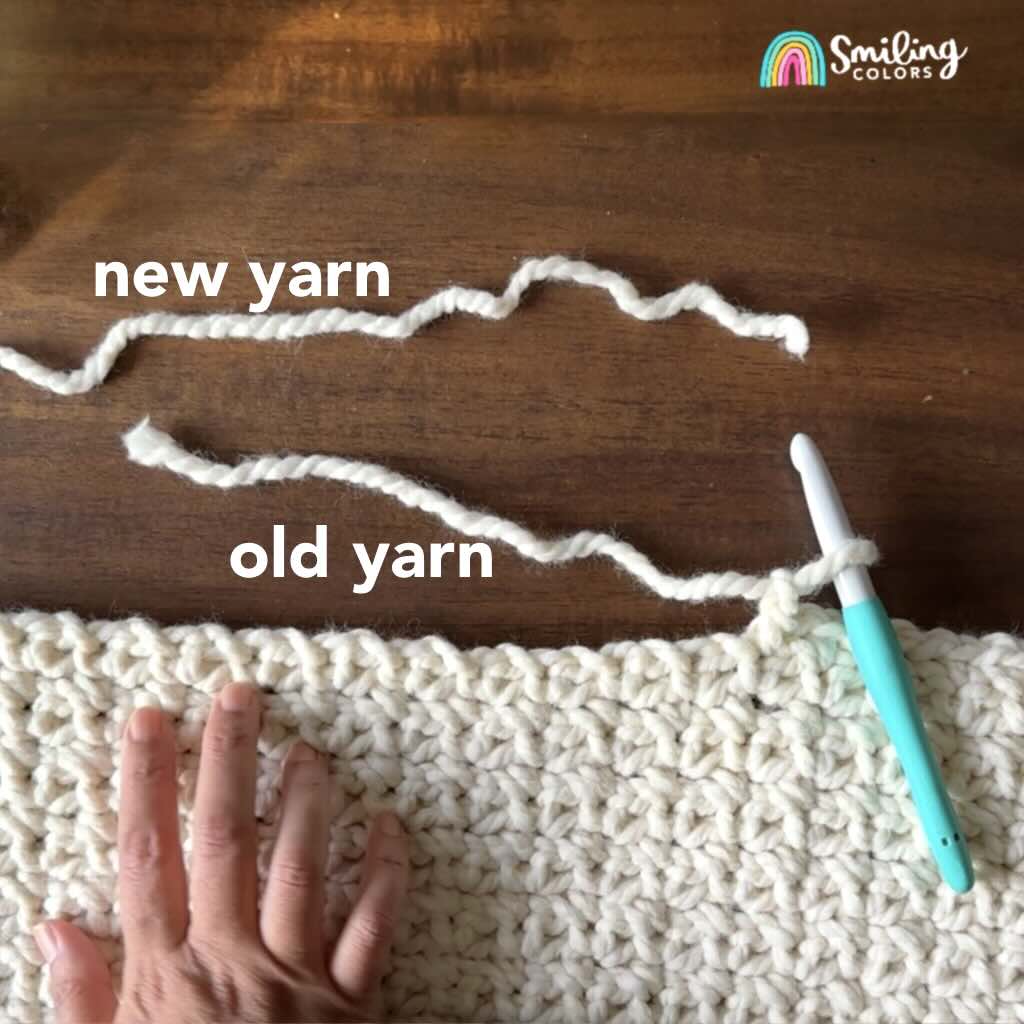
The magic knot creates the smallest and strongest join that that holds surprisingly well when done correctly.
Lay the old yarn and new yarn parallel to each other to understand the steps below easily.
How to make the magic knot join:
- Tie the new yarn around the old yarn and create a loop.
- Create a knot by inserting and pulling the new yarn end into this loop.
- Tie the old yarn tail around the new yarn and create a loop.
- Create a knot by inserting and pulling the old yarn tail into this loop.
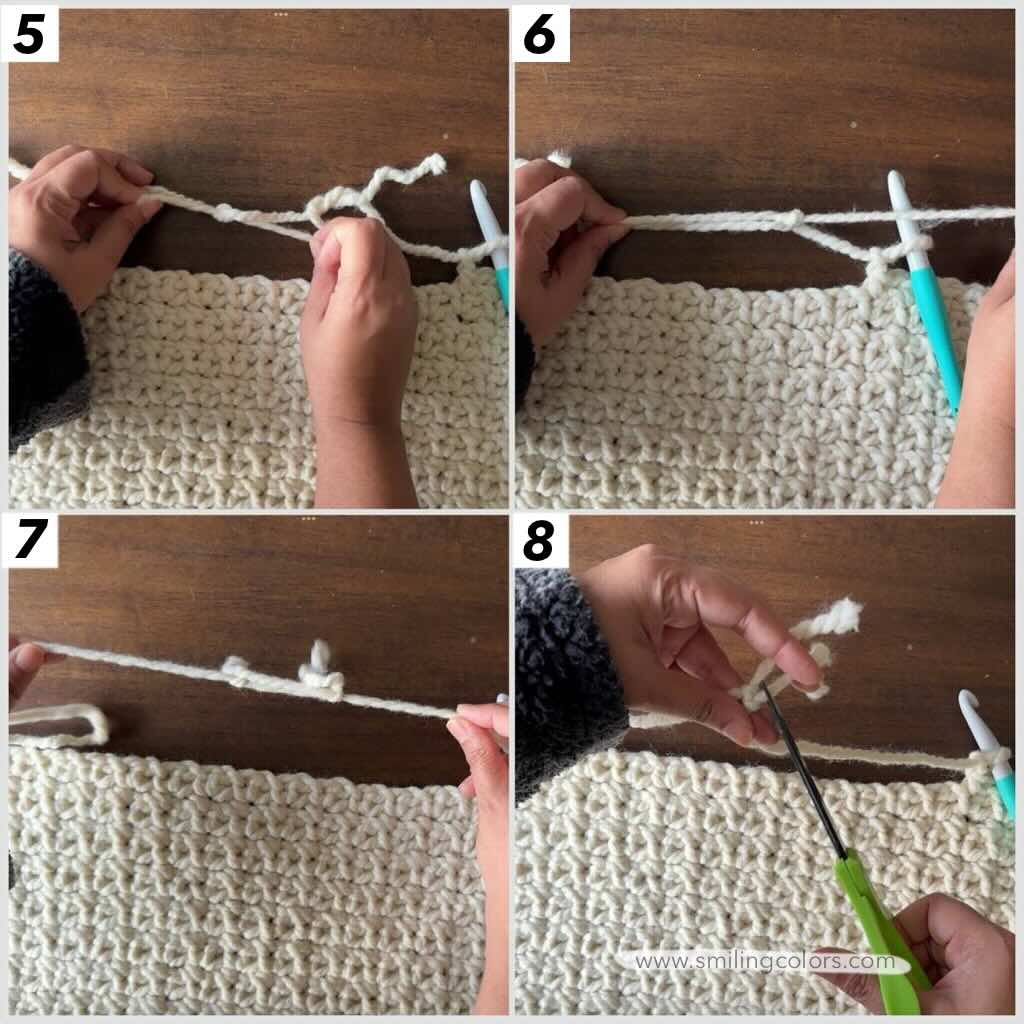
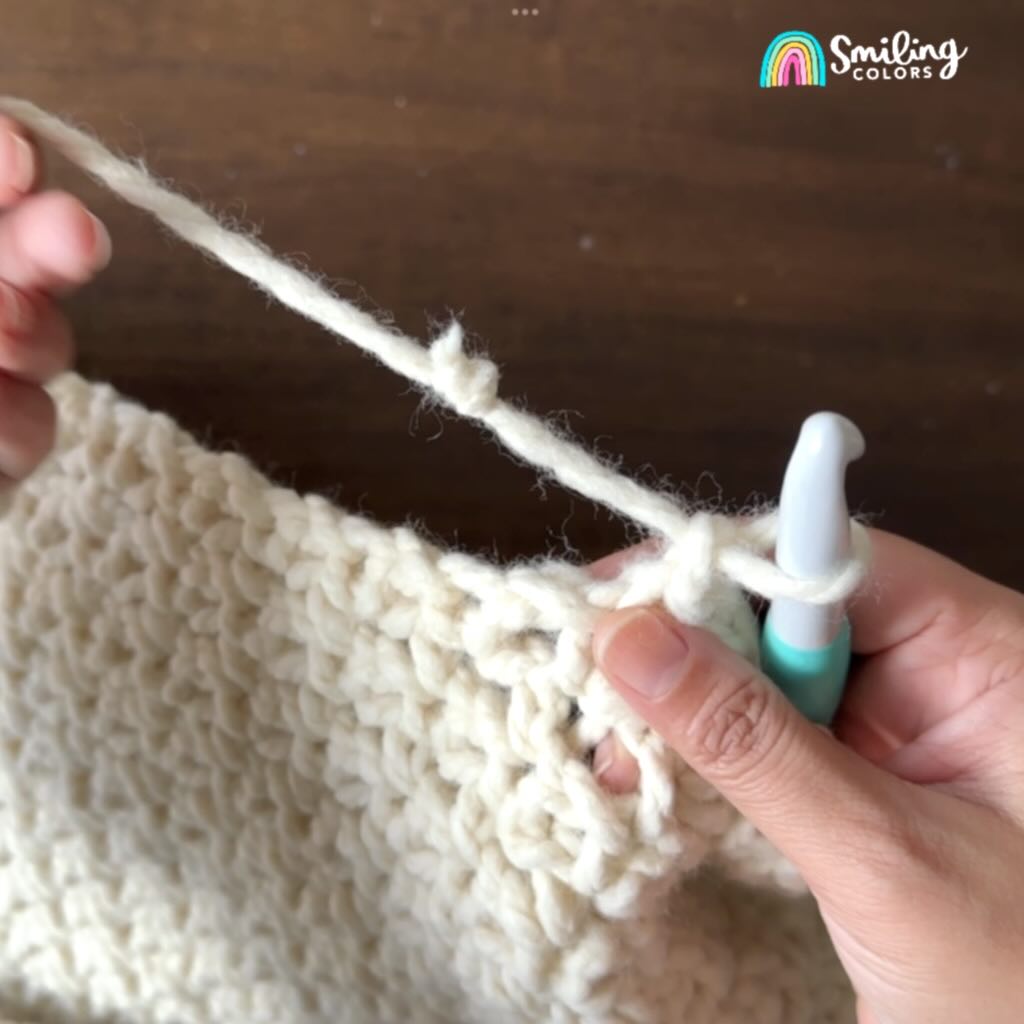
- Pull and tighten the second knot.
- Pull and tighten the first knot.
- Pull both standing yarns in opposite directions (yarn that is attached to the new skein and the yarn that is attached to the project) this slides the knots together.
- Trim the ends very close to the knot.
Common Yarn Joining Mistakes Beginners Make (And How to Fix Them)
Even when you know how to join yarn, a few small mistakes can make your project feel frustrating. Here are a few tips that have helped me.
- Tying the knot too tight– It’s tempting to pull your knot as tight as possible, especially when you’re new. But this can actually break the fibers of your yarn or pucker the yarn fabric you’ve created. Instead, pull just enough to make a firm knot.
- Cutting Yarn Tails Too Short: Always leave at least 4 inches, or up to 6 inches of yarn tail. This gives you enough length to weave in yarn ends securely so your join doesn’t come undone later
- Forgetting to Check the Back of Your Work: A join might look fine from the front, but messy on the back. Flip your work over and adjust your yarn tension so as to tuck the join within the next few stitches. This is especially required for blankets and scarves.
Which Yarn Joining Method Is Best?
If you are just learning how to crochet a scarf for beginners using the simple knot is a good starter option. However if you are mastering how to crochet a blanket for beginners both the Russian join and magic knot are far better options that create a long lasting join. The Russian join might come easily to you if you are familiar with sewing. The magic knot might surprise you at how well it works, you just needs a few tries to figure it out, and you won’t ever look back.
Once you get comfortable with a these methods, running out of yarn won’t slow you down at all. Remember learning how to join yarn is not the same as introducing new colors.
I know there are many more crochet techniques out there on how to join yarn- which is your favorite? Let me know in the comments!
