Hello friends! Today I have a new tutorial for you- A holiday themed wooden sign! Come and see how to paint letters on wood without a stencil!
When it comes to Christmas Crafts, I’m totally digging the pink christmas trend and went with a simple modern look for this tree here. I love using acrylic paints and in today’s video I’ll show you how to paint letters on wood without a stencil, and you don’t have to be a hand letter expert at all to learn this technique!
Affiliate links have been used at no extra cost to the reader. You can read my full disclosure here.
SUPPLIES YOU WILL NEED:
- WOODEN PLANK OR SIGN: Any piece of wood (shaped or rectangle) which can be cut at home or bought at a craft store. Here are a few great choices.
- ACRYLIC or CHALK PAINT: I used this pink one
- DIMENSIONAL PAINT: for lettering like this one or use any black acrylic paint with a paintbrush or nozzle.
- PAINT BRUSHES– an angled one and a smaller one.
- TRANSFER PAPER: The one I use in the video is a graphite-based one, so any wrong marks are easily erasable!
- MULTI-PURPOSE SEALER: I use a water-based sealer, this one is great to use on a variety of surfaces- wood, metal, glass, glazed ceramics, terra cotta, and plaster too
How to paint letters on wood without a stencil video
I have a in-depth tutorial showing how to paint letters on wood without a stencil on my YouTube channel. Click HERE to watch it or click the video box below.
Tutorial: how to paint letters on wood without a stencil
- STEP 1: Prepare your wood sign with stain, chalk paint or acrylic paint.
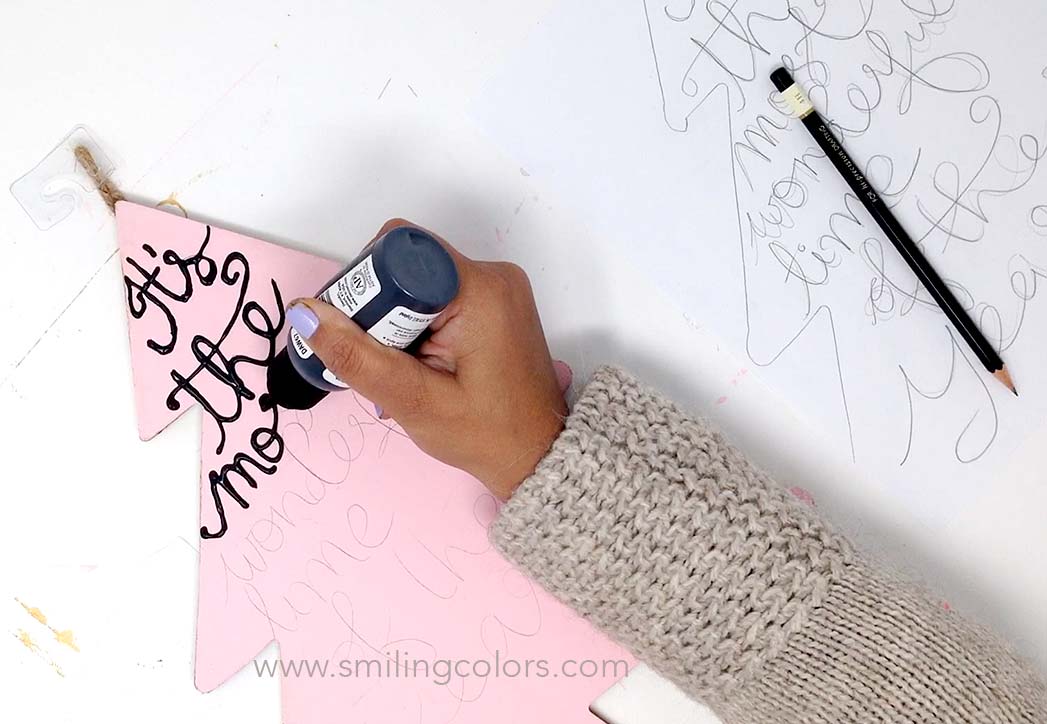
- STEP 2: Onto a piece of paper, practice your lettering first. Or use a print out like I did in this lettered sign.Transfer your sketch onto the wood plank using a transfer paper.
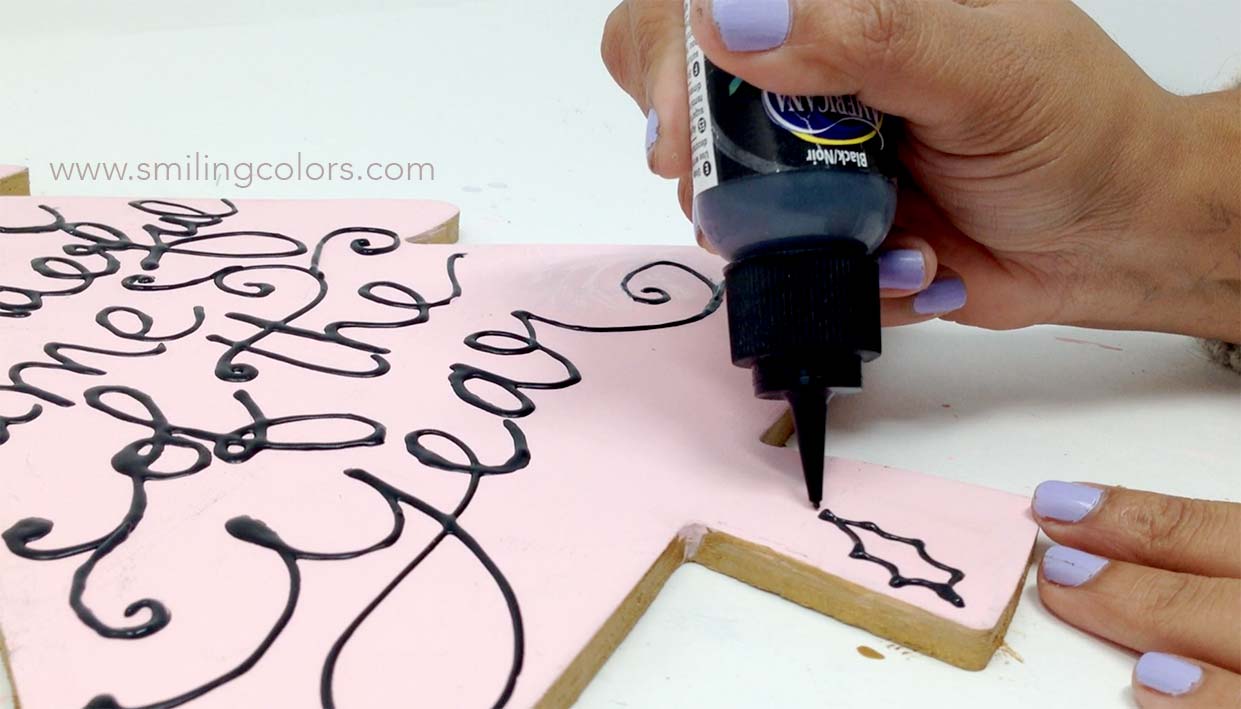
- STEP 3: Once the sketch is on the wood, using a paint pen, or a dimensional paint trace the words slowly.Apply even pressure and go slow to get even amount of paint onto your letters.
- STEP 4: Once the lettering dried completely, I went back and using a small paintbrush touched up any of the pencil lines showing through.
- STEP 5: Finally, I added some doodles of holly leaves, and swirls around to fill in all the empty spaces around the letters.
- STEP 6: Protect your sign with a coat of sealer if you are planning to use it outdoors.
Once it all dried, I totally loved how it turned out! I love anything with hand lettering and the black words simply pop off of the pink! Also, I am totally digging the pink color for the holidays.

BLOG HOP
Today friends I’m part of a great blog hop! Be sure to check out all the Creative Christmas tutorials below.

Nutcracker Christmas Tree Decorating | Remodelaholic
Copper Christmas Ornaments | From House to Home
DIY Rustic Carved Wood Ornaments | Ugly Duckling House
Snowman Globe Ornaments | Kailyn Williamson
Dollar Store Snow Globe Ornaments | Our Crafty Mom
Handlettered Ornaments 3 Ways | Lemon Thistle
Wood Slice Snowman Ornament | Creative Ramblings
Mini Wreath Ornaments | Love Create Celebrate
Easy DIY Geometric Ornaments | Practical and Pretty
7 Cheap and Easy Christmas Ornaments | Toolbox Divas
Macrame Ornaments | Frazzled JOY

Grapevine Christmas Wreaths | Grace in My Space
DIY Apple Candle Village | Life on Summerhill
Festive DIY Christmas Card Holder | Red Cottage Chronicles
Lettered Tree Sign | Smiling Colors
Modern Christmas Wreath | Sister’s What!
Reversible Holiday Easel | Queen Bee of Honey Dos
Pretty Decorative Clothespins | Sustain My Craft Habit
DIY Wooden Triangle Christmas Tree | Adventures of a DIY Mom


What a pretty way to decorate a DIY tree! I love the pink and black…non-traditional colors that still look festive 🙂
Such a pretty sign, I love the pink and black together. Great tutorial.
Great idea! Love how it turned out.
So beautiful, Smitha! Thank you for joining Creative Christmas!