A tutorial showing you Chalk paint furniture before and after with a DIY Nightstand Makeover! Today I am upscaling a garage sale find into something I love!
Today I have a full step-by-step tutorial with a detailed supply list and tons of photos showing you my chalk paint furniture before and after transformation. This is an easy DIY for the home and a great inexpensive way to reuse and redecorate your furniture!
SUPPLIES YOU WILL NEED:
For this Nightstand Makeover you will need- chalk paint, gold or copper leaf, adhesive and sealer for the foil, stencil, wood filler, sander de glosser, scrub, and brushes.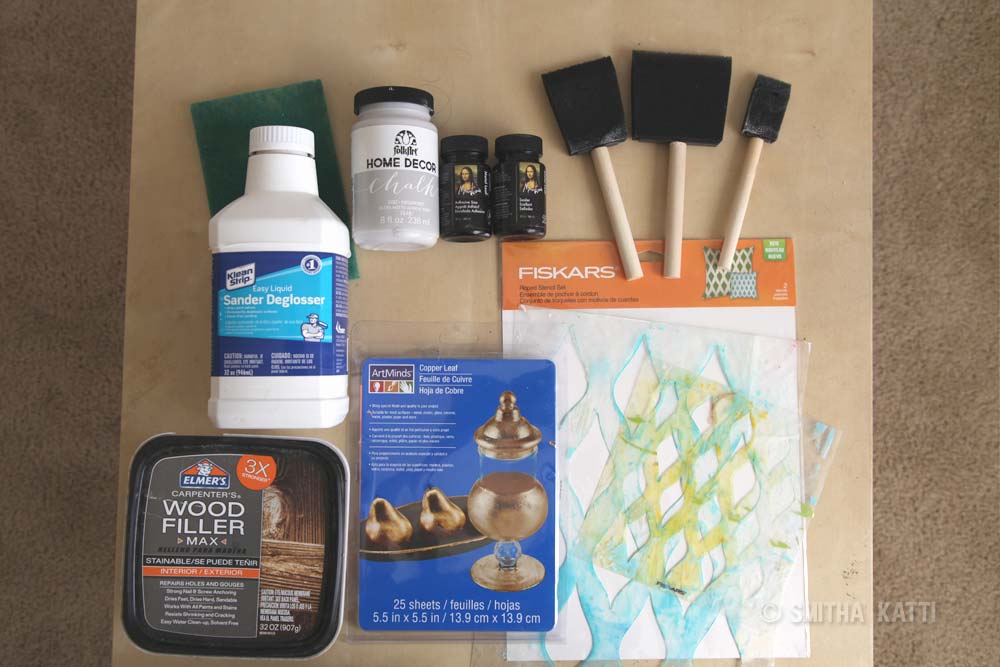
how to paint a night stand
You can easily paint over a nightstand. Here is my step by step tutorial for this DIY Nightstand Makeover. Let me know in the comments if you found this helpful!
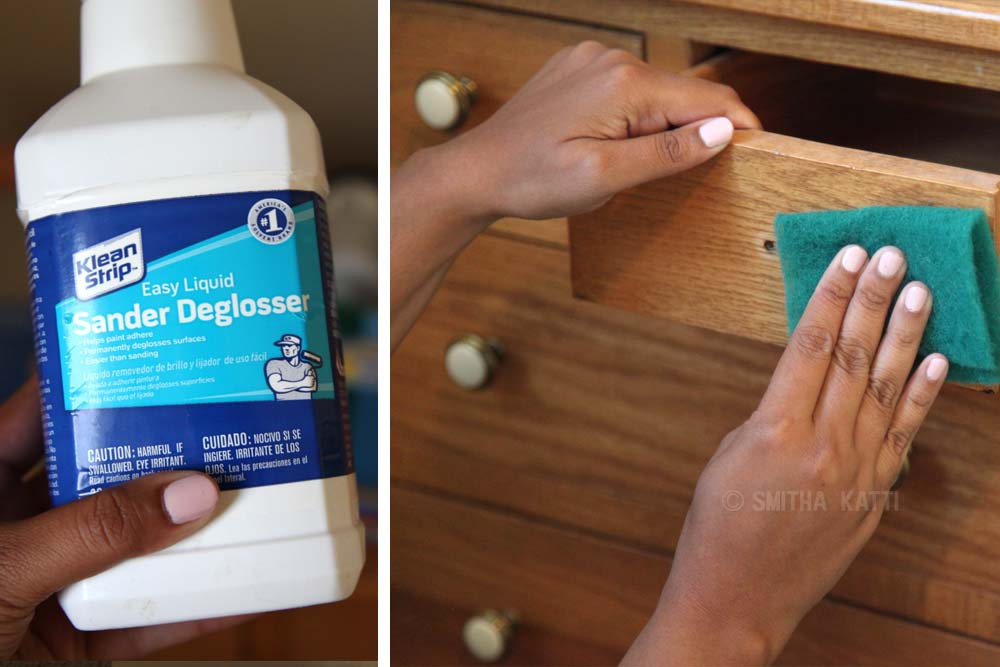
Step 1: I sanded the nightstand down using some Sander deglosser with a scrub. Think of it as removing nail polish- and scrub lightly all over to create a rough surface for the paint to adhere onto.
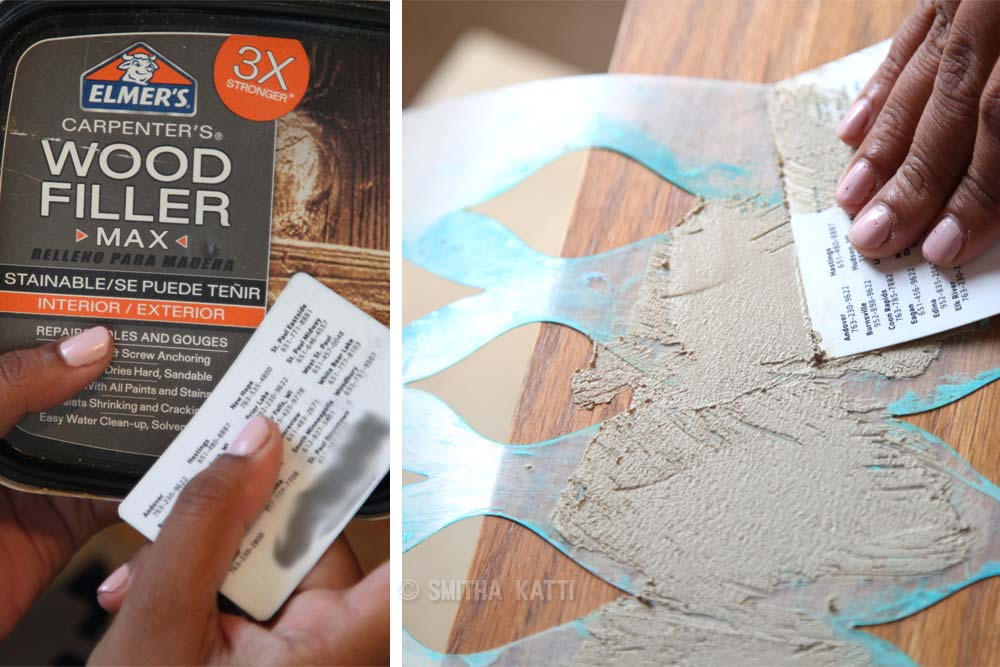
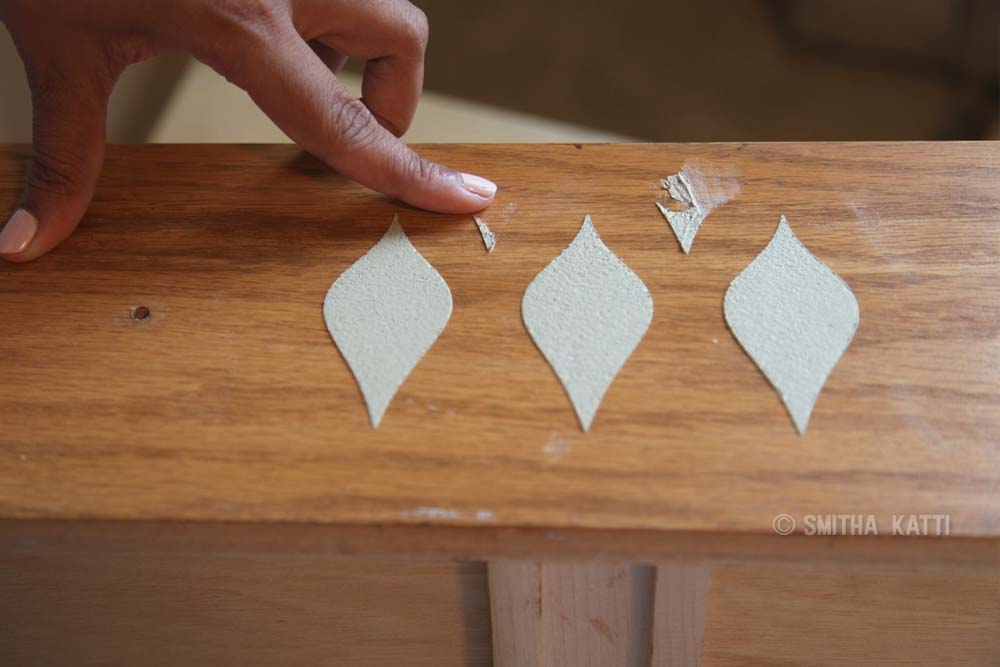
Step 2: Place stencil on top of the drawer front and position it where you want. The stencil I’m using here is the Roped stencil by Fiskars. Scoop some of the wood filler onto the stencil and smooth all over using an old credit card. I like the texture wood filler gives and it adheres pretty well onto the wood surface.
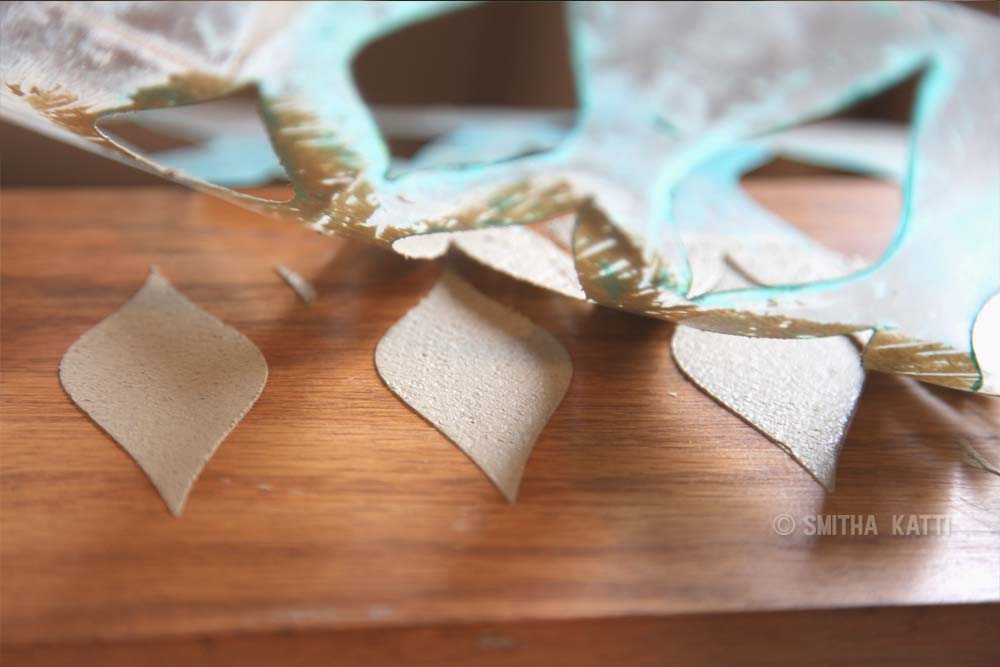
Step 3: Lift stencil up carefully in a single upward motion. If you get any of the wood filler where you don’t want it, simply wipe it off with your finger or a paper towel. Repeat for all other drawers. Let dry.
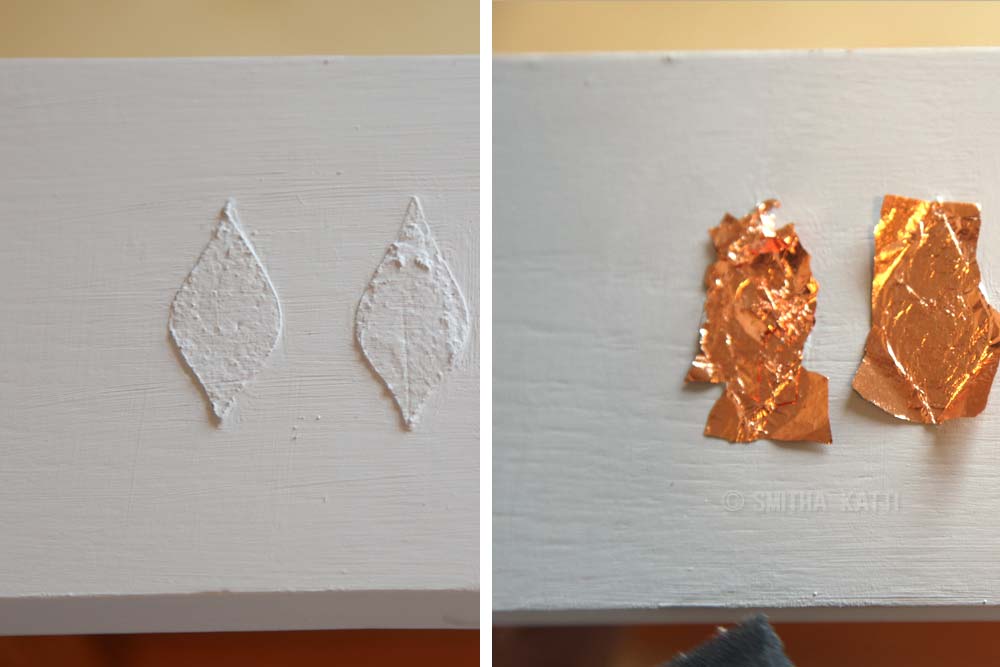
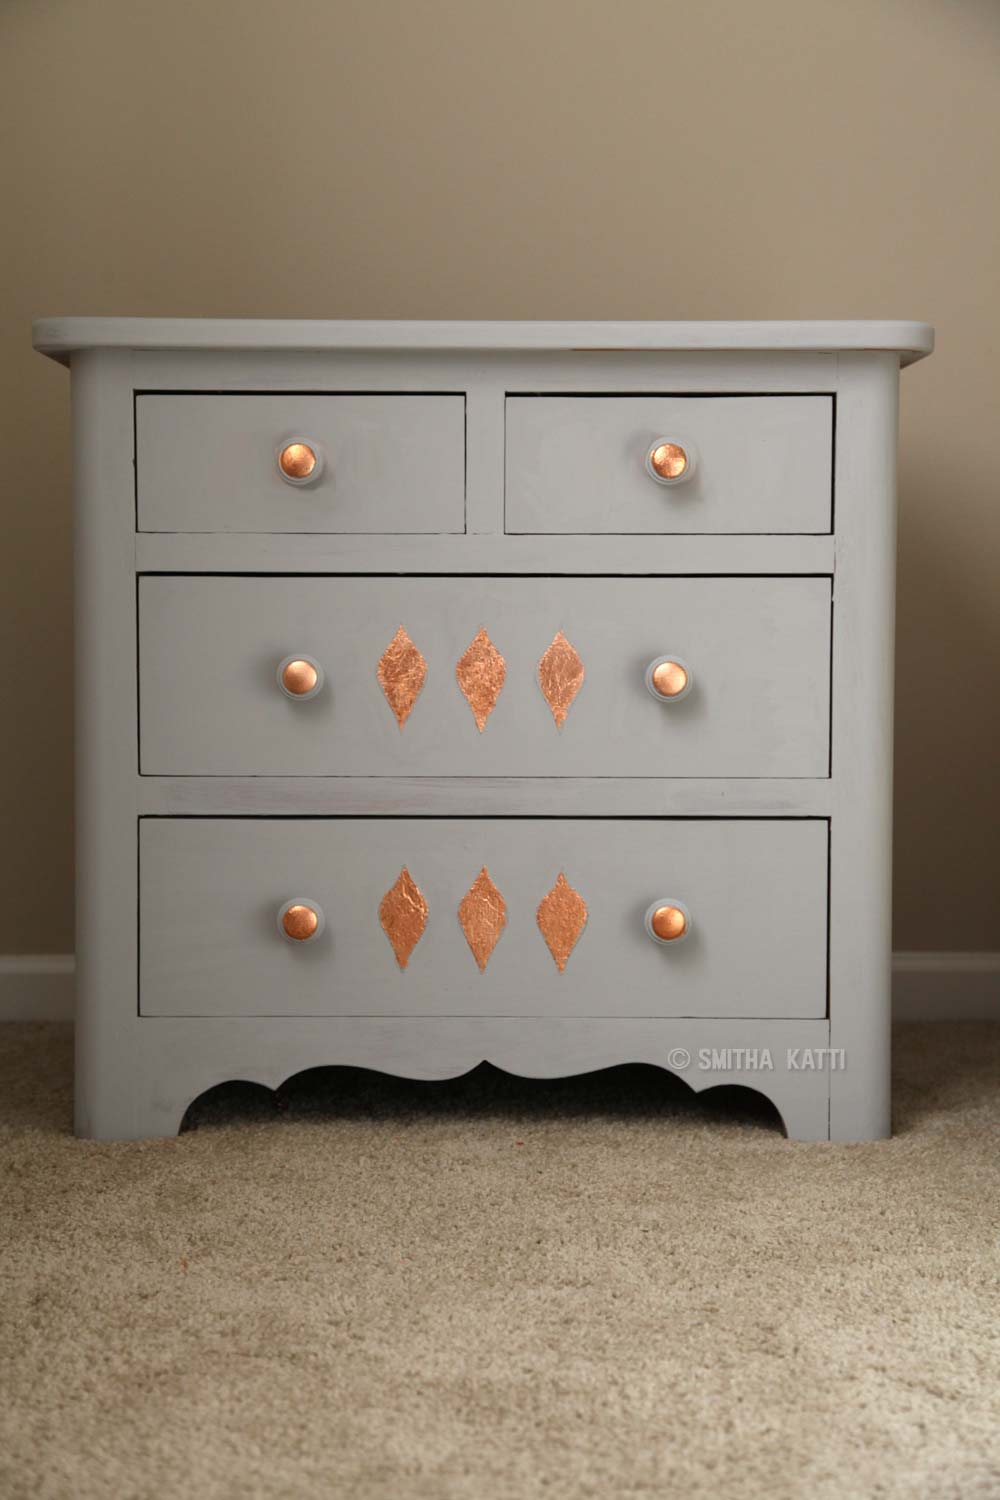
Step 4: Paint all over the drawers and the nightstand with at least two coats of chalk paint. I’m using Parisian grey color by Folk Art.
TIP: While painting over wood, let that first coat of paint dry for 24 hours. This gives the wood time to absorb the paint thoroughly and prevent future peeling.
The second coat of chalk paint dries really quick and you need just 2 hours of drying time between coats.
For the copper leafing: using a brush carefully apply a thin coat of the adhesive onto just the stenciled raised area. Let dry for a few minutes and then carefully place the copper leaf sheet on top.
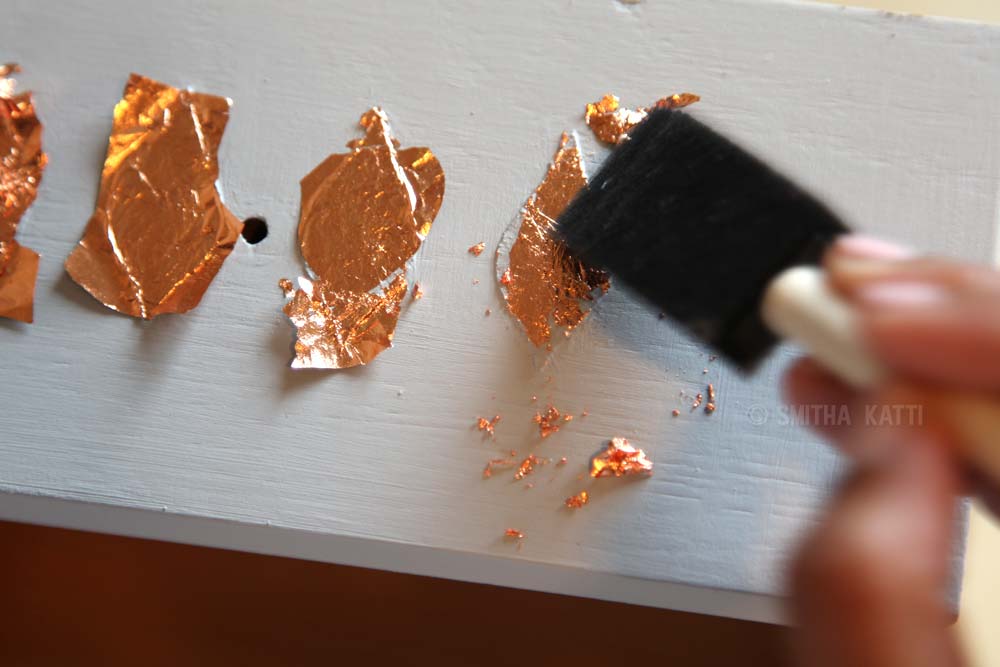
Step 5: Let the copper leaf adhere and dry for a while. Then carefully brush on top with a dry sponge brush to remove the excess copper leaf. Apply two coats of the sealer on top to protect the leafing. This is my favorite part of this DIY nightstand makeover!
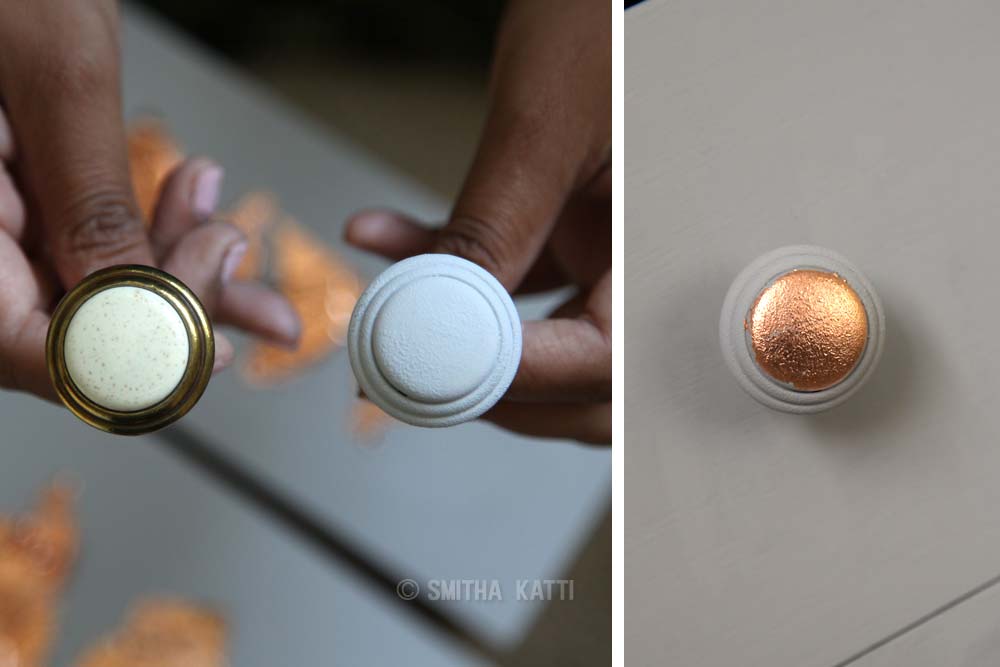
Step 6: I decided to upscale the knobs for this nightstand makeover. I chose to paint them with the same chalk paint. Simply pounce the paint onto the knobs first and then for the second and third coat gently paint.
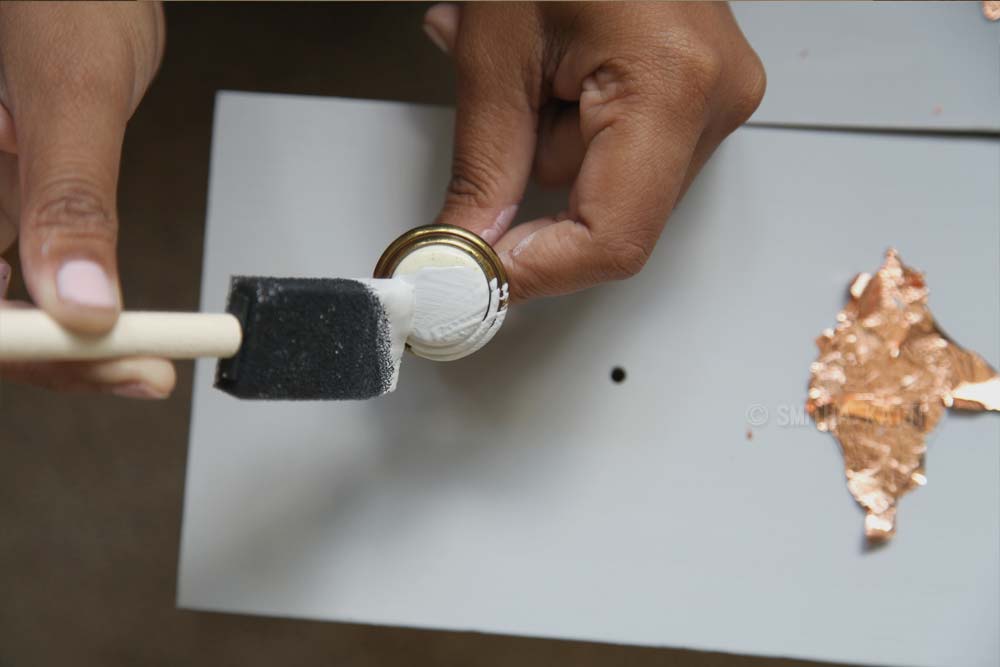
I loved how the knobs looked all painted, but felt that it needed a touch of shine. So I carefully painted the leaf adhesive in the center only and added copper leaf. Finished it off with 3 coats of sealer.
And here is the Before and after nightstand makeover side by side!
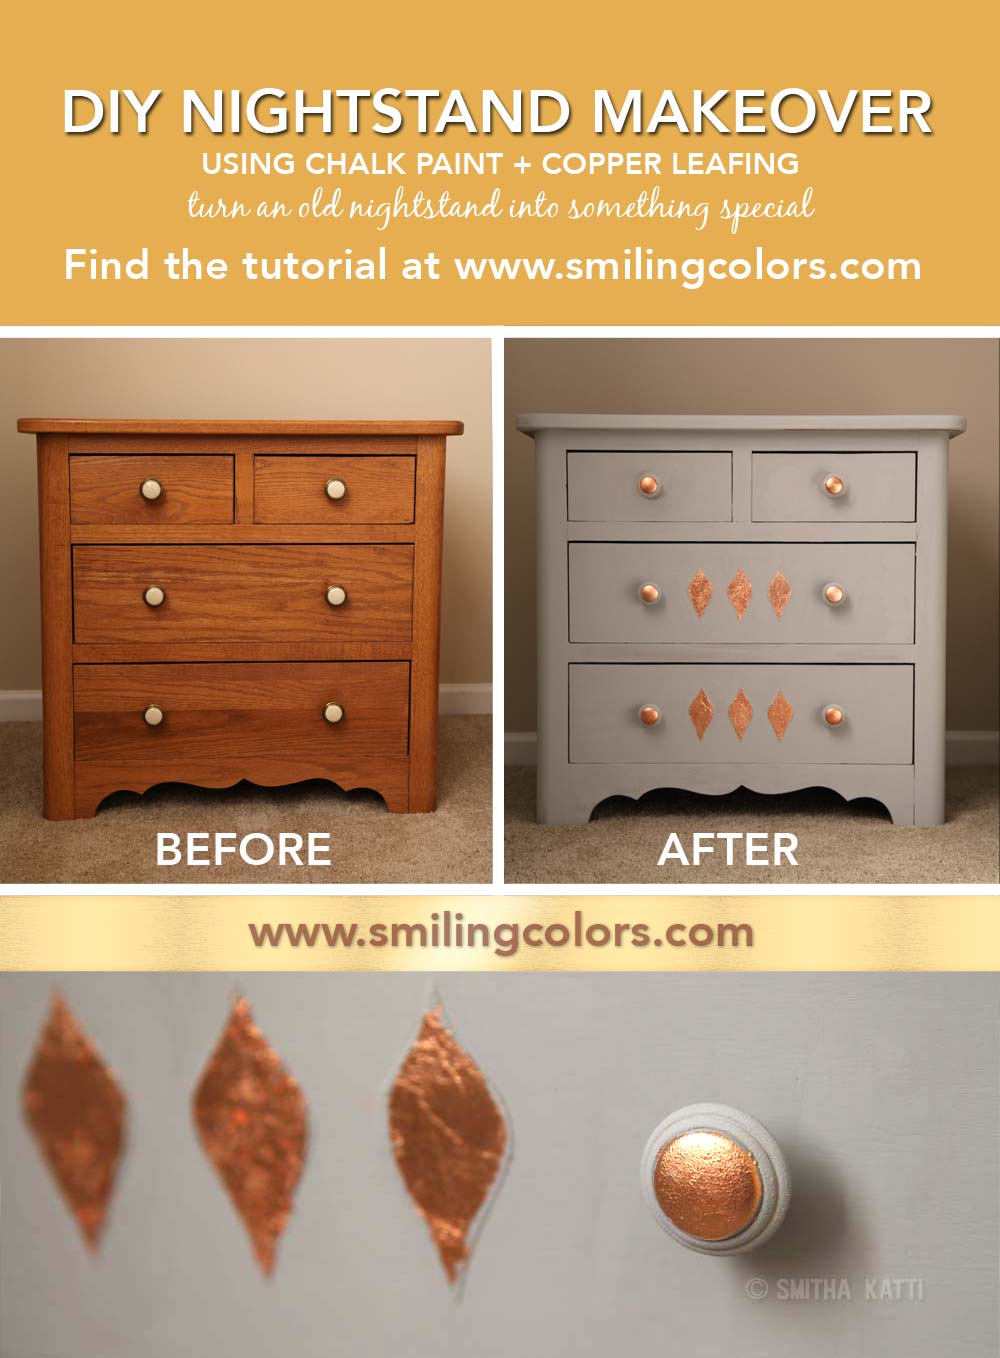
DIY Nightstand Makeover
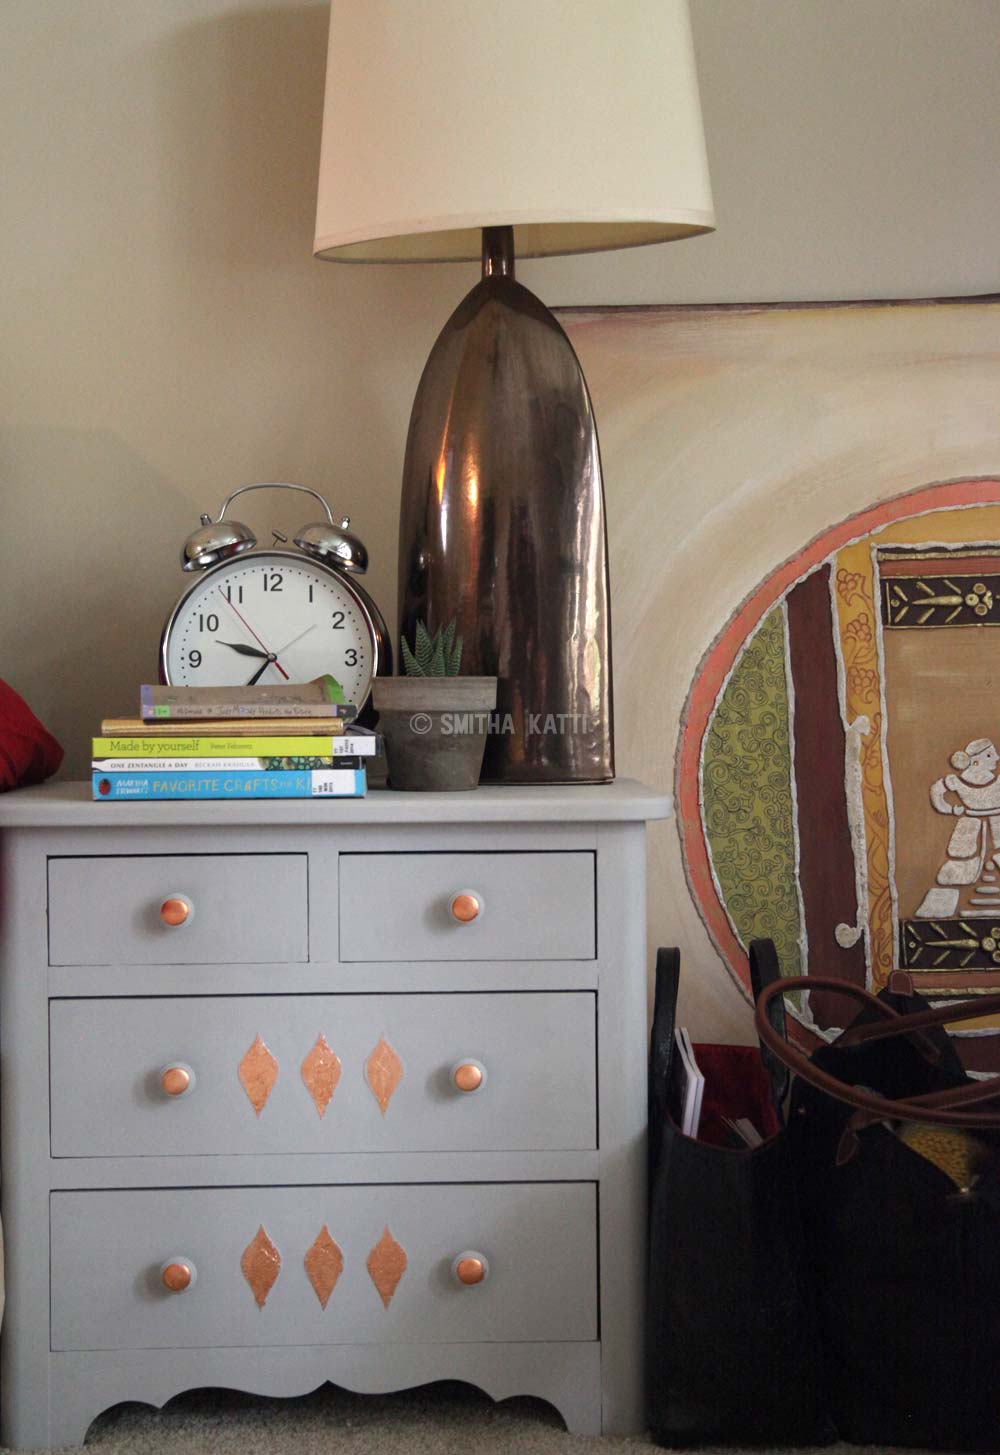
Ta da! If there ever was a big Ta da for me, this was it! I love the matte grey finish of the table that juxtaposes so well with the shiny copper leaf. I could not be happier with this DIY nightstand makeover and I hope you liked it too. Now I have not one but 4 drawers of my own!
This is how the nightstand looks by my bedside. The bags next to it are my trusty knitting bags that have somehow multiplied and become two now 😉
See how I use this same stencil on fabric!

Hi I’m Smitha! I live in Minnesota with my husband and two daughters. You’ll always find me painting florals in my sketchbook. And I love the sheer joy of making something with just my hands! But my bigger love is capturing it all on camera Read more.
Thanks for stopping by today! If you learnt something from this tutorial, do share this post with a friend or on social media! Tag me @smithakatti #smithakatti I’d love to see what you create!