Create beautiful colorful art using this tape resist painting technique. Creating crisp white lines is an easy process and perfect for kids, beginners or anyone who loves playing with color and patterns!

Affiliate links have been used at no extra cost to the reader. You can read my full disclosure here.
What is tape resist art?
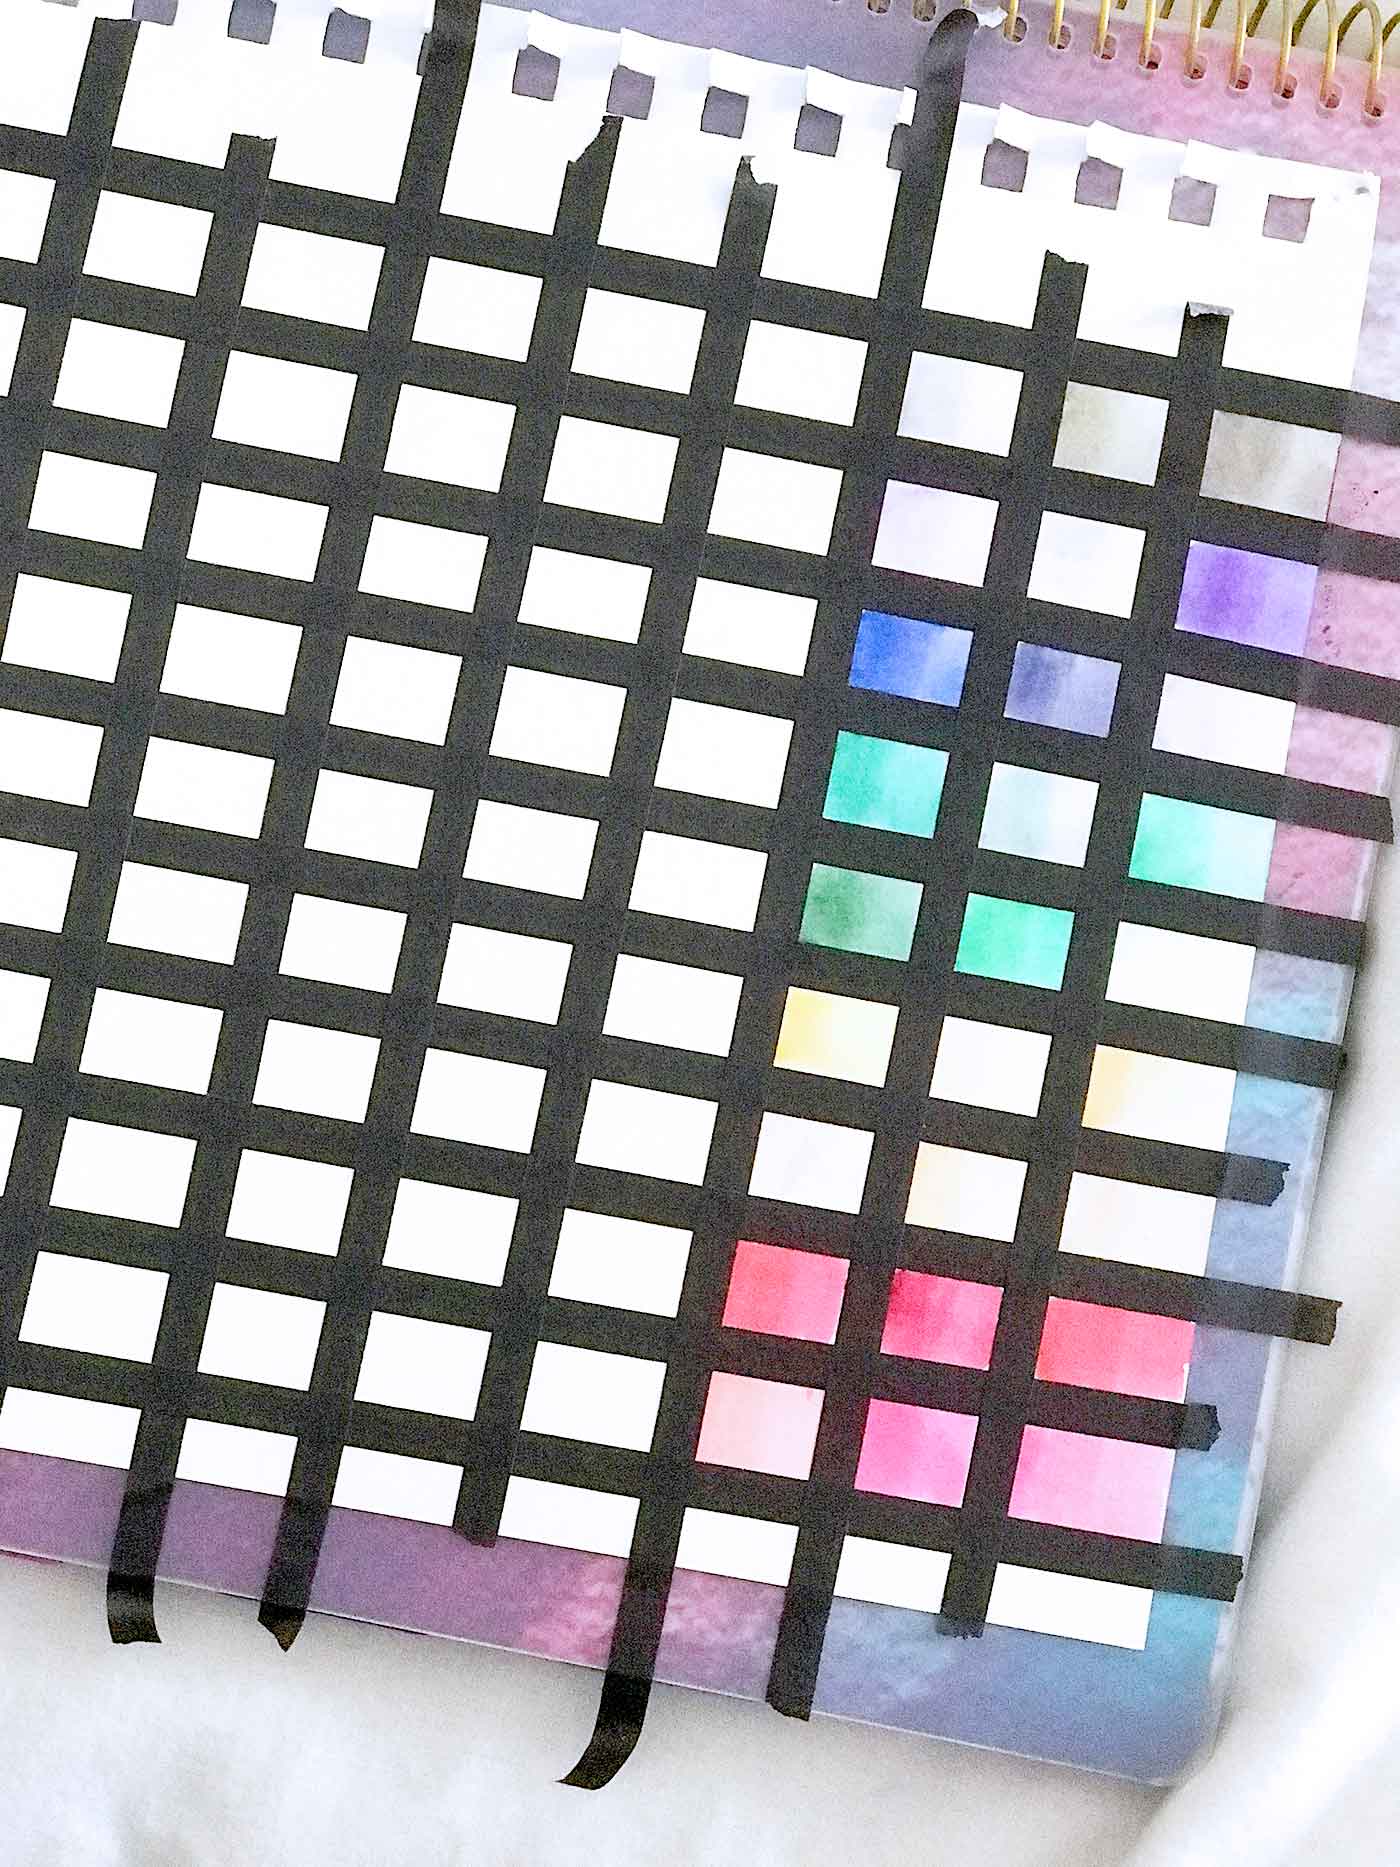
Tape resist art is created by using a low tack tape to protect the white of your watercolor paper and creating designs, patterns or even monograms. When you paint over the tape, the tape prevents or blocks the paint preserving the white beneath. After the paint has dried, you peel the paint to show a contract of white against color!
What tape to use for tape resist art?
You want to use a low tack paper tape for best results. I have shared a list of the best masking tapes for artists that don’t peel the sketch paper and have used all of these tapes many times successfully!
What You’ll Need
- Watercolor paper or any heavy paper or cardboard you have hand 👉Watercolor paper used here is Canson XL https://amzn.to/3lwh0xn
- Painter’s tape to create the resist. I highly recommend using these artist grade masking tapes. That Rainbow Washi set (I have the 5mm and 3mm set) https://amzn.to/3eYKfHC
- Watercolor paint + water + paintbrushes. 👉I’ve used Camlin Watercolour cakes https://amzn.to/3tF21no
- Flat surface to tape your paper down to prevent warping
Step by step Tape Resist Painting Tutorial:
Step by step tutorial showing you how to create tape resist art
1. Tape your design : Use painter’s or washi tape to create lines, shapes, or even write a word on your paper. Press down firmly so paint won’t seep under the tape. If needed, tape down the edges of your paper on a flat surface so it stays flat while you paint like a table or clipboard.
2. Paint over the taped paper: Use watercolors to fill in the spaces between tape. Mix your colors to create a design or use just one solid color
3. Let it dry : Wait until the paint is dry to the touch before removing the tape.
4. Peel off the tape to reveal the magic : Slowly remove the tape to reveal crisp white lines/shapes against your painted background. The magic is in the white negative space design!
For best results, peel tape as soon as the paint is almost but not completely dry, don’t let the tape sit on the paper for too long!

Tape Resist Painting Video:
Watch the step by step tutorial in video format- Enjoy it on IGTV or YouTube!
Here’s another example:
In the below example, I was inspired to use the Pantone colors of the year 2021- Ultimate Grey and Illuminating. I love how the tape resist painting easily created these white lines in the pattern!

Tips for Tape Resist Paintings:
- Always tape your paper down for best results and remember to peel the tape before the paint dries too much.
- Try taping fun patterns or designs to create unique one of a kind art.

Do you have any Tape resist painting tips for me? I’d love for you to leave a comment below down and share them with me! I love how simple this art project actually is, and is enjoyable by all. Be it toddlers or adults in a classroom or in your sketchbook!