I have a video tutorial today showing 6 fun and easy notebook decoration ideas. There’ll be cutting, pasting and doodling involved for sure.
Hello! Today I have a few easy ways to decorate a notebook to share. Make sure to enjoy these Notebook Cover Ideas for more inspiration!
Notebook decoration ideas video:
Click here to see how my easy ways to decorate a notebook video on YOUTUBE. While you are there, don’t forget to subscribe to my channel! I share many DIY/Craft/Art projects on my YouTube channel that I do not add to my blog here 🙂
Click here to Pin this tutorial!
Notebook decoration ideas:
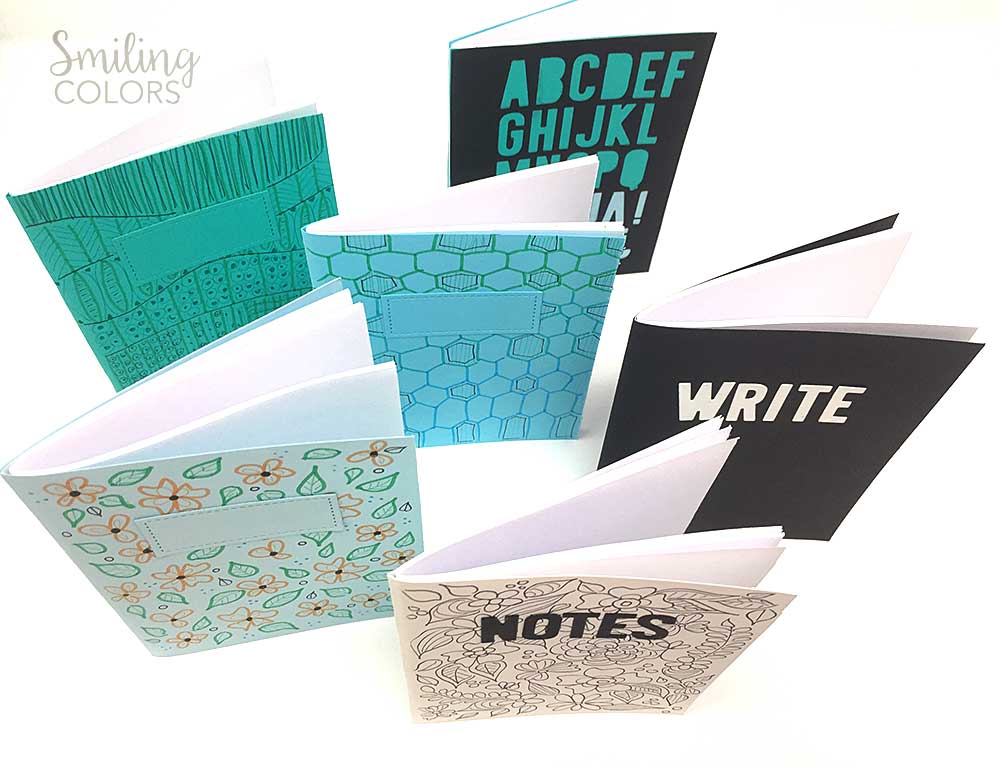
I have these cute mini notebooks today that are surprisingly easy to make. Check out my blog post- How to make a book at home to see how you can make these notebooks at home yourself!
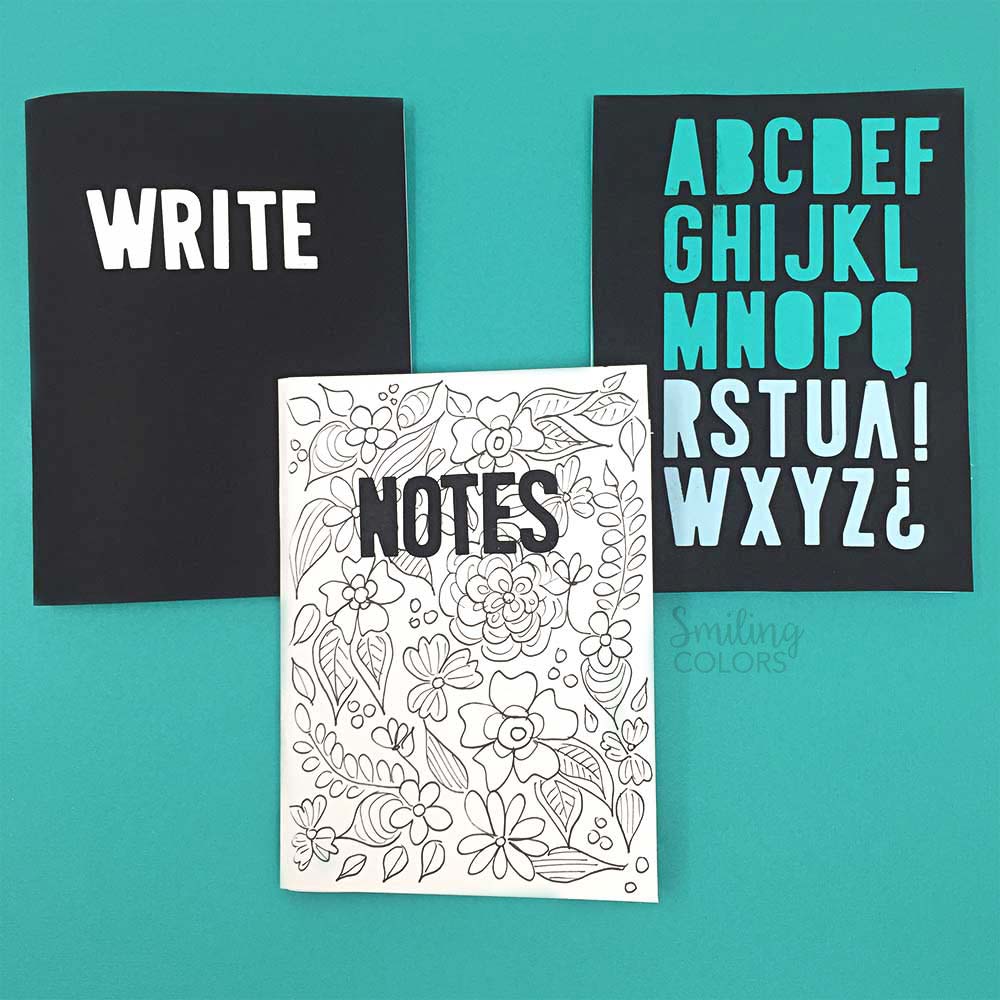
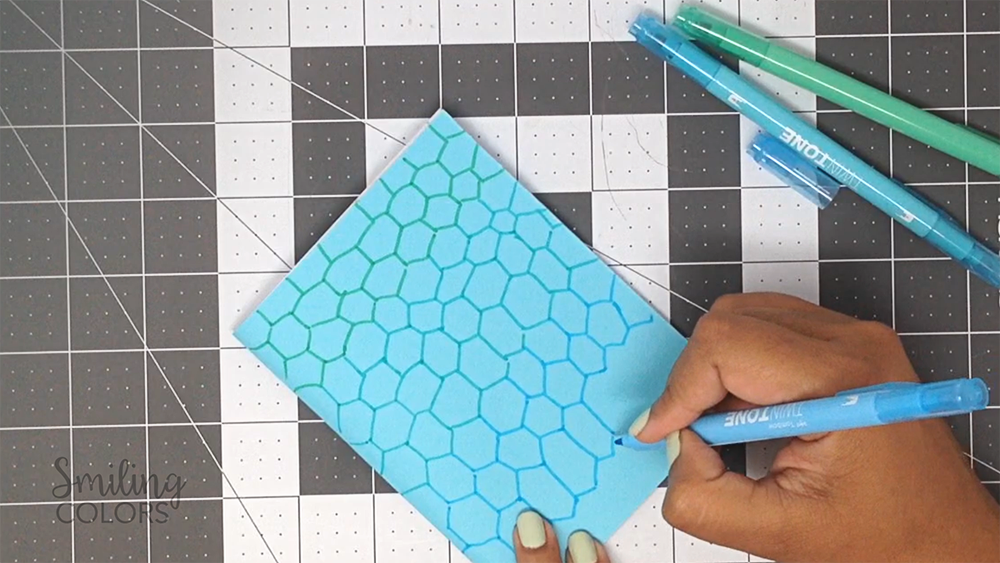
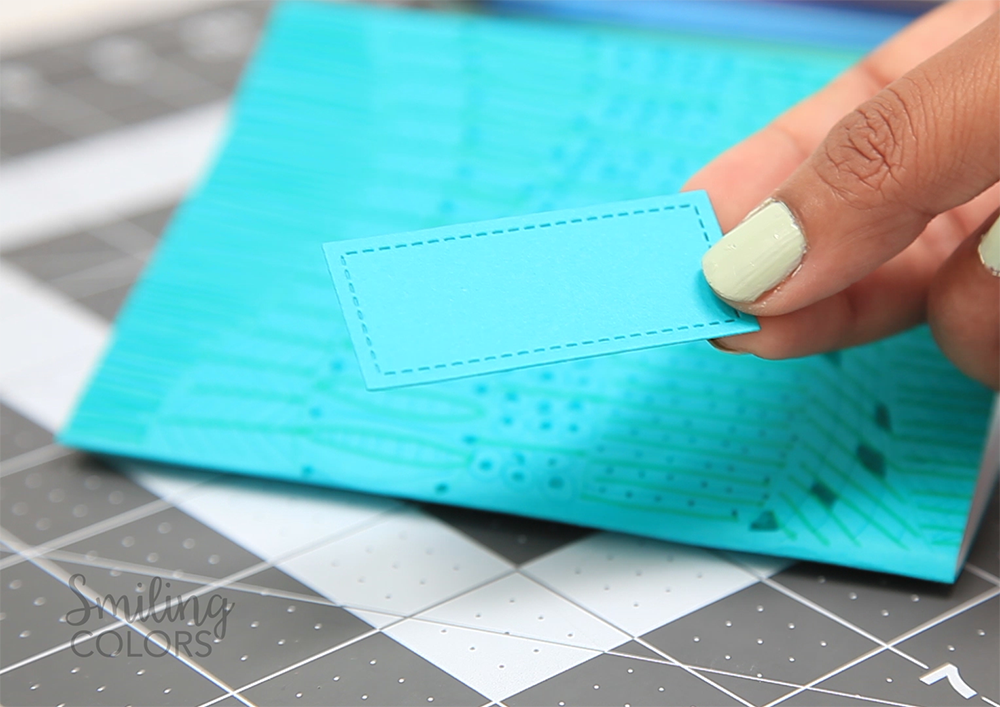
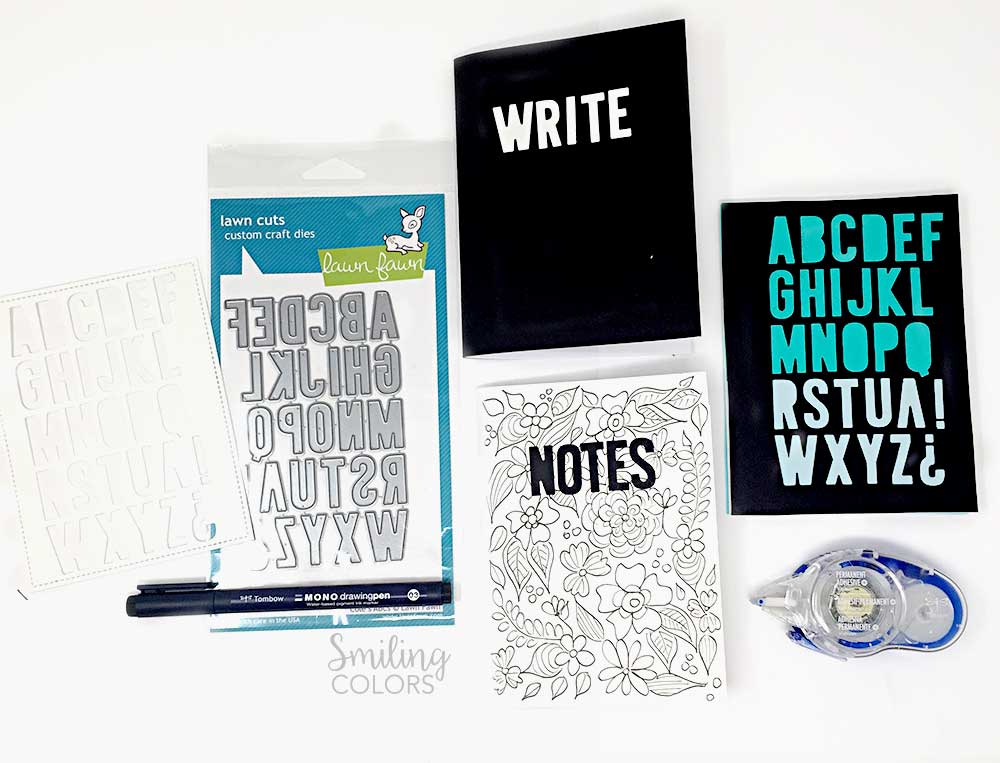
By the way, how cute are those colors? Today I am just having fun and decorating these notebook covers. I pulled out my TwinTone markers and die-cut these cute labels with a faux stitched edge using the Lawn fawn Outside in Stitched Rectangle Stackables set.
I doodled a bunch of designs and then added the label on top.
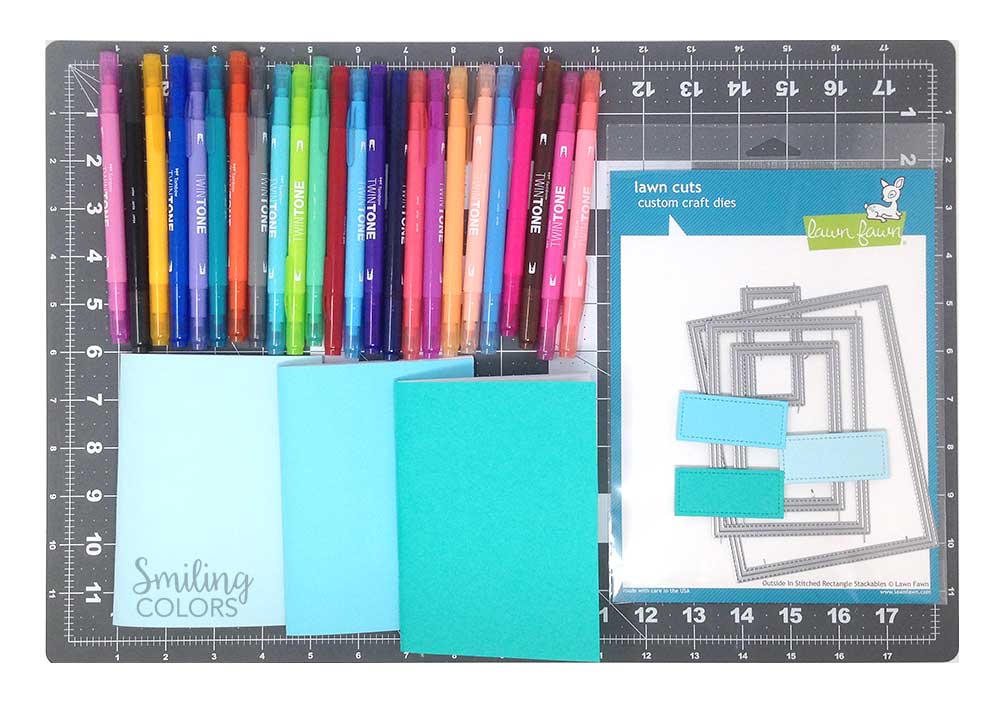
To create this set of typography inspired notebooks I had fun die cutting these fun block font alphabets using the Lawn Fawn Cole’s ABC dies. I love all things lettering and these alphabets are such a great basic block font. I am sure I will be reaching for this die over and over again!
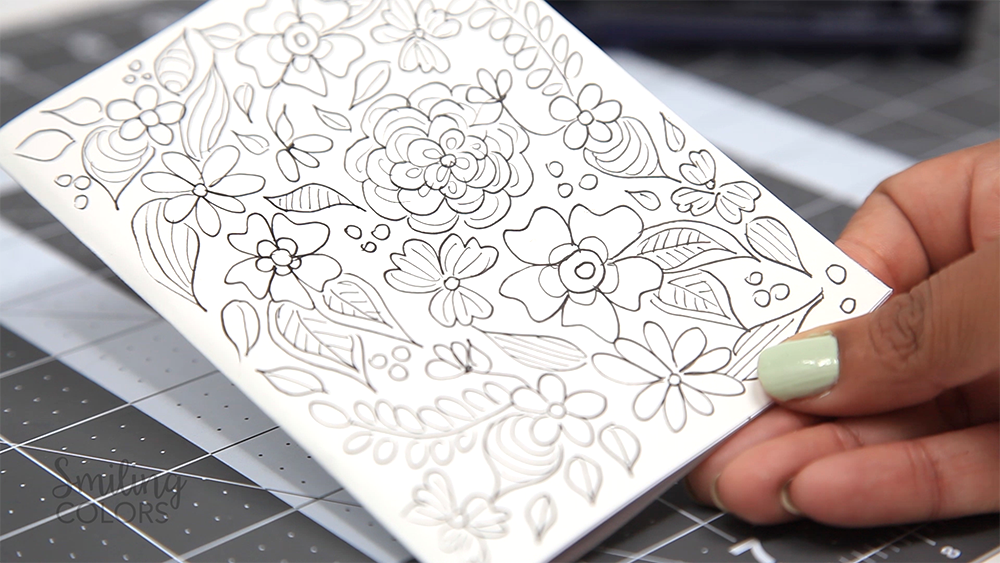
For the Notes book, I doodles a bunch of flowers with the MONO drawing pen. Yes, I drew flowers again as always.
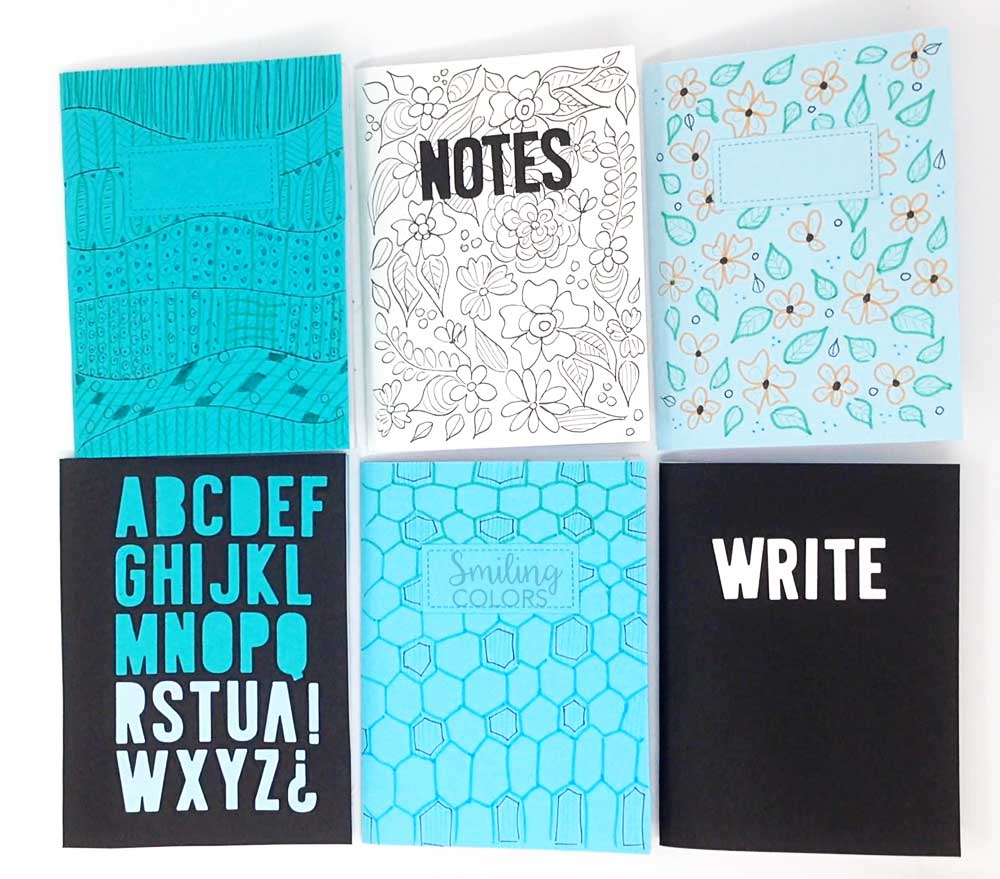
FINISHED RESULT:
All in all I decorated a set of 6 notebooks today and each one of them make me smile. I think these notebook decoration ideas are all simple and doable, but let me know what you think. Also, what would you use these notebooks for? Me, I’m the kind of girl who always has a notebook and pen in her purse so these will be traveling in my purse. Also, my kids and husband have already claimed one book each for themselves!
Supplies used:
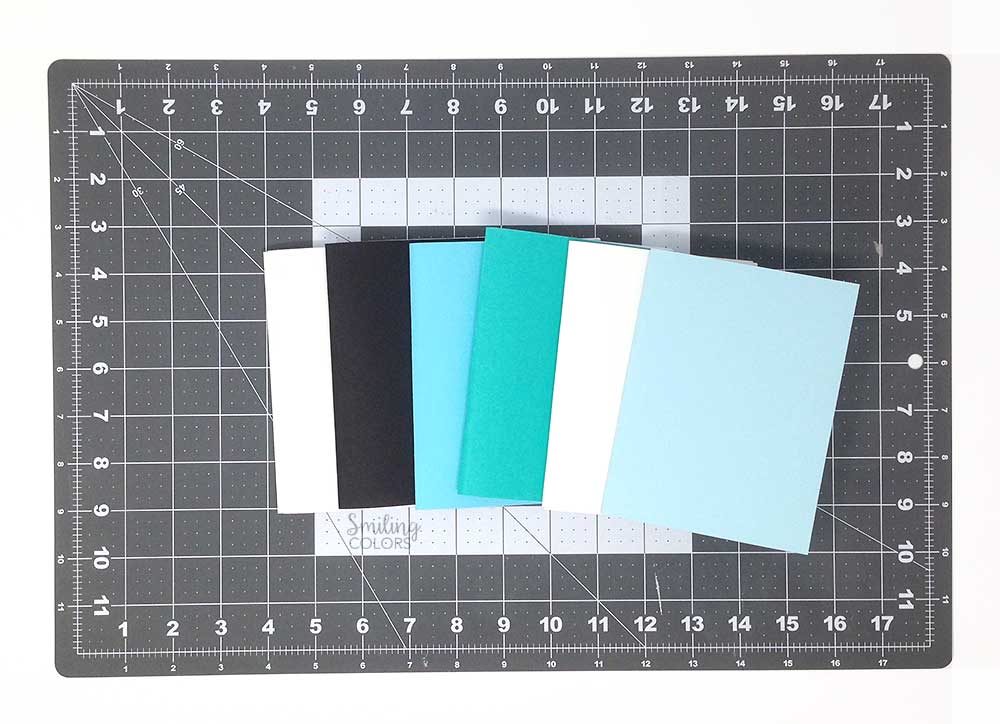
Below, I have tried to list all of the craft supplies I pulled out to create this project. Affiliate links have been used. This means that if you make a purchase I might earn a small commission.
- Lawn Fawn Rectangle dies
- Recollections Cardstock
- Fiskars Self Healing Mat
- Lawn Fawn Cole ABC’s Die
- Large Clear Acrylic Ruler
So of all the books, I made today, which one was your favorite? Leave me a comment below and let me know!
My favorite is the Notes book below and also the book with all the alphabets on it 🙂

Happy Crafting!


Oh my! Such a stunning project!!! Beautiful idea!!!
I love blog hops because I get inspired to create! I like the book with the alphabet on it.
I love these notebooks!
Very cute idea !! My favorite has the alphabet on the front!
Those little notebooks are perfect. Looking forward to the video!
Great ideas! I like the Notes book. I love flowers and floral designs.
I really like the notebooks. The black and white floral is my favorite.
I love the doodled flowers, so cute!
I like the Notes one also because you can leave black and white or you can color it.
It would be so much fun to color that one in!
What fun notebooks. Thanks for sharing.
I love the notebooks, they’d make great little gifts.
Awesome notebooks!! Great idea for a teacher gift!!
Can’t wait to try this!
Great ideas!
Fantastic ideas!Thank you for sharing!
Nice, fresh take, great ideas!! Thank you!!
Cute notebooks. I like the flowers.
My favorite is the peach flowers with green leaves on blue. TFS.
These journals are great. hate to pick but I think I like the white floral the best. Gives you a chance to add your own color.
Great idea!
Great notebooks. My fave is the one with the colorful leaves and flowers.
awesome
Such beautiful notebooks!
the one with the flowers in black and white, but love them all!
I make notebooks for my granddaughters but never thought to doodle on the cover. Thanks for the inspiration.
Love your mini notebooks!
These notebook are so cute.
Wonderful idea…you are very creative!
fun backgrounds, cards. thank you.