Want to make a plain cake feel a little more special? This easy DIY cake banner is one of my favorite ways to add a handmade touch to a birthday cake or any celebration.
All you need are a few simple craft supplies, some colorful cardstock, and a little twine. You can customize the colors and message to match any party theme and because you’re making it yourself, you can even add a name or a special message.
How to Make a Cake Banner
Step 1: Make Your Banner Pieces
Start by cutting small shapes from cardstock. You can use triangles, circles, squares, or any shape you like.
I used a paper punch to make the process quick and easy. If you don’t have a punch, simply cut the shapes by hand.
If you’re starting with plain cardstock, add your own color using markers.

Step 2: Attach the Banner to Twine
Cut a length of twine slightly longer than the finished banner.
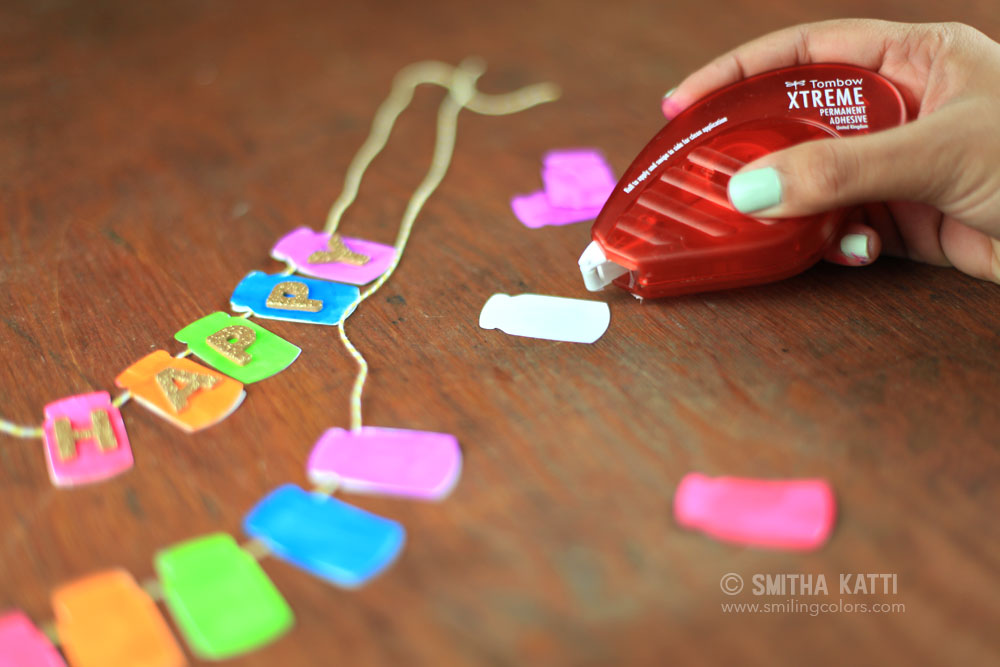
Arrange your cardstock pieces in the order you want them to appear. Turn each piece over and apply a small amount of strong adhesive to the back.
Place the twine across the adhesive and then sandwich it with a second cardstock shape.
Press the two pieces together firmly so the twine is securely held between them.
Continue until you have enough pieces for your message.
Tip: Use a strong adhesive so the pieces stay securely attached to the twine.


Step 3: Add Your Message
Now comes the fun part!
Use glitter letters or adhesive alphabet stickers to spell out your message. I used Happy Birthday, but there are so many possibilities – like Congrats, Let’s celebrate, Happy Anniversary or a personalized name
You can make your cake banner as simple or as elaborate as you like.
Step 4: Attach the Banner to Skewers
Cut two pieces of twine and attach the ends of your banner to wooden skewers.
Choose skewers that are taller than you think you’ll need. It’s easy to trim them down later, but you can’t make them longer!
Once your cake is ready, carefully insert the skewers into the cake and adjust the banner so it hangs nicely across the top.
For an extra festive touch, add tiny bows or other embellishments to the skewers.

Conclusion
And that’s it! You now have a colorful, handmade cake topper that can completely transform a simple cake.

Ta da! This is what it looks like when it’s done- colorful, glittery, and unique. This simple DIY is a perfect way to personalize your cake with a name as well. Instead of just Happy Birthday, you can say Happy Birthday Susan easily.
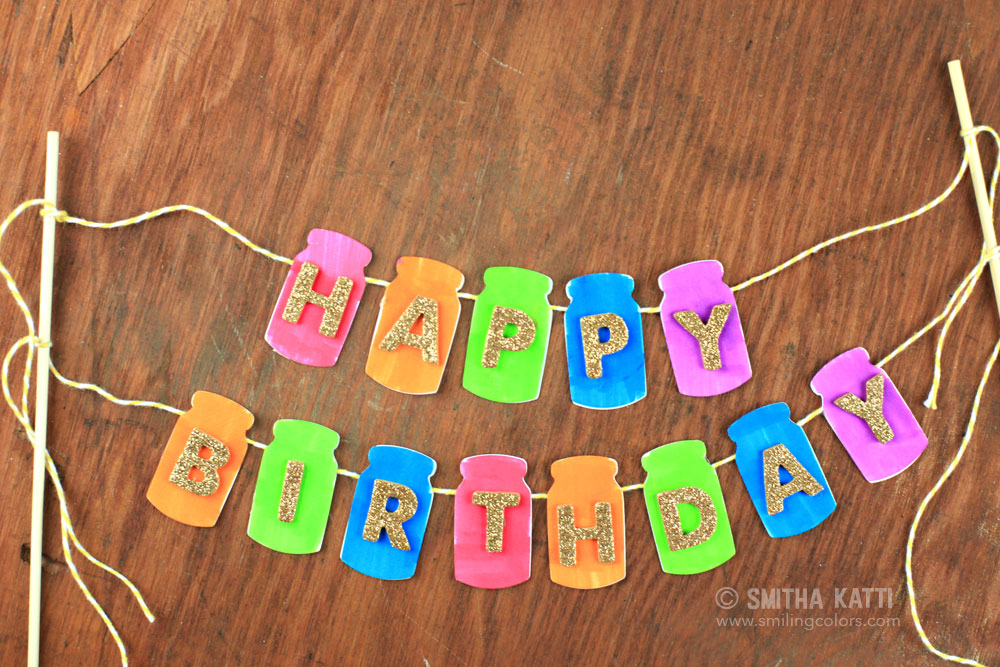
I love how easy it is to personalize this project. Change the colors to match your party, spell out someone’s name, or create a banner for a wedding, baby shower, graduation, or holiday celebration.
It’s also a great little project when you want to add a handmade detail without spending hours crafting.

Now that your cake topper is complete, don’t forget the card! Download cute free happy birthday card printable pdf so your gift is ready to go in minutes.
If you enjoy making your own party decorations, this simple cake banner is a great place to start. A few colorful craft supplies are all one needs to make any of these Celebration Crafts to give your event a handmade touch.