Use your border punches in a unique way to make this DIY paper flower garland in this easy step by step tutorial. Makes the perfect Spring Party Decor!
Spring is in the air and as a paper crafter, I take that as a sign to create flowers. This DIY Paper Flower Garland Tutorial is easy to follow and I promise you that your finished project will be as colorful as can be. If you are a paper crafter and are looking for a way to use up that patterned paper stack that you seem to collect, this is the perfect DIY project for you!
Supplies Used:
- Border Punches: The old-style border punches (remember Threading water?) or the newer AdvantEdge Punch system with cartridges.
- Patterned papers: A good stack of these in a variety of colors and patterns. I am a paper hoarder, so this was easy to find.
- A circle punch
- A pair of scissors
- A stapler. This is crucial, the stapler makes it so much easier to make these flowers quickly.
- Ribbon and buttons
- Glue Dots
How to make the Paper flowers
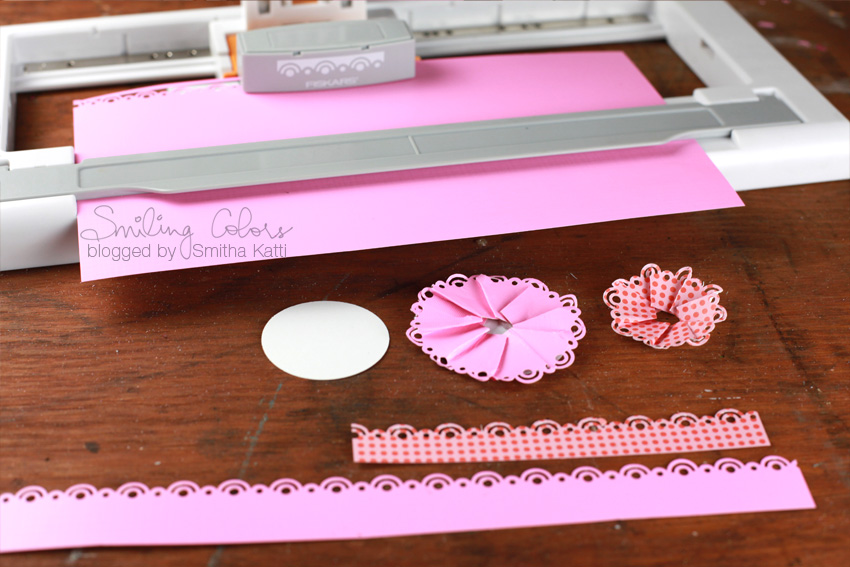
Step 1: Punch borders along the edge of your patterned paper. I love using the AdvantEdge Punch system for this for a few good reasons – One, it speeds up the process by magnetically holding the paper in place as you move the punch along with the paper. Two, the cartridge moves along smoothly punching the pattern continuously, eliminating the need for you to manually align the paper each time.
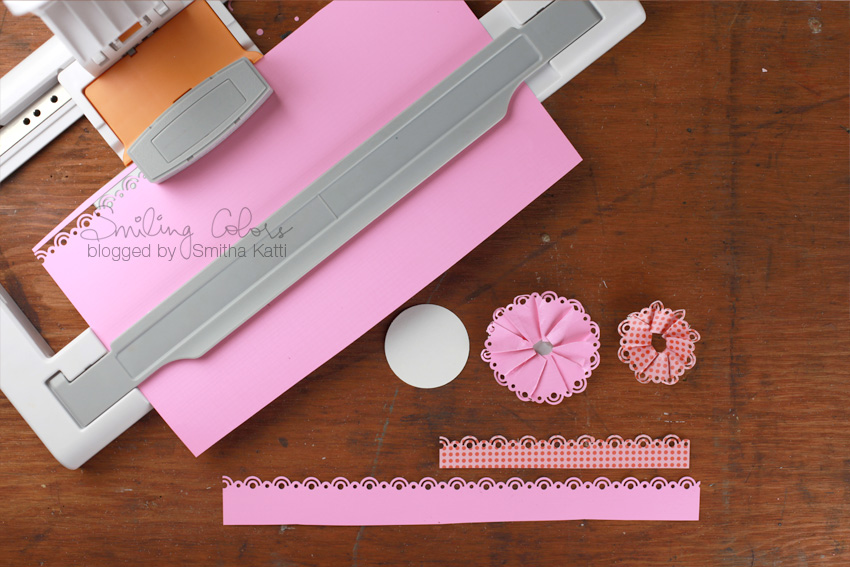
Step 2: Trim the border off of the paper using a pair of scissors and ruffle it onto a punched circle. For really thick patterned paper, it helps to dampen your fingers while forming the circle from the border. Place the ruffled circle onto the punched circle, affix another smaller ruffle on top and staple everything into place.
I love using my tiny attacher for this.
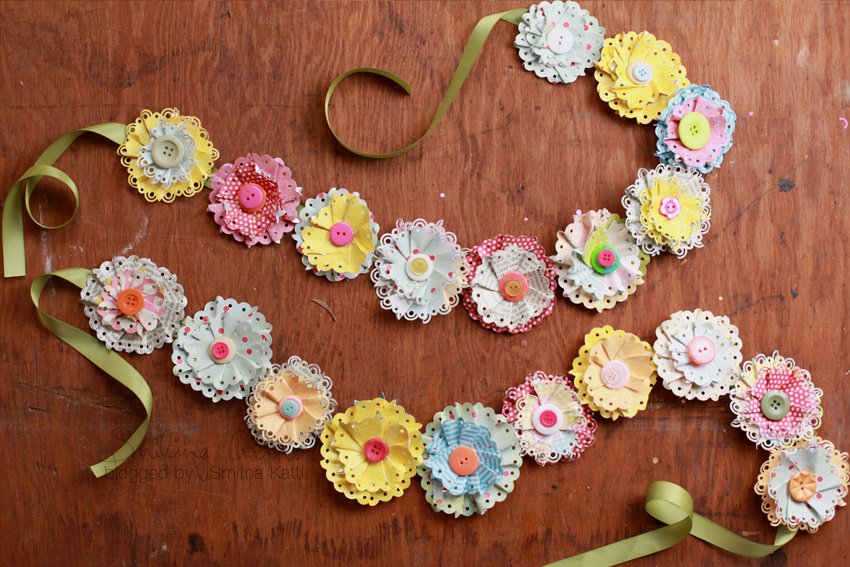
dIY paper flower garland
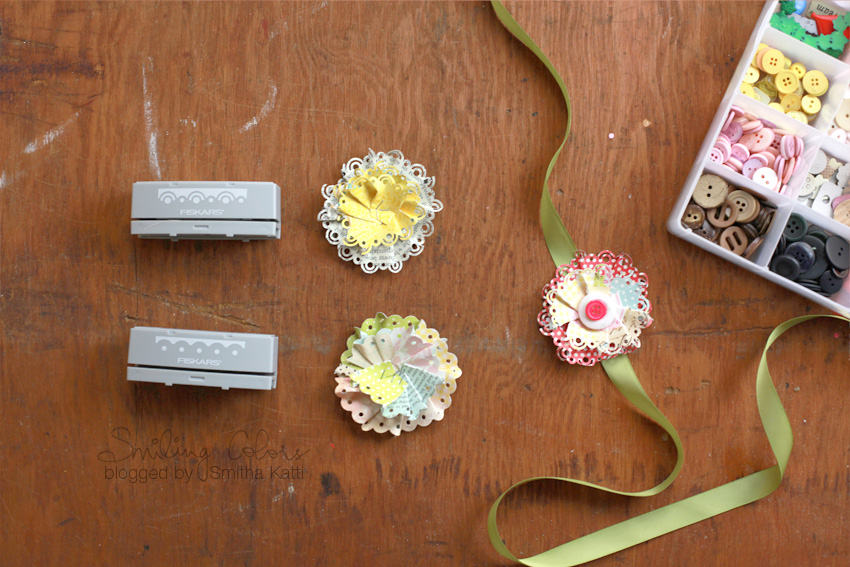
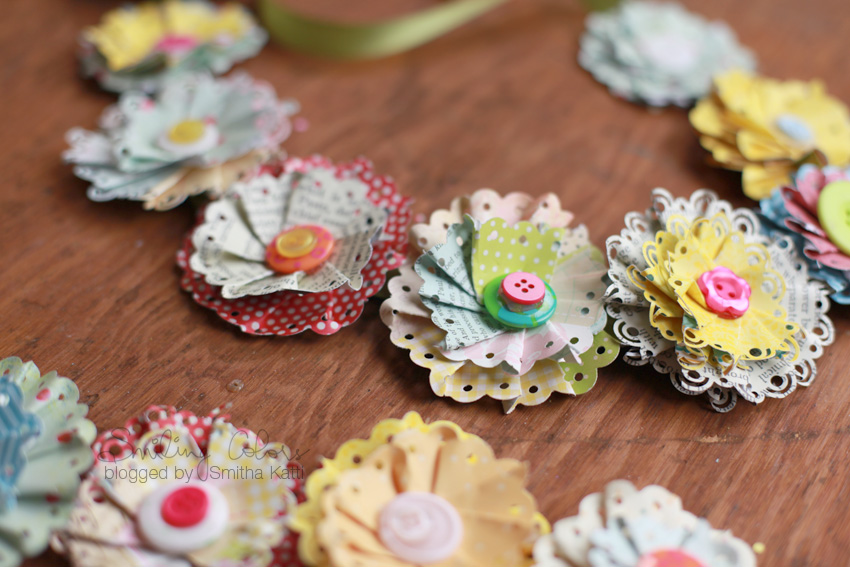
Change out the cartridge in the AdvantEdge Punch System and punch away some more. FYI, the two cartridges I show below are called Groovy Rainbow and Threading Waters. Make multiple flowers and then start stapling them onto a ribbon. Finish off each flower by adding buttons (using Glue Dots) in the center to hide the staples.
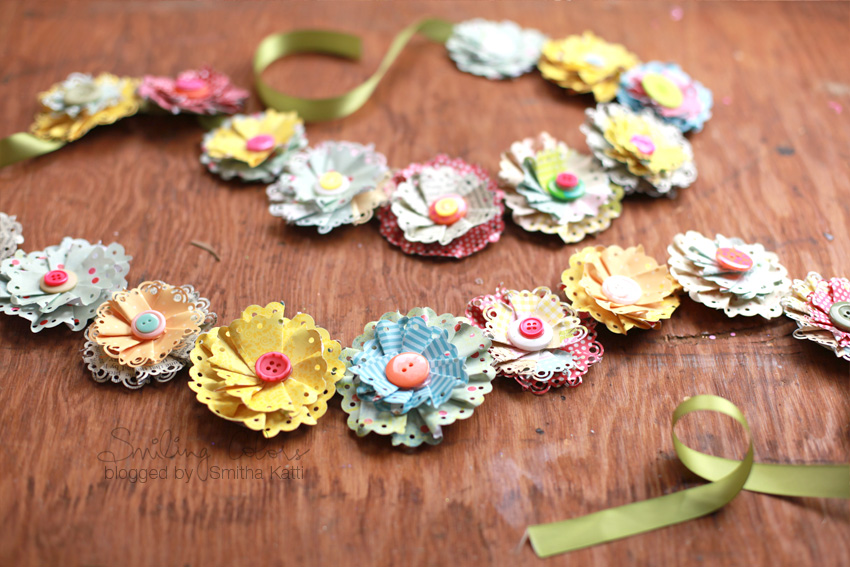
paper flower garland
Tada! I finished making all the flowers and the Paper flower garland is complete, and boy is it pretty! I love flowers and these garlands would look beautiful as decorations for any spring party! You could even use them to make your daughters room all flowery. There is no need to hand cut petals, the border design does it all.
Please leave a comment below if you would like to see any particular DIY by me, I’m always looking for new ideas! If you liked this post, please hit the buttons below and share it on social media! Join my newsletter 🙂

Hi I’m Smitha! I live in Minnesota with my husband and two daughters. You’ll always find me painting florals in my sketchbook. And I love the sheer joy of making something with just my hands! But my bigger love is capturing it all on camera Read more.
Thanks for stopping by today! If you learnt something from this tutorial, do share this post with a friend or on social media! Tag me @smithakatti #smithakatti I’d love to see what you create!