This post contains affiliate links to my go-to craft supplies. As an Amazon Associate, I may earn from qualifying purchases
Quickly add a touch of color and whimsy to a plain bag!
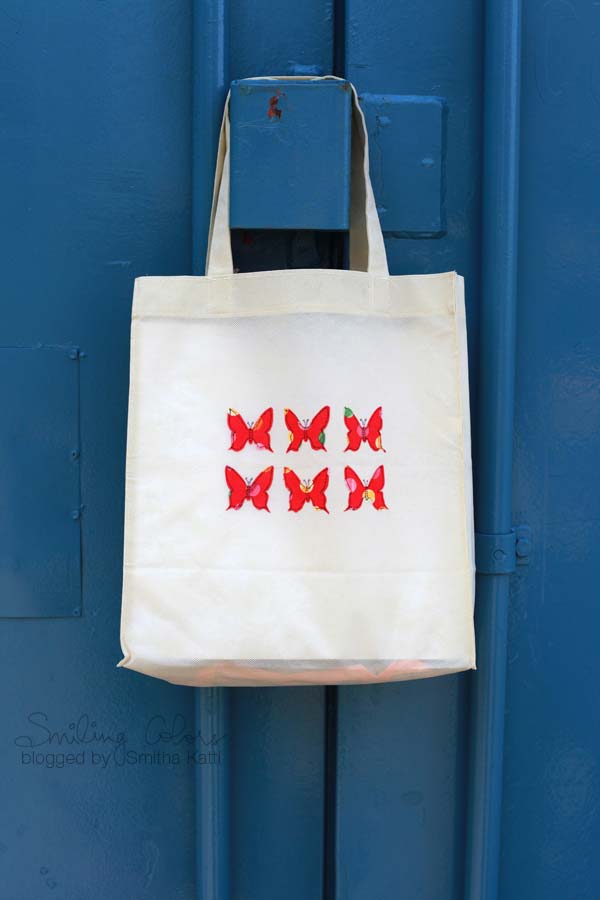
Today I am using adhesive-backed fabric sheets to decorate a tote bag! This is a simple tutorial and can be easily made in under 15 minutes!
Supplies you will need:
- Duck Fiskars Nonstick scissors
- Stamp Block Set
- Simple Stick Stamps
- Reusable Tote
- Adhesive backed fabric
How to Decorate a Tote bag
Total Time: 15 minutes
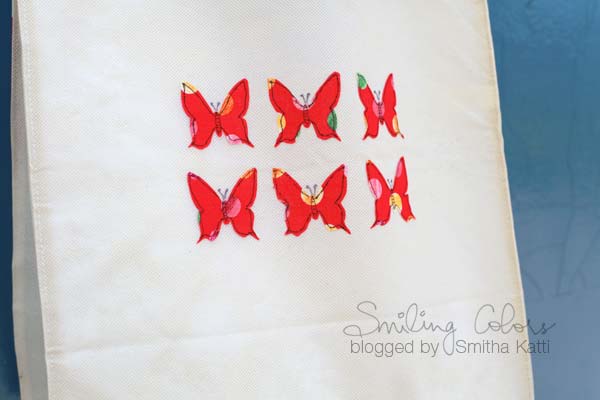
Using the Simple Stick Stamps on an acrylic block stamp butterflies onto the back of a Duck fabric sheet

Using the Fiskars Duck 5 inch scissors carefully cut out the butterflies from the Duck Fabric sheets

Peel the butterflies off of the backing and adhere onto tote bag.

This project is SO simple. And you can change it to personalize your tote (or anything else) easily. This makes a perfect handmade gift.
You can also use a die cutting machine to die cut any shapes you want to then adhere those onto the tote bag. The options are really endless!
I’m thinking of adhering a large ampersand or monogram to these bags and giving them as Teacher’s gifts at the end of the year. The kids can also help out a bit with the altering so that they can feel involved in the project too.
ALSO READ: More Handmade Gift Ideas