Learn how to make a simple Ruffled Flower Pillow with the fabric you might already have at home! Step by step photo tutorial included.
Supplies you will need
- Fabric- for the pillow cover, for the ruffled flower, and for the center of the pillow if you choose.
- Felt (optional) for the center of the pillow
- Pillow form: I’m using a 16-inch round pillow here
- Fiskars Softgrip Scissors
- Pinking Shears
- Fabric adhesive
How to make a ruffled flower pillow
Step by step tutorial showing you how to create an easy ruffled pillow.
Total Time: 2 hours
1. Cut the Fabric for the pillow cover
First, cut the pillow cover front to be a complete circle using a Pinking shear. Make this larger than you pillow with at least 2 inches seam allowance. This allowance allows for the thickness of the pillow itself.
For the back of the pillow cover, cut two circle halves with enough fabric overlap to form the pillow closure. Then fold and sew the straight edges. 
2. Cut and iron the fabric strips for the ruffles
For the flower itself, I chose to use two fabrics; a plain pink one and a patterned pink one. We’ll alternate these two fabrics to form the flower petals. This can easily be made with as many fabrics as you choose- one or many more.
Cut 5-inch wide strips of fabric in the lengths of 112, 88, 72, 64, and 56 inches. Fold each strip widthwise into half and iron neatly to form a crease.
3. Create the ruffle circles
To gather the fabric, hand-stitched or machine stitch each strip along the raw edge to form ruffles.
To close the circle, place one end of the strip within the other and pinned them in place
4. Layer and stitch the ruffle circles in place
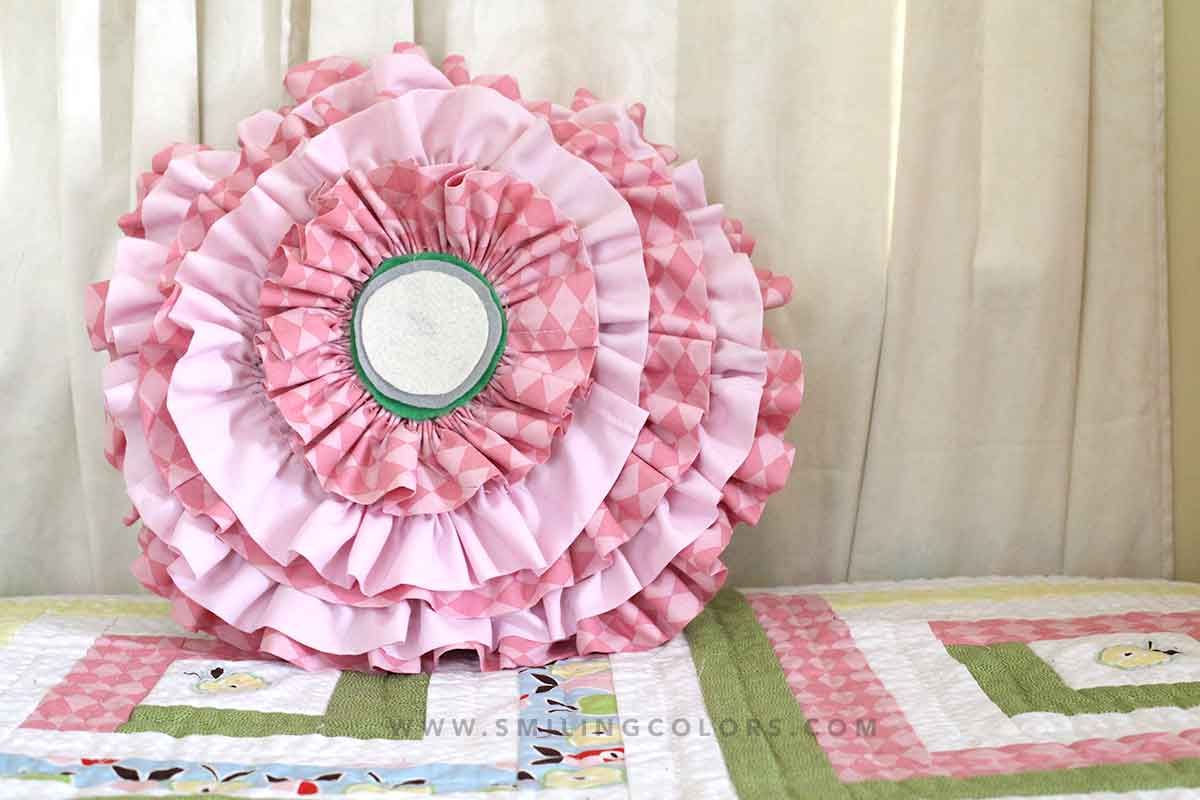
Make all 5 ruffled circles and then begin layering them. Place the largest ruffled fabric circle along the outer edge. Then machine stitch the whole pinned ruffled outer circle onto the pillow front.
Repeat this, until you have all five ruffled layers in place, 
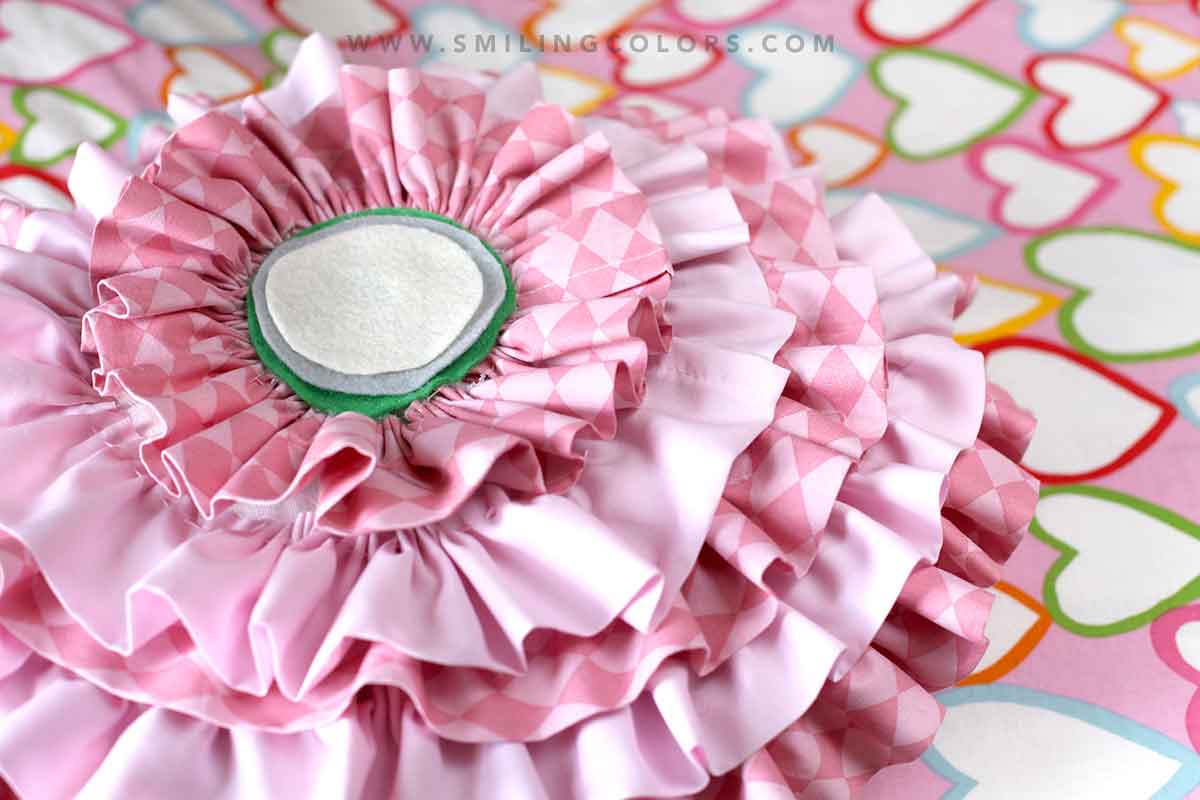
5. Create a center for the flower with felt or fabric
For the center of the flower, I die cut three felt circles of the same size. Trim a little bit off of two of these circles using a pair of scissors. 
6. Adhere or sew the felt circles into place
Add the felt circles to the center of the flower and the pillow is ready! I glued the Ruffled flower into place with fabric glue
ruffled flower
I love how pretty this Ruffled Flower pillow turned out! It seemed like a simple idea in my head, and I’m glad I was able to put it into action.
For this ruffled flower pillow, I purposefully chose to use fabrics leftover from this Log Cabin Quilt I made.
I ended up hand sewing all the ruffles simply because I wanted to watch TV while I sewed.
This ruffled flower tutorial was written while I was a part of the Fiskars Design team.
More Fabric Crafts to Try:
- Die cutting fabric: How to Iron on fabric shapes
- How to sew a colorful quilt with Triangles
- Quilted Potholders Tutorial
- How to Sew a Quilted Bag with Zipper
- Drunkards Path Pillow with Rainbow Quilting
- Fabric Stash Buster Ideas

Hi I’m Smitha! I live in Minnesota with my husband and two daughters. You’ll always find me painting florals in my sketchbook. And I love the sheer joy of making something with just my hands! But my bigger love is capturing it all on camera Read more.
Thanks for stopping by today! If you learnt something from this tutorial, do share this post with a friend or on social media! Tag me @smithakatti #smithakatti I’d love to see what you create!

Adorable pillow!!!!
Amazing! Love the colors and all those ruffles. I can’t believe you sewed it all by hand.
So pretty
so pretty!
Wow that is gorgeous!! I am in awe of your talent and your craftiness 🙂
So pretty! Perfect little “sofa” pillow!