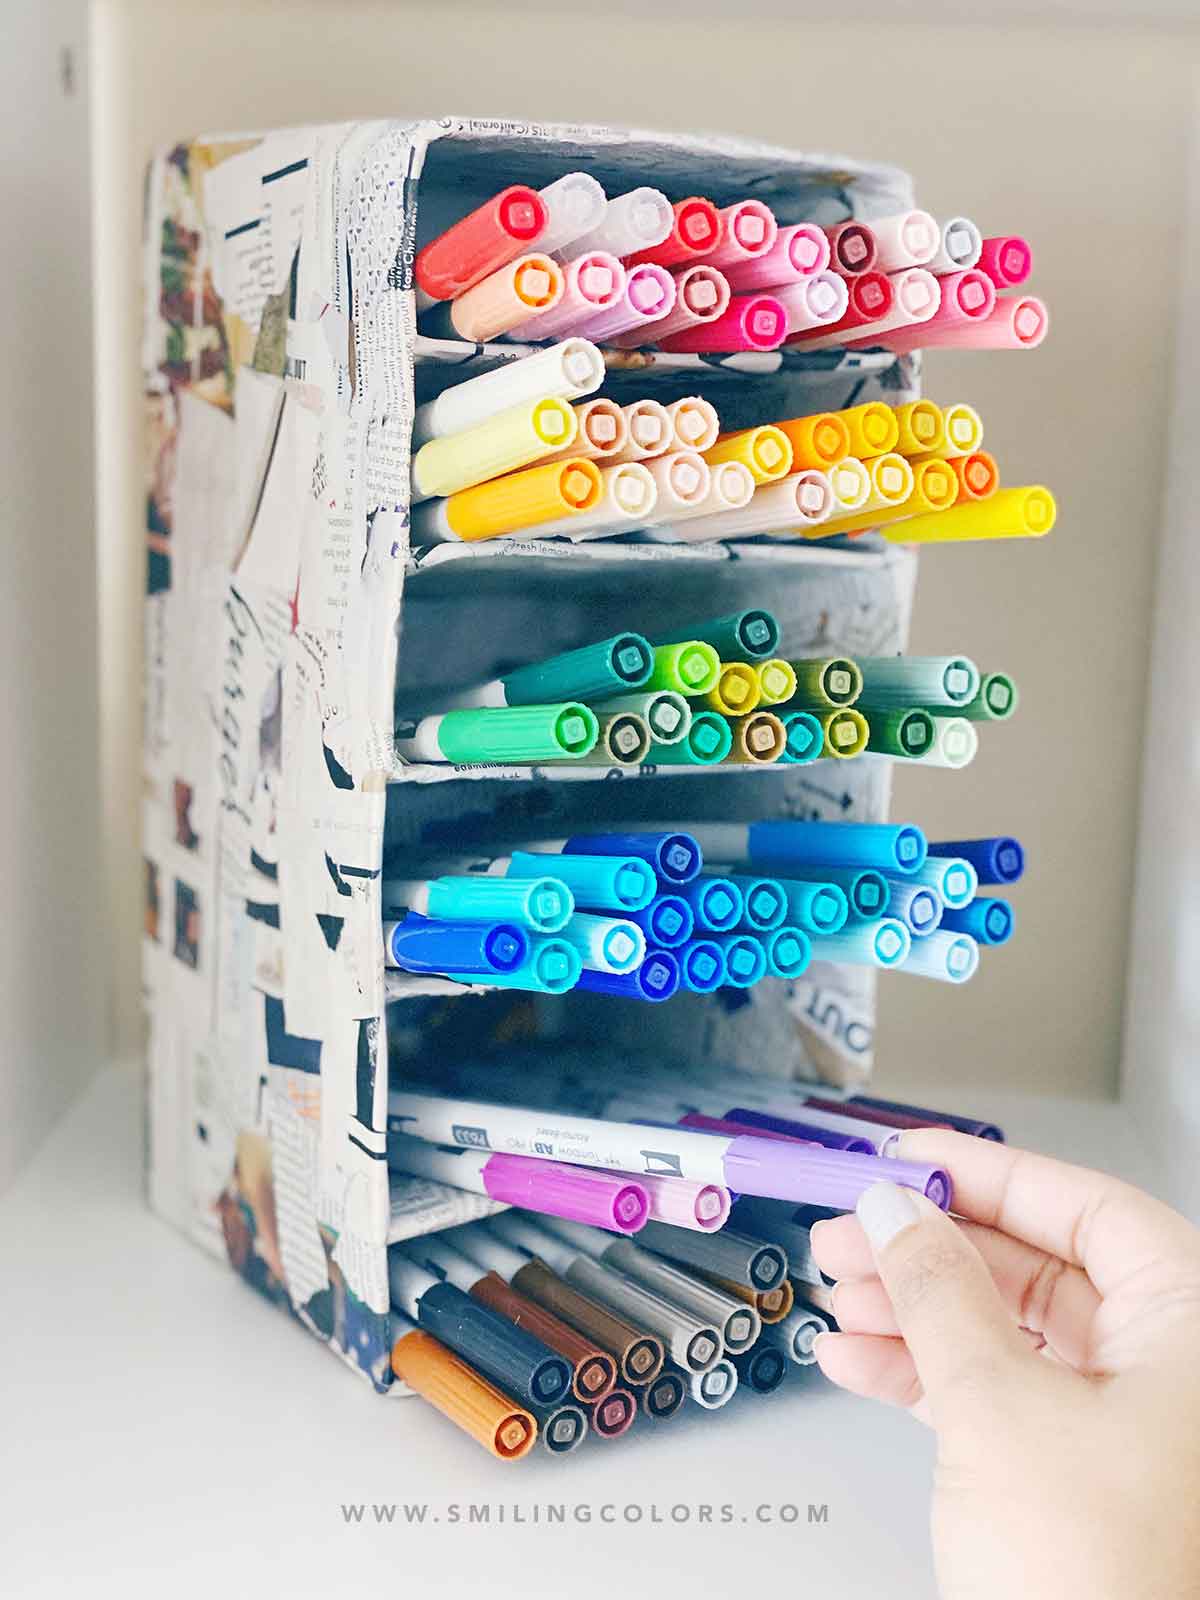
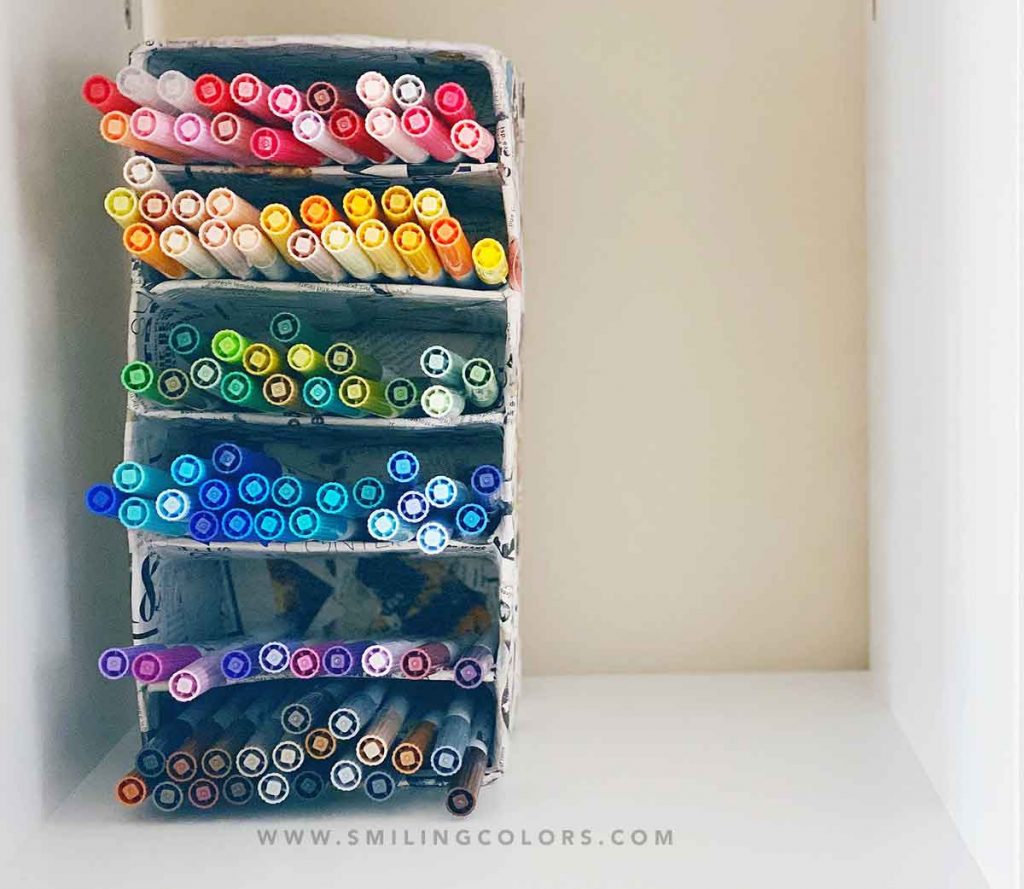
Hello friends! We all love our markers and today I’ll show you how you can make the most inexpensive DIY Marker Organizer by reusing an old cardboard box!
There is something so so satisfying about getting your hand into the glue and tearing up bits of paper. This DIY Marker Organizer was made using the Paper Mache on Cardboard Technique.
This post contains affiliate links and when you purchase an item via these links, I receive a small commission at no extra cost to you.
DIY MARKER ORGANIZER TUTORIAL
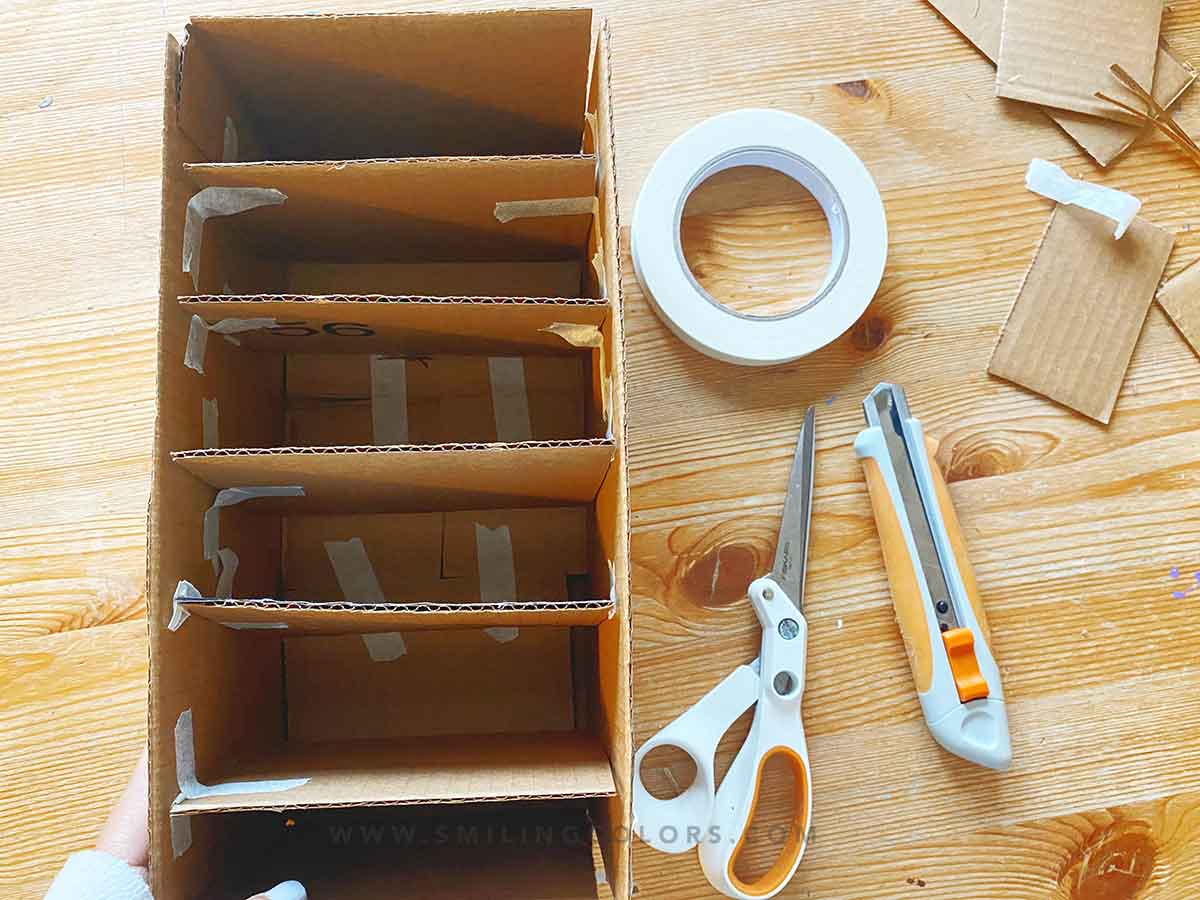
- Make your cardboard frame: Using a sharp pair of scissors + box cutters, cut into your cardboard box to make it the size you want. Cut equal-sized pieces for the shelves and hold them temporarily in place with the paper masking tape.
- Make your Paste (Optional): I used all-purpose flour to make a paper mache paste at home. This is a great way to extend your supplies- The recipe is 2tbsp all-purpose flour + 1 cup of water. Bring to a boil while stirring and let cool.
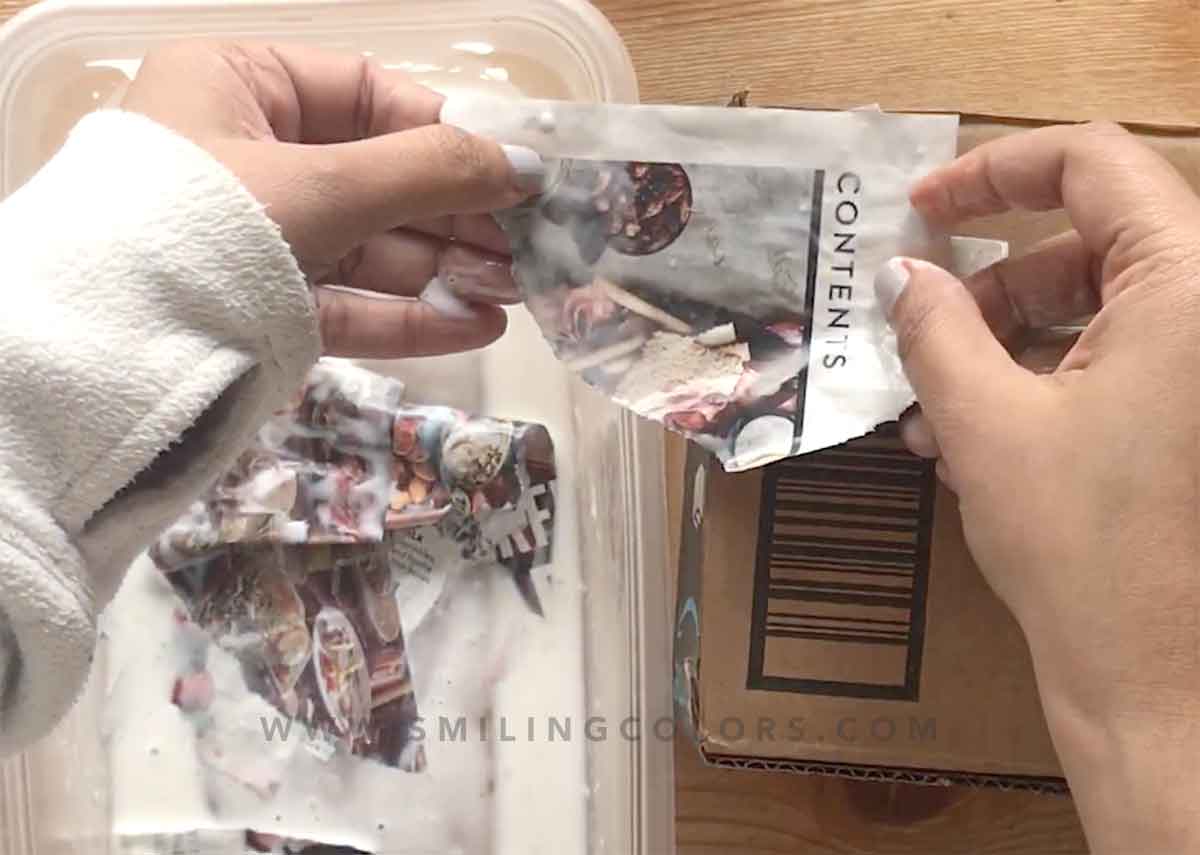
- Tear up your paper: Find old magazines and newspapers, and tear it into small pieces. These pieces will be layered to reinforce and strengthen the storage unit.
- Soak your paper in the glue and layer: Dip your paper in the glue, let it soak for a few minutes, and then pick up each piece individually and layer it onto the cardboard box. This will need to dry thoroughly before we add another layer of paper.
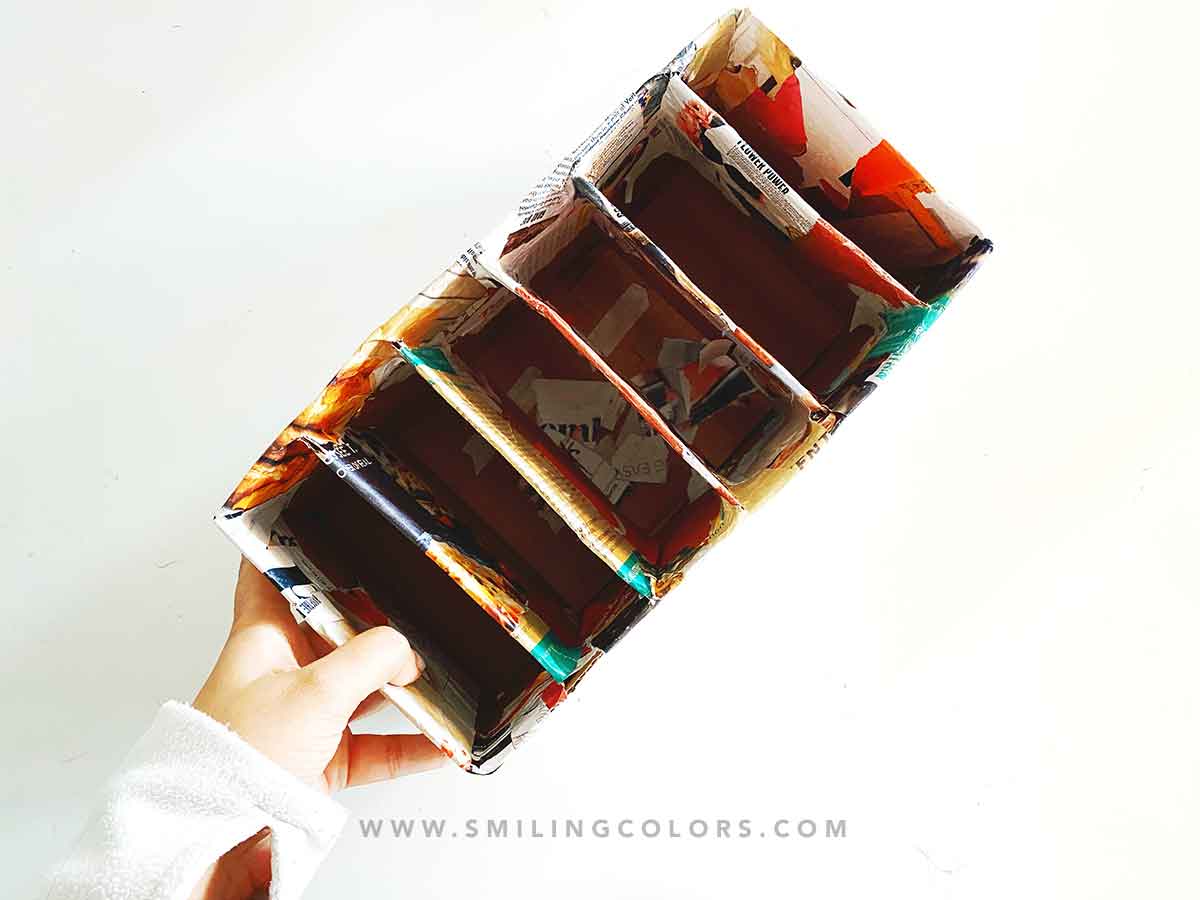
- Let it dry in between layers: Cover the entire cardboard with layers of paper. As it dries, you will see the storage unit hardens and strengthens. The dried glue adds structure to the box and the shelves will stay in place neatly.
- Finish it with a coat of sealer: You can at this time leave it as is, or choose to add a layer of acrylic white paint on top. Your choice. I like the look of the print and type and am choosing to leave it as is here.
- After a week of drying, I would recommend applying a layer of sealer all over your DIY Marker Organizer to prevent mold or warping.


dIY marker storage Video
An in-depth step by step Video Tutorial showing you my DIY Marker Organizer process
There are so many beautiful crafts you can make with things we would normally trash or recycle. Check out this post for more ideas on how to reuse your cardboard boxes for your home.
Supplies used:
- An old cardboard box
- Newspaper or old magazines
- Homemade paste or white glue
- Scissors- I’m using Fiskars Amplify + Box Cutters (or Exacto knife)
- A big bowl to mix the glue
- My favorite masking tape
- A coat of varnish or sealer as a protective layer.
Tips:

- Tear your paper – do not use a scissor to cut them into pieces. Those feathered edges glue nicely in place.
- Make sure to tie up your hair: before you begin, because once you start the glue will get everywhere even in your hair!
- Grab an old paintbrush to help you reach those corners in the back easily. Make sure to wash it right away!
- Use a masking tape– not cellophane tape or scotch tape while building your DIY marker organizer.
CONCLUSION:
I totally love how my DIY Marker Organizer turned out! It’s a little wonky, but perfectly imperfect. My kids also helped out with the paper gluing so it was time well spent giggling and making memories.

I own so many markers at this point, and share more tips in this How To Organize Art Supplies In A Small Space post.
I love how this marker organizer turned out, and also how it matches thsee DIY Cardboard Box Storage Ideas I shared previously.

click here to Pin this tutorial, thank you!

Inspiring you with simple doable Art and Craft ideas and tutorials that will encourage you to use your supplies, get messy and find your creativity.


Wouldn’t a shoe box be just as good?
you could use a shoe box if it feels strong and stands upright. The markers are pretty heavy, so the box needs to be sturdy