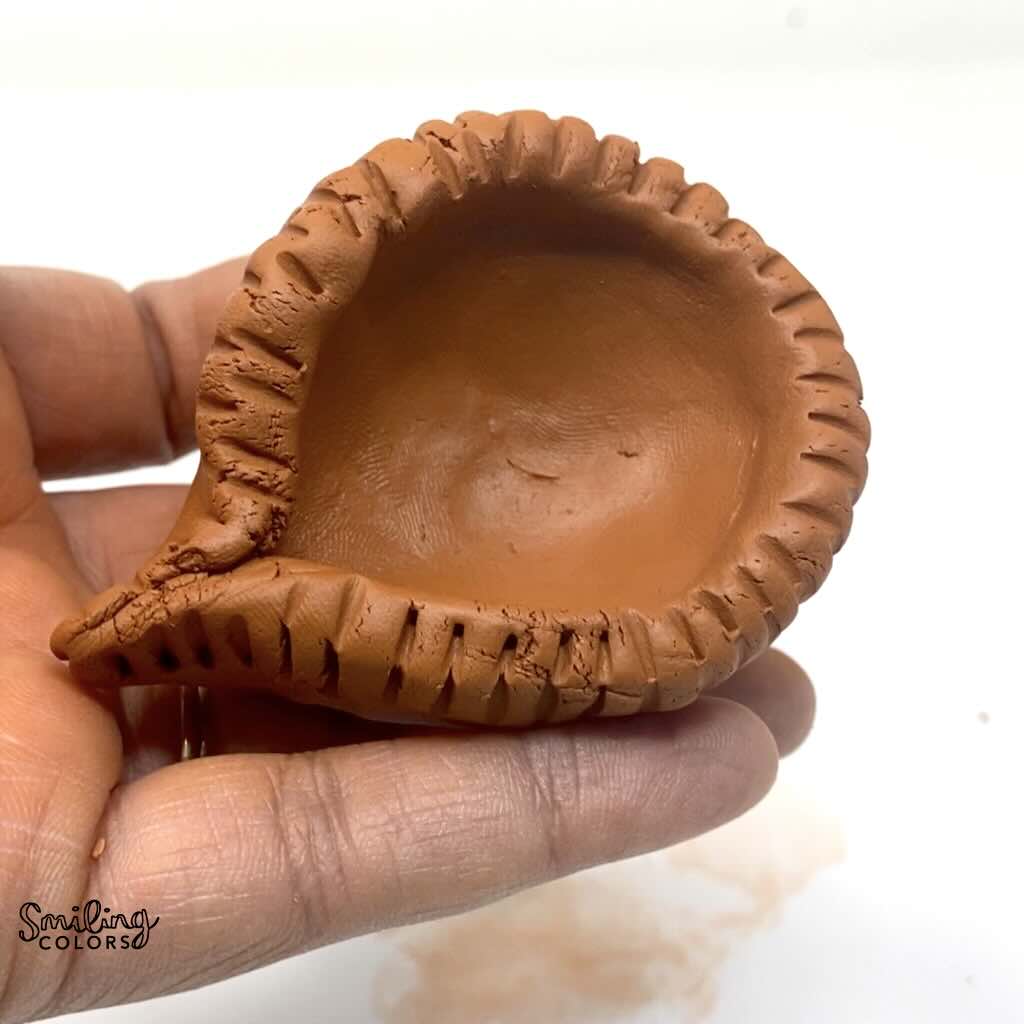
Diwali is the Hindu festival of lights, we light lamps all around our house to celebrate the victory of good over evil. In this tutorial, I’ll show you step by step how to make clay diyas at home.
This DIY clay diya tutorial focuses on shaping, drying, and finishing your diyas so they look clean and elegant. Whether you’re new to working with clay or just looking for a Diwali project, this is an easy and rewarding way to create your own traditional oil lamps at home.
Supplies you will need:
To make these clay diyas, you will need a clay and a few optional tools.
- Air dry clay – I like this clay as it gives you a more traditional terracotta- style finish. You can use any clay you might have at home.
- Toothpicks or small tools for detailing.
- A small bowl of water
- Paper towels
how to make clay diyas Step by Step Tutorial
This simple tutorial will show you how to make clay diyas at home step by step from start to finish.
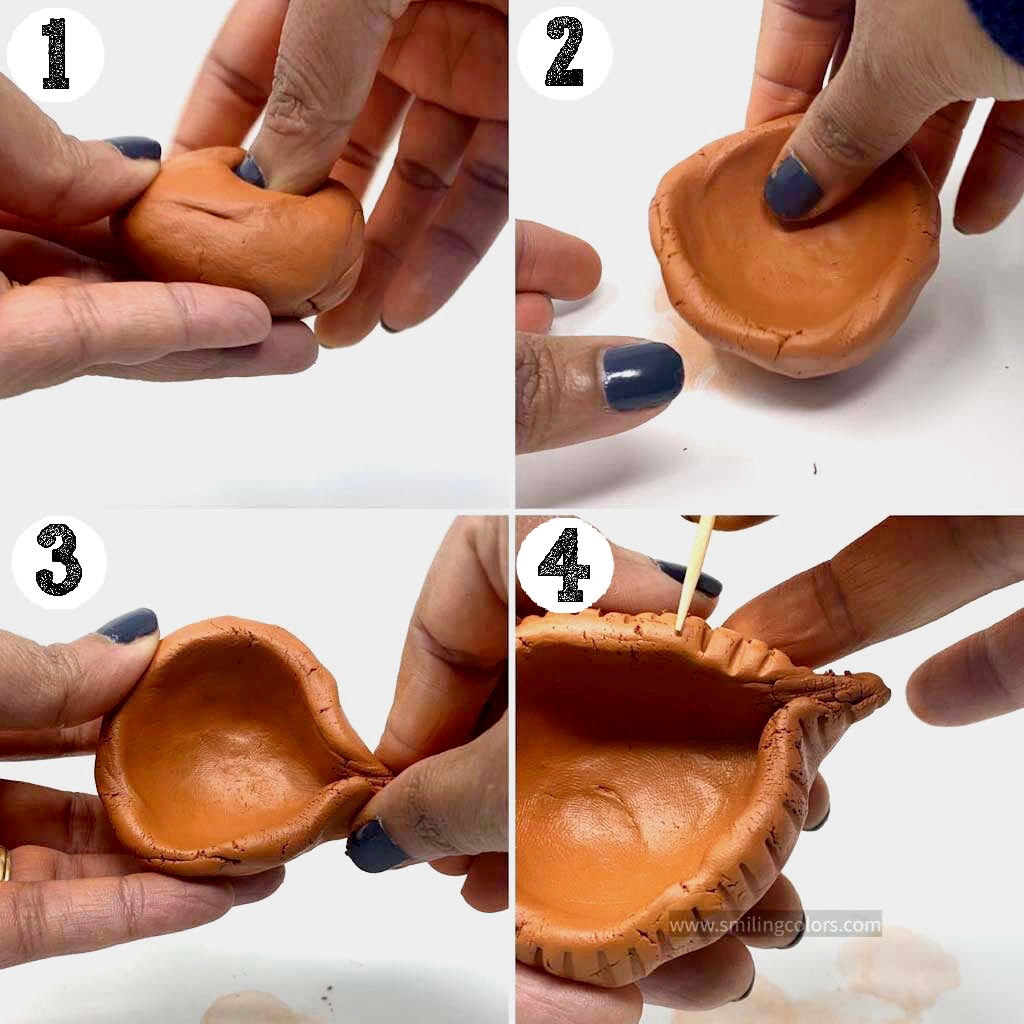
- Grab a small ball of clay that is about the size of a lime or golf ball. Knead it well with your palms until it is soft and smooth. Dampen clay with a little water to soften if needed.
- Shape it into a bowl form. Roll the ball of clay into a smooth round shape and then use your thumb to create an indent in the center. Gently press outwards to form the sides of the bowl, keeping the rim even,
- Pinch a Spout. Use your fingers to pinch one side into a small pointed lip- this gives the diya its classic look.
- Add decorations. Use a toothpick or small tool to carve lines or dots or patterns. You can also use acrylic paints, gems, mirrors or glitter.
- Dry Naturally. Let your diyas sit overnight (or longer) at room temperature. No baking needed! Place them on a paper plate so they can dry evenly.

Tips and Hacks:
Here a few hacks on how to make clay diyas.
- Store unused clay: I usually store and reuse my air dry clay after making ganesha with clay and it easily lasts 6 to 12 months.
- Keep your clay tightly wrapped. Close the lid on the rest of the clay right away- you don’t want it drying out. To store it longer, wrap in plastic tightly.
- Restore clay that’s drying out: Wrap it in a damp paper towel (squeeze out excess water) until you’re ready to use it again
- Kid- friendly version: Looking for a fun and colorful version? Try this Diwali diya making activity for kids.
how to make clay diya VIDEO
Here is a quick video showing you how to make clay diyas at home.
And that is how to make clay diyas at home using air dry clay! These lamps work well with both oil + wick or a battery operated tea light. I like using air dry clay here as there is no need to bake the finished diyas. You just need to plan ahead and give the diyas about 24 hours to dry.
If you are looking for more creative ideas check out this Easy Diwali Watercolor Painting Tutorial, How To Draw A Diya, or you can download and print this Free Printable Happy Diwali Card instantly! Shubh Diwali friends!