Ganesha (also spelled Ganesh or Ganapati) is the beloved elephant-headed Hindu deity known as the remover of obstacles and the god of wisdom, beginnings, and creativity. Today let’s learn how to draw Ganesha step by step.
For today’s how to draw Ganesha tutorial all you need is a pen. But if you want it go fancier, I’ve got you covered with a colorful version too. There is also a printable pdf that you can download for free at the bottom of this post and then enjoy some quiet art time without your screens!

how to drawing ganesha Video:
How to Drawing Ganesha videos- enjoy my video on IGTV or How to Draw a Ganesha YouTube Video
HOW TO DRAW GANESHA STEP BY STEP:

Step 1: Sketch the Head and Trunk
Start by lightly sketching the head shape of Ganesha. Think of a rounded oval for the face, then add a long, swirling elephant trunk that curves gracefully downward
Tip: Don’t stress about perfection — the trunk can have a natural curve that makes your drawing unique.
Step 2 : Add Large Ears
Ganesha’s ears are large and expressive. Draw an ear on each side of the head, shaping them like gentle waves. They don’t need to be perfectly symmetrical, variation gives life to your art. The ears will always be in movement and never both in the same exact position.
Step 3 : Draw the Crown
Atop the head, sketch a crown. This can be simple or detailed, many artists add ornamental points, jewels, or a center gem.
Step 4 : Outline the Body, Arms and Hands
Below the head, draw a curved torso with a larger belly, traditionally seen in Ganesha imagery. Add a shawl or draped cloth around his shoulders if desired.
Ganesha is often depicted with multiple arms. For an easy drawing, draw one hand raised in blessing and another holding a sweet (laddoo) which a symbol of rewards and prosperity
Step 5 : Add the Legs
Draw legs in a folded or seated position, typical of many Ganesha art styles. Keep the lines gentle and curved this gives your sketch a calm, balanced look.
Step 6 : Add Facial and Jewelry Details
Now go in with a fine pen to draw, eyes with peaceful expression, decorative jewelry, tiny circles for pearls on the crown and necklace and extra detailing on the shawl and accessories
DOWNLOAD HERE: Click here to download the printable guide
How to Draw Ganesha with Markers:
Here I am using water based markers for my Ganesha drawing. These markers are great for so many techniques, check out this how to use watercolor markers post.
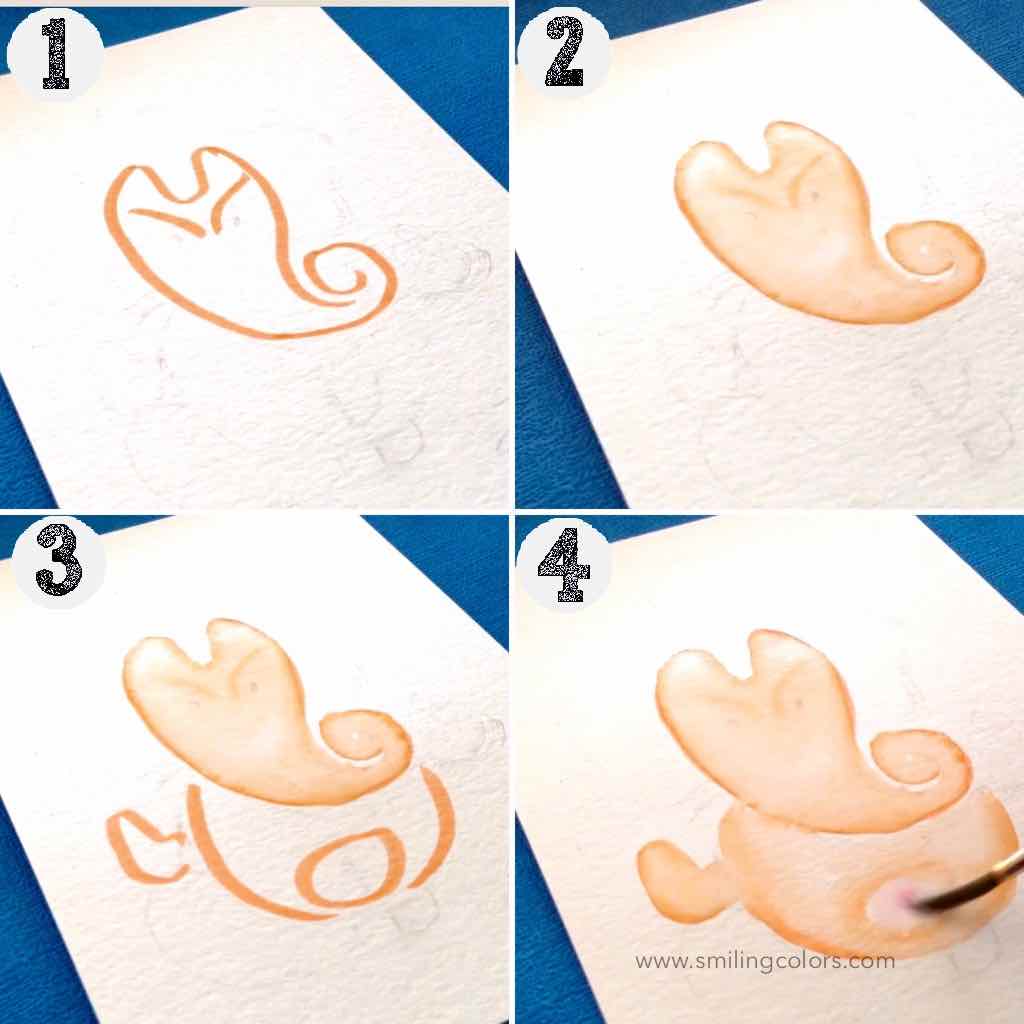
- Begin with the face shape. Using a skin tone color, draw an oval shape, which ends with a swirled trunk of an elephant. Mark where the eyebrows and eye center will be.
- Paint over the marker with water, gently dragging the color and water to meet in the center.
- Add a stomach and palm shape next.
- Paint with water again, adding a little bit extra water to the center of the tummy and slight hint of pink if needed.
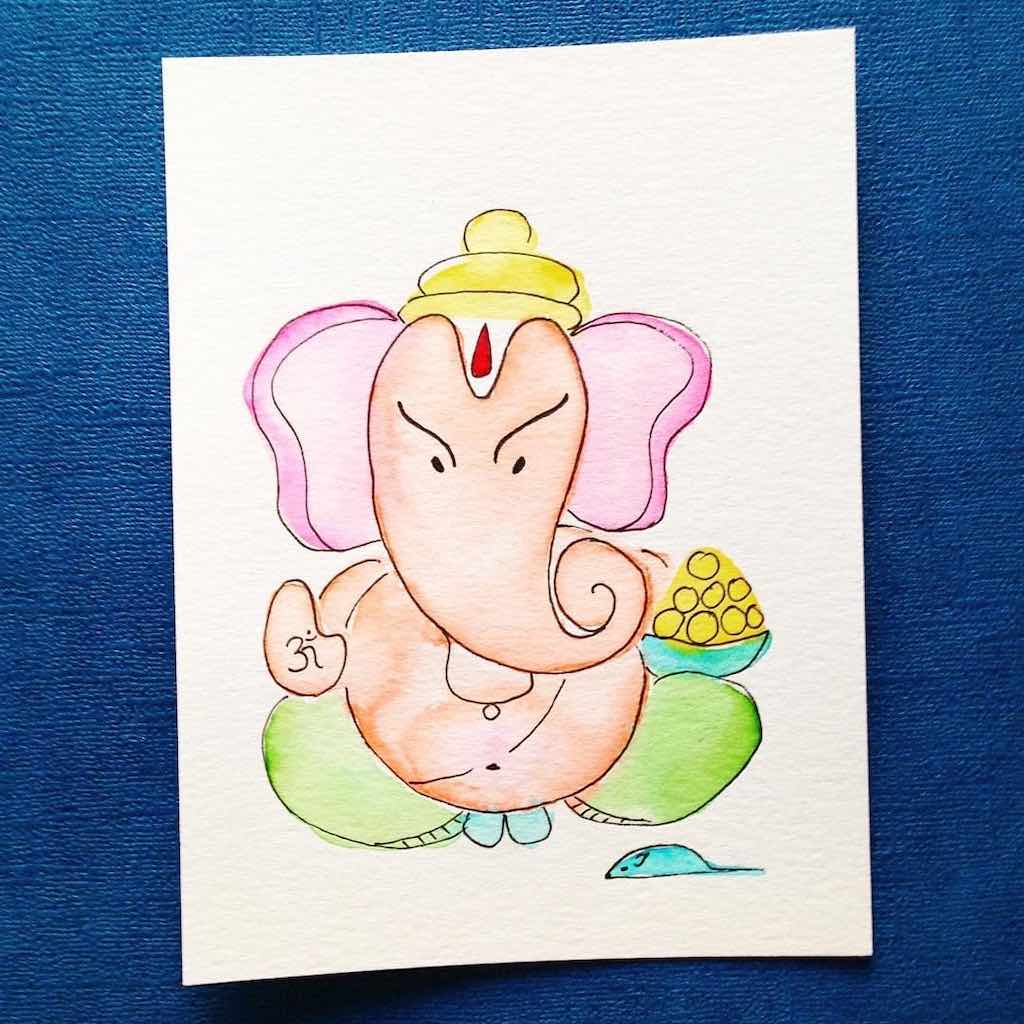
- Using a pink color, add two symmetrical ears. The ears should be large and dramatic.
- Draw in and paint the thighs with a green color.
- Using a bright orange color, draw the prasadam and crown. You can use gold here instead if you have it.
- Finish off by adding touches of blue design to the plate holding the prasadam, the feet and painting a mouse at the feet of Lord Ganesha.

Let dry. Go in with a fine black pen and carefully outline using a black pen.
Supplies I’ve used:
Affiliate links have been used at no extra cost to the reader. You can read my full disclosure here.
- Pens https://amzn.to/3wQgQGe
- Mechanical Pencil https://amzn.to/3g6gJAj
- Eraser https://amzn.to/32eP8EV
- Sketchbook- I made this sketchbook last week! How to Make a Sketchbook out of an old book
I hope you enjoyed today’s How to Draw Ganesha Step by Step tutorial + Video. I love drawing Ganeshas on the first page of all of my new sketchbooks! Explore more Ganesha celebrating ideas on my blog like Ganesha paintings and making a DIY Ganesha Clay Sculpture