These simple crochet coasters are perfect for beginners and a great way to practice basic crochet stitches while creating something useful for your home.
Whether you’re using up scrap yarn or starting your crochet journey, these coasters are a fun and practical place to begin. This free crochet coaster pattern works up quickly, making it ideal for last-minute gifts or small, relaxing projects.

Materials Needed
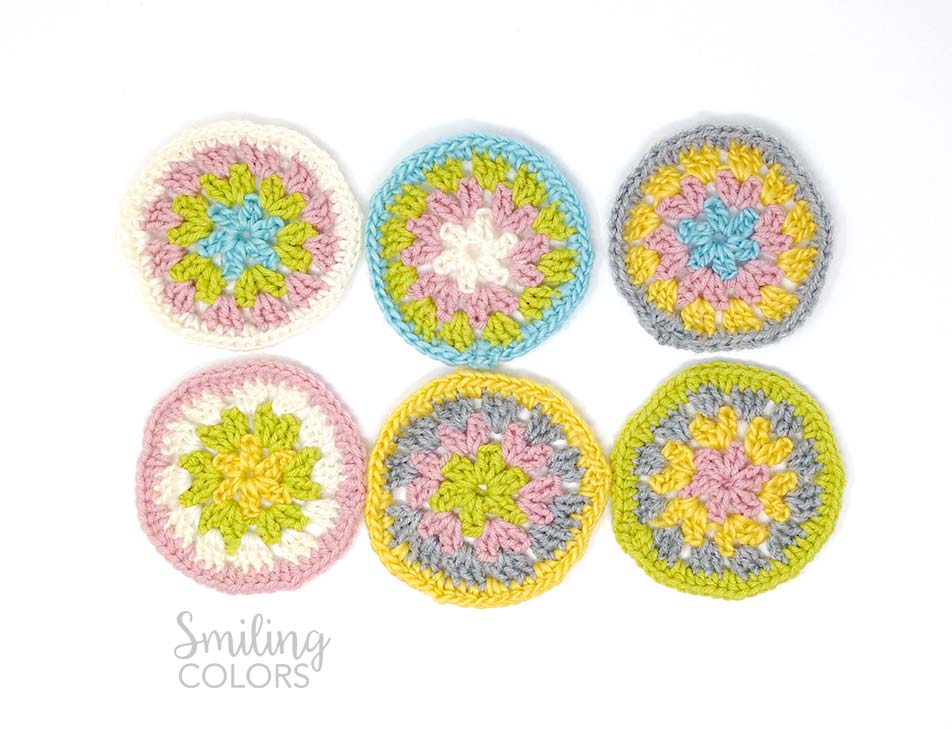
- I have 6 colors of yarn here, you really don’t need much yarn to make these. All of these yarn is leftover from my previous projects- the pink yarn from the rainbow knit blanket, the white, yellow and blue, green yarns are from this stockinette stitch throw and the grey one is this pale grey color by Vanna’s Choice.
- I am using a no H 5mm hook. I recently splurged and bought myself an ergonomic hook set and I love it!
Crochet Coaster Tutorial
Making a crochet coaster is a fun small project that you can learn to crochet with. You will need to know how to make a slip knot, how to chain, how to single crochet, how to half double crochet and how to double crochet
These crochet coasters are a circle take of the Basic Granny Square Pattern. If you prefer to make something less “holey” try this crochet flat circle pattern.
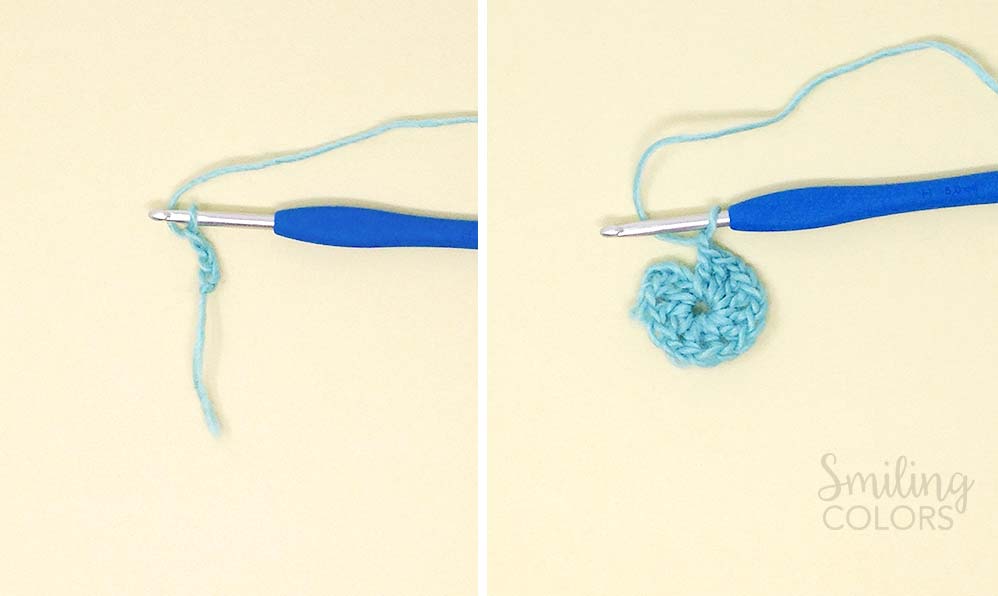
Round 1: Start by making a magic ring. Create a foundation chain of 4 stitches and then join with a slip stitch to the beginning to form a ring.
Next, chain 3- this counts as our first dc, dc into ring, chain 1. This forms our first cluster.
Then, *2dc, ch1* 5 times and then complete the circle with a slip stitch to the top of the initial chain 3. Cut the yarn and pull through.
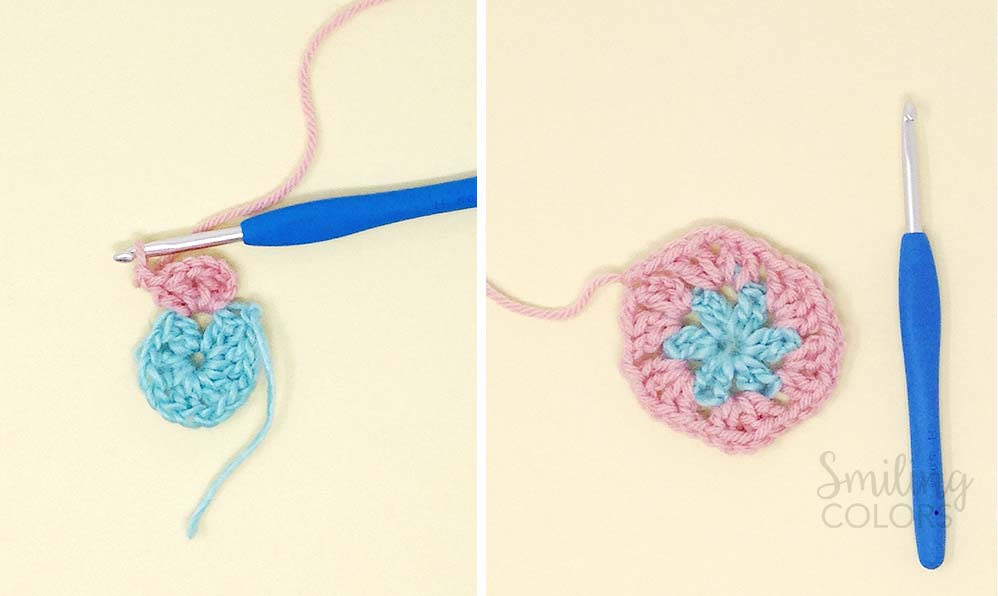
Round 2: Change color. Join your next color of yarn with a slip stitch into any of the chain 1 spaces.
Now chain 3- this again counts as our first dc. *dc, ch 1, 2dc, ch1* into the same chain 1 space.
*2dc, ch1, 2dc, ch1* 5 times and then complete the circle with a slip stitch to the top of the initial chain 3. Cut the yarn and pull through.
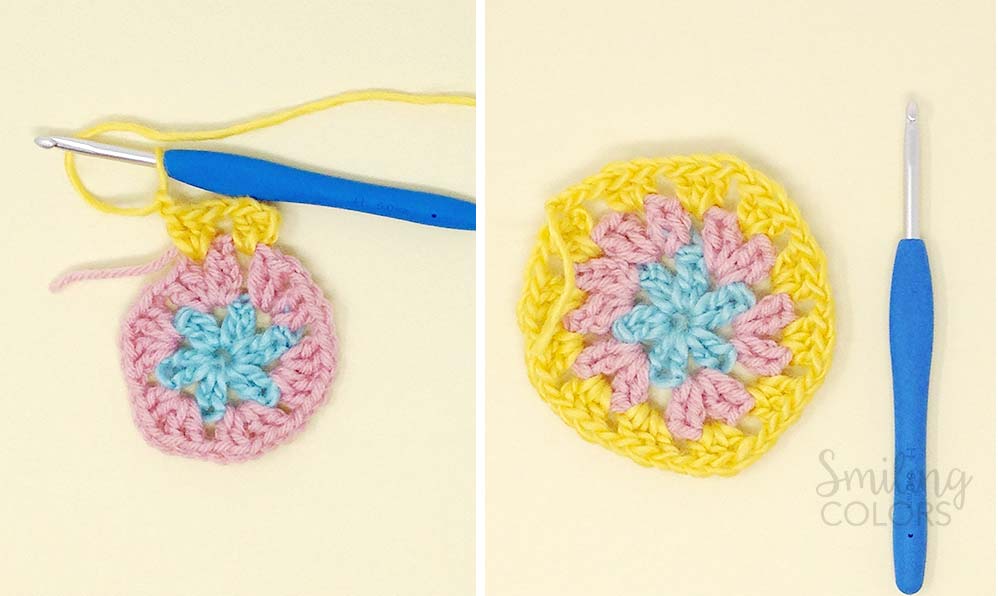
Round 3: Join your next color of yarn with a slip stitch into any of the chain 1 spaces.
Now chain 3- this again counts as our first dc. *2dc, ch 1* into the same chain 1 space.
*3dc, ch1* 11 times and then complete the circle with a slip stitch to the top of the initial chain 3. Cut the yarn and pull through.
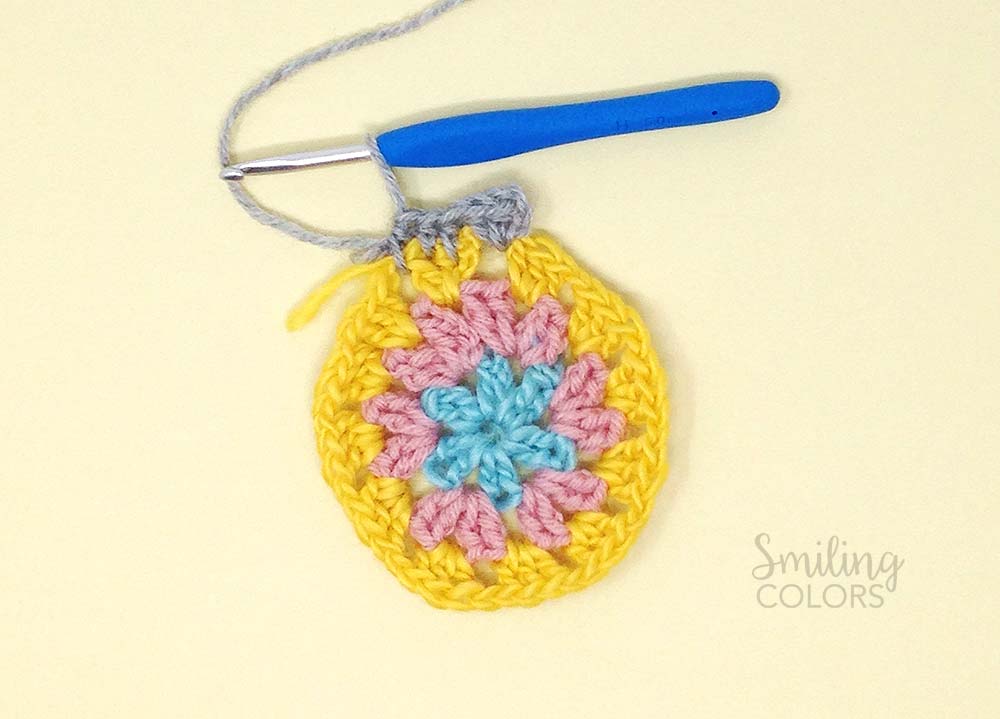
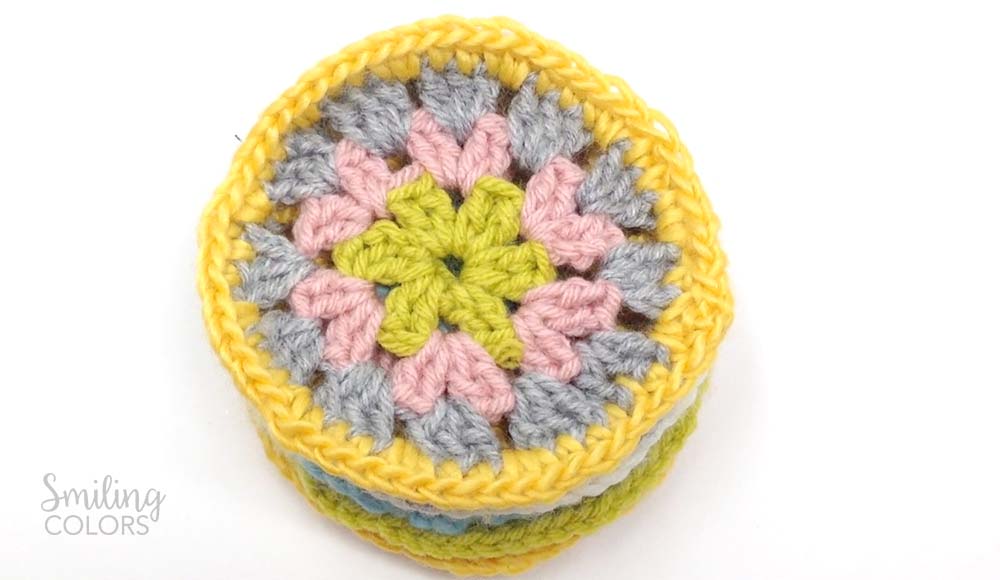
Round 4: This is the final round and creates a nice edging. We chain 2 this time, and then do a hdc into each of the dcs in the previous row.
Next, we make two hdcs into the chain 1 space below. And repeat this till the end. Join with a slip stitch. Cut the yarn and pull through.
And that’s it our first crochet coaster is complete! Once you make one you will be tempted to make so many more! These Crochet Coasters are so pretty, colorful, and easy to make.


I grew up watching my mom crochet the most beautiful things- blankets, pillows, dresses, and sweaters for me. These crochet coasters were a simple crochet home project for me and since they are so small it was easy to carry them around.


Do you back the coasters so moisture doesn’t get on your furniture?
I did not. It still works great! I have backed other felt coasters I’ve made with cork or burlap.
These are so cute!!! I will definitely give them a shot!!!
Finally, an easy to follow tutorial. I love the colors you used.
Thanks for the pattern!
I really like your On The Go package. I use those hair clips for my yarn balls as well, it keeps it very neat, no yarn tangles. This is a great project for OTG as well. I take crochet with me everywhere I go, since it helps me balance with all other stimuli around. But my ‘normal’ projects get too big to carry around, after the beginning stages. And this is the perfect go to. This and simple flowers 😉