If you are wondering whether or not you should invest in a light box let me share with you why I love mine. I will also share a few pointers on how to use a lightbox for tracing your designs in today’s post.
Looking for lighting solutions as a blogger ? Check out what 3 Blogging Equipment items you will really need
disclaimer: affiliate links have been used below at no extra cost to you. Please read further here
What is the best light box to buy?
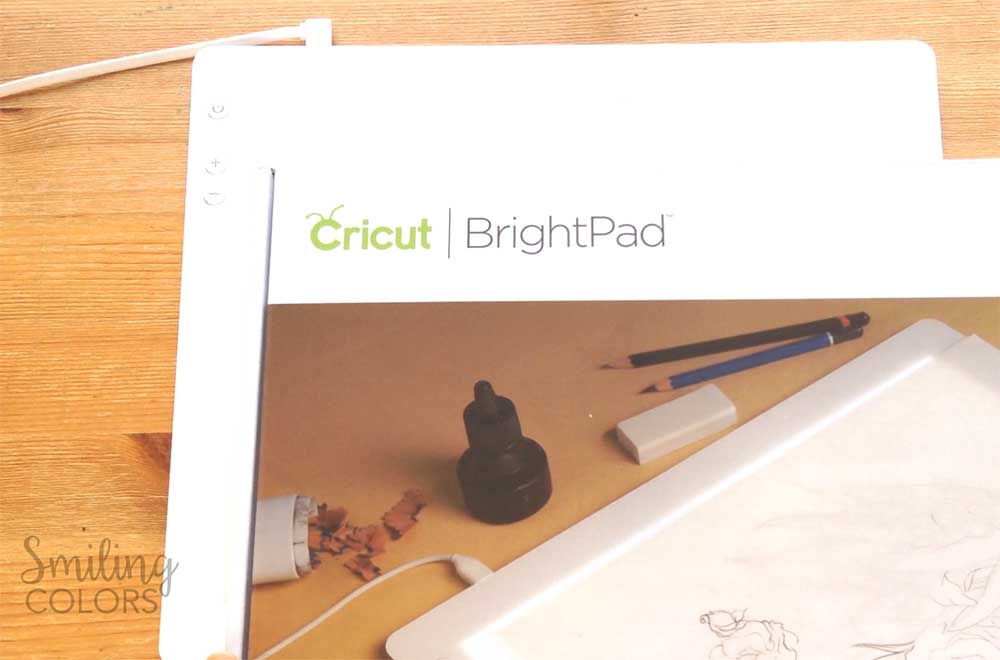
I have the Cricut Bright pad, it has a sleek design, and is really easy to use. It is light, portable and best of all comes with a few different adjustable brightness levels.
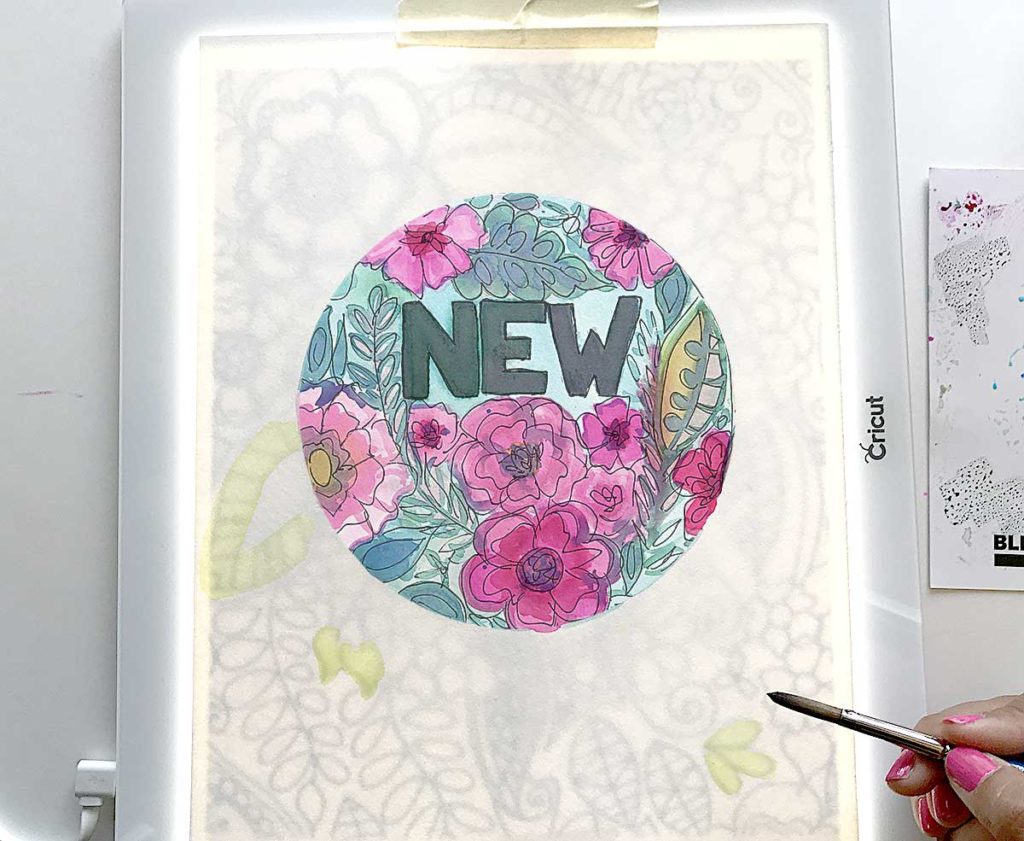
The paper I used today is a SUPER thick 350lb thickness mixed media paper and this light pad worked like a charm!
What is the best way to use a light box?
Today I want to watercolor a floral composition but already have a design in mind. There are many ways you can transfer your design onto watercolor or mixed media paper- and today I will show you how to use a lightbox for tracing.
Other than watercoloring you will be amazed at how many other ways you can use your light box! You can use it to Hand letter on a t shirt, to weed out your intricate cut vinyl and even to illuminate the gems of your diamond art kit!
How to use a lightbox for tracing your designs:
Here is how to use a lightbox for tracing plus a few tips!
- Choose a design, pencil sketch or print out and resize to the correct size you need.
- Place your design onto the lightbox and then place your watercolor or mixed media paper on top.
- I like to use some masking tape at the top to tape these two together. You do not need to tape this to the lightbox itself. It is easier to tape just those two together and be able to angle them while painting or drawing.
- Turn on your lightbox and adjust brightness until you are comfortably able to see the design without straining your eyes.
- Turn off your room light if you need to do more detailed work or are unable to easily see the fine details of your design.
- One of my biggest tips for you- keep your lightbox and work at a 45-degree angle while working. Keep moving your light pad as you work instead of trying to move your hand around the corners.
- You can trace your design with a light pencil first and then paint it in or as I do you can directly paint your design to achieve a no-line image transfer.
how to use a lightbox for tracing Video
Video 2: In this below tutorial video, you will also see how to use a lightbox for tracing, and a closer look the Cricut Brightpad I have.
DIY Light box ideas:
- Keep your design against a window and use the sunlight as your lightbox.
- I’ve heard you can also try using your iPad to trace your designs. I haven’t tried doing this, but if you google “iPad as a lightbox for tracing” you might find some pointers.
- You can also use a clear shoebox or plastic bin with a flashlight underneath to work as a makeshift lightbox.

Inspiring you with simple doable Art and Craft ideas and tutorials that will encourage you to use your supplies, get messy and find your creativity.
What a great way to use the light box. I have been trying to decide if I need one or not, but I’m leaning towards yes!
I love my light pad and am sure you’ll love it too!!
What a great idea! I have had the bright pad on my wish list for a while. I definitely need to just make the purchase. So many great uses for it.
It is a great tool to have indeed! So much fun!
I really love your idea! I enjoy painting but I’m a terrible artist, lol. I think this technique is the answer!