A great way to transform your pillow to add color to it with paints. Today let me share how to stencil a pillow in a few easy steps.
One of my favorite things to do while redecorating my home is to change out the throw pillows. These pillows are an inexpensive way to bring color to your decor. By making your own pillow covers you have the option to choose any color under the rainbow!

how to stencil a pillow Cover
Today I am using stencils and if you have not used them before, start with these tutorial to learn more: How to Stencil on Fabric Step by Step and How To Use A Stencil Brush + Easy Tips For Stenciling
- Start by placing the stencil on top of the fabric.
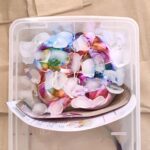
- Using the stipple brush, pick up a little of the fabric paint, and tap off excess paint.
- Make sure to wash your paint brush thoroughly after using a black paint to remove all traces of the dark color.
- Using an up-down motion lightly pounce the brush on top of the stencil.

- Make sure that you have covered the entire stencil with paint
- Add some drama to your piece, by highlighting a few areas using a contrasting color.
- Gently lift the stencil off of the fabric in one upward motion. Let the paint dry for a few minutes.
- Move your stencil onto the next area and line up using the guide marks on the stencil. Repeat above process.

Tips
I would recommend placing a paper or plastic placemat underneath, if you were using a thinner fabric to prevent staining your work surface. . But make sure you remove the paper as soon as you are done stenciling and do not allow the fabric to dry on top of the cardboard. If you are using a presewn pillow case, insert the cardboard or something plastic between the front and the back of the pillow.

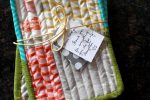
I hope you enjoyed this how to stencil a pillow cover tutorial!


very creative!