Grab a few of those foam pumkins and today lets try out a few easy Dollar Tree Pumpkin Makeovers using paint!
These are simple, quick and cheap to make but the results are so trendy!
New Dollar Tree craft items keep showing up on the aisle, but these Dollar Tree Pumpkins are a fall staple. Make sure to also check out these other Fall Crafts- 7 EASY Pumpkin Drawing ideas with Step-by-step Tutorials! , Felt Pumpkin Craft DIY Fall Wreath Dollar Tree, and Dollar Tree Candle Making Kit
FOLLOW ME: INSTAGRAM, TWITTER, FACEBOOK, PINTEREST
Dollar Tree Pumpkins Makeover VIDEO:
Click the video box below to watch the Easy Dollar Tree Pumpkin makeover video on YOUTUBE. While you are there, don’t forget to subscribe to my channel!
SUPPLIES USED:
Here is what you will need-
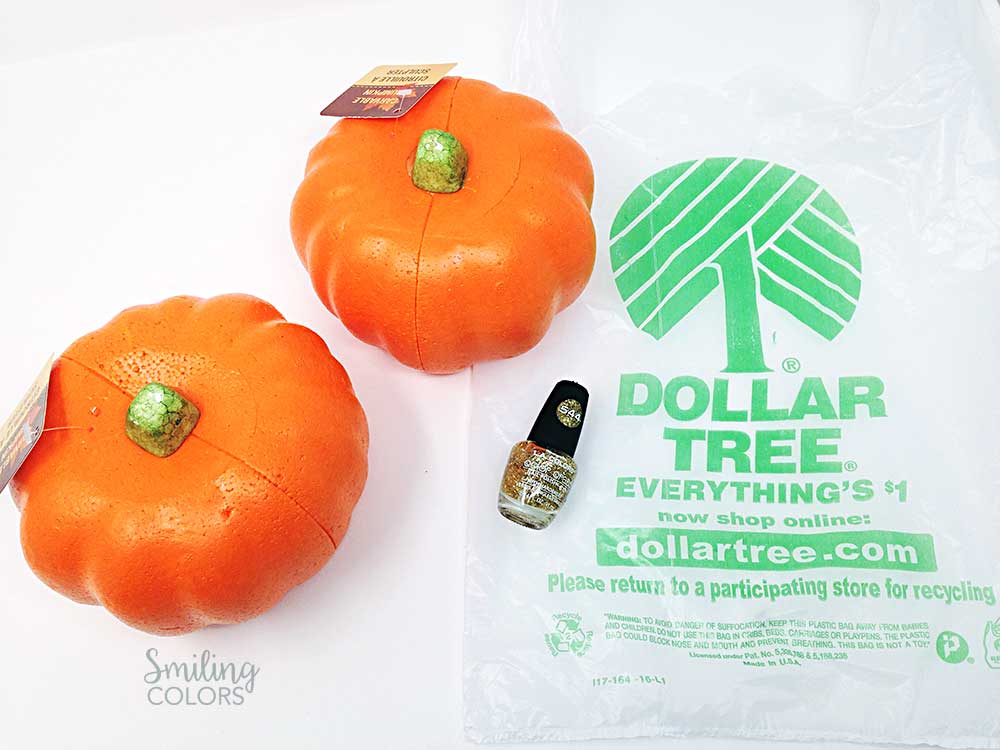
- Dollar tree pumpkins to decorate. You can buy them at the supermarket, the craft store, or like I did today at Dollar Tree Craft aisle. These are inexpensive and great for crafts!
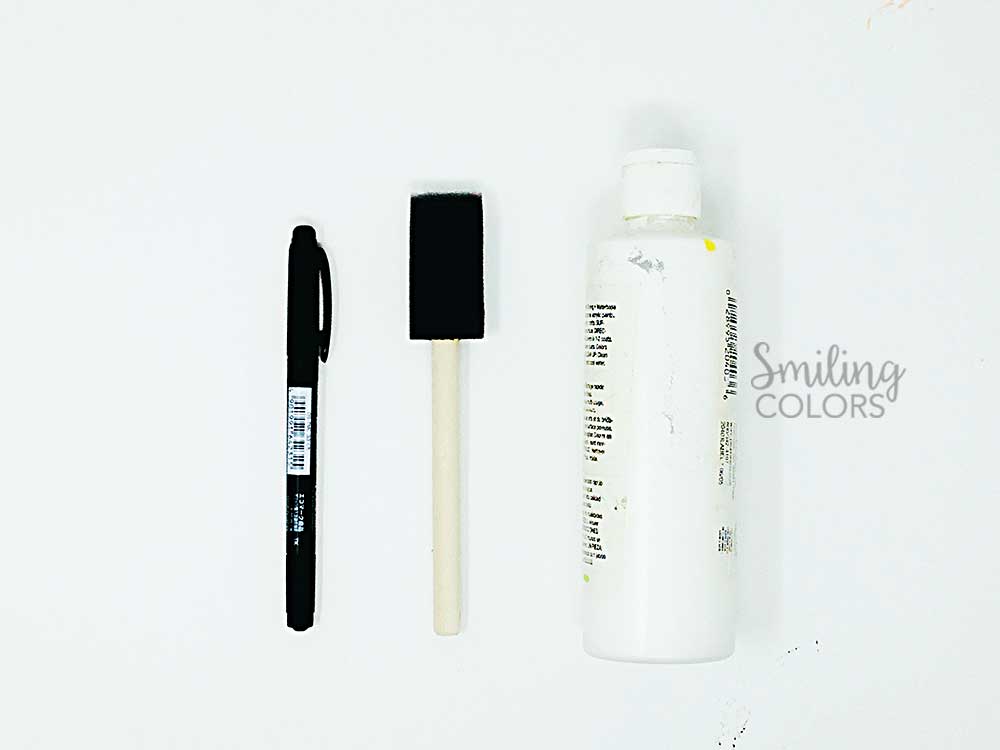
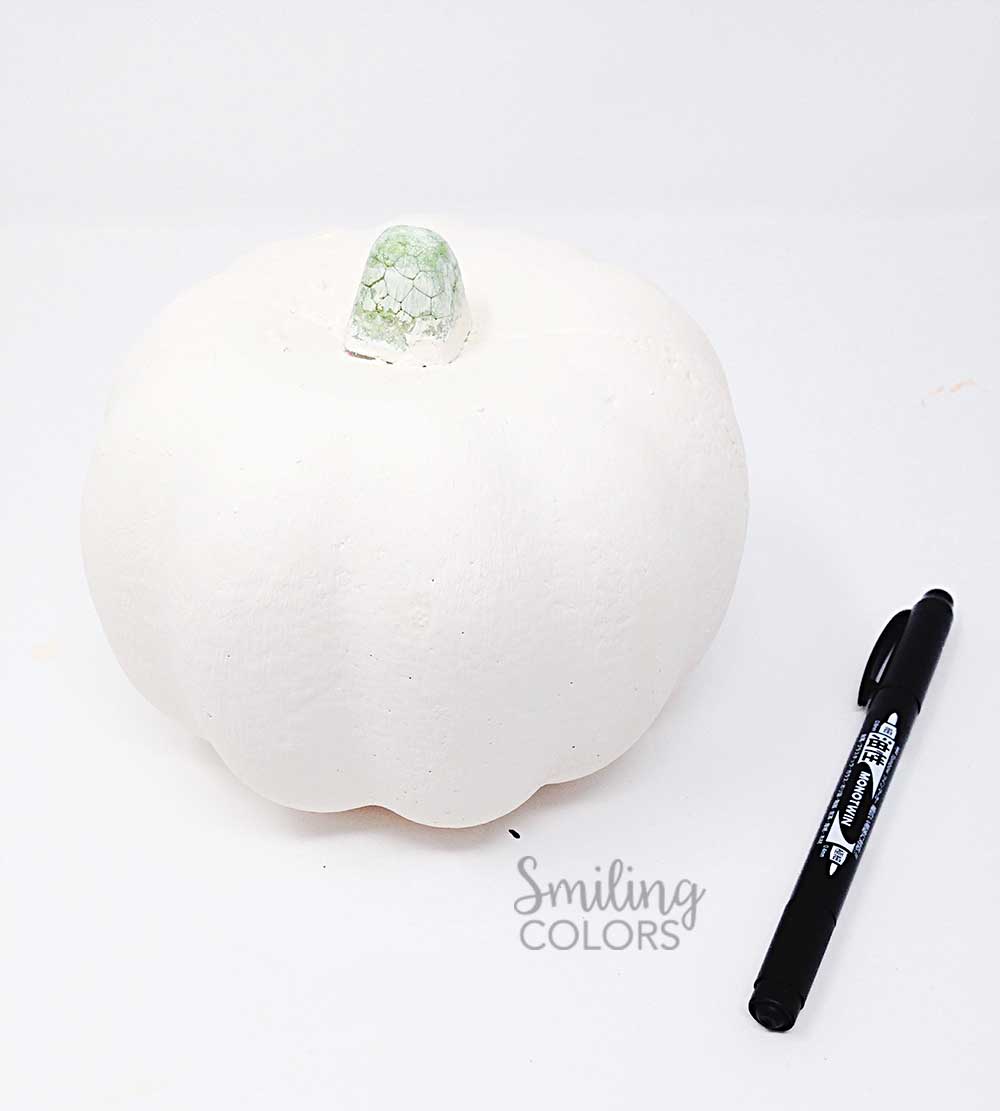
- White acrylic paint
- A foam brush
- Black marker. If you are decorating a large pumpkin you would need a thicker marker.
painted dollar tree pumpkins
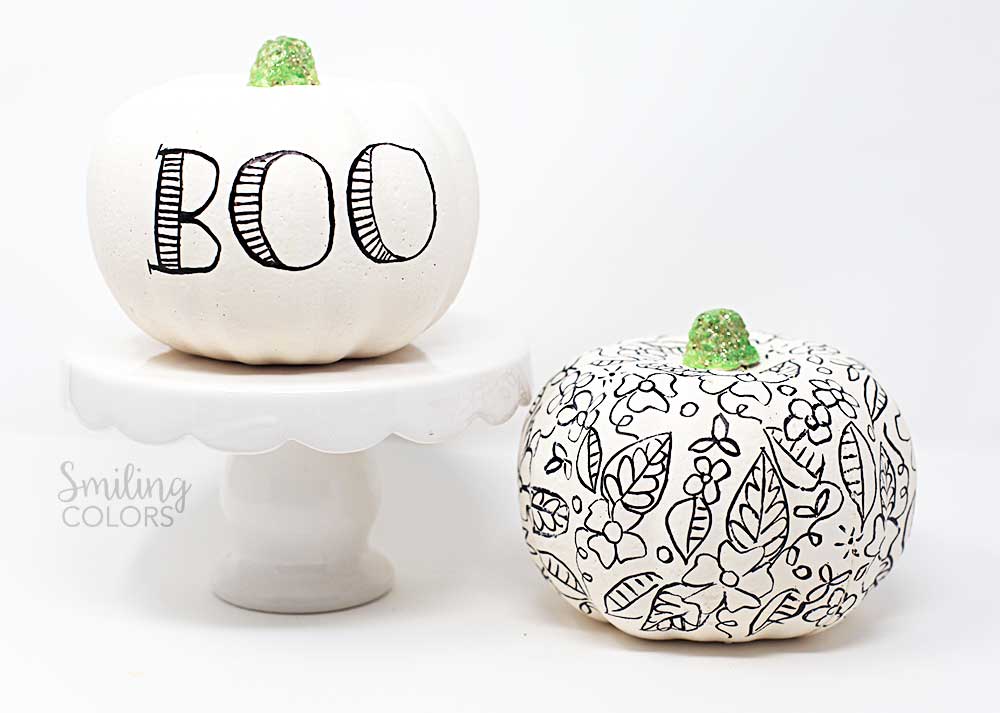
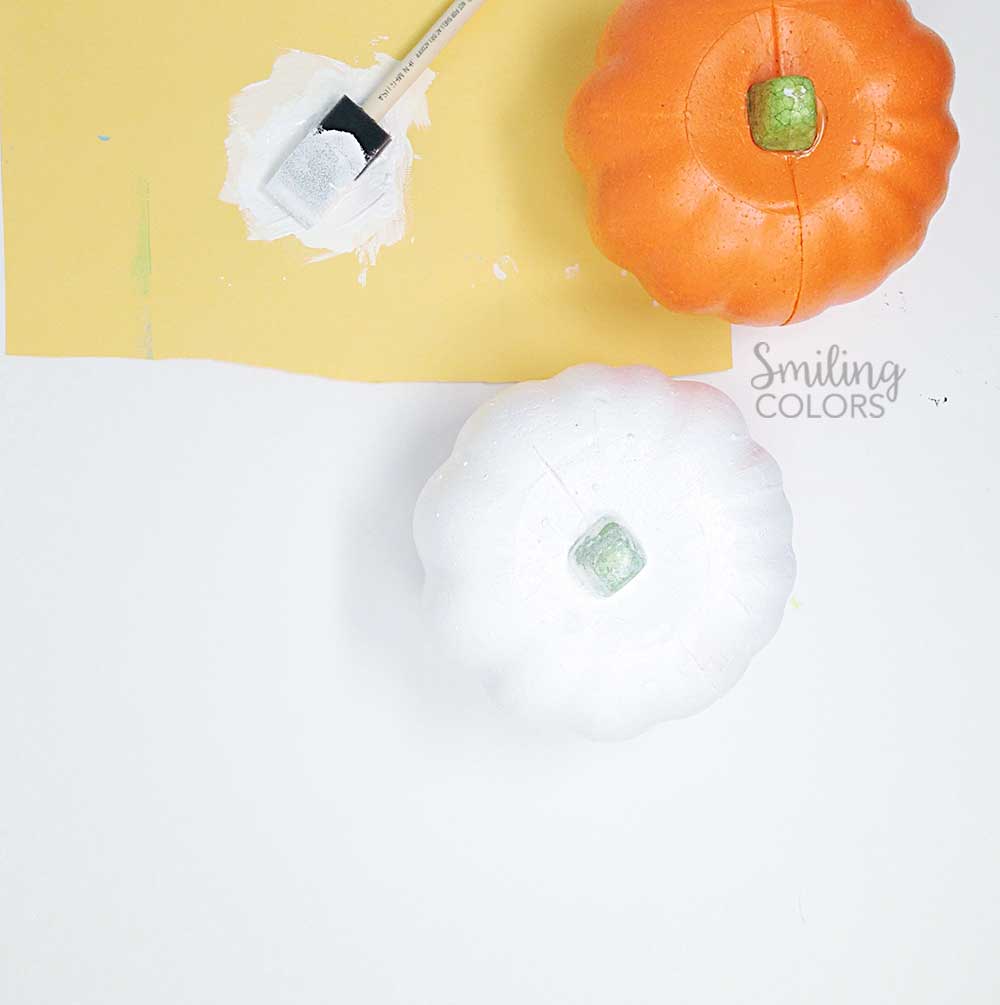
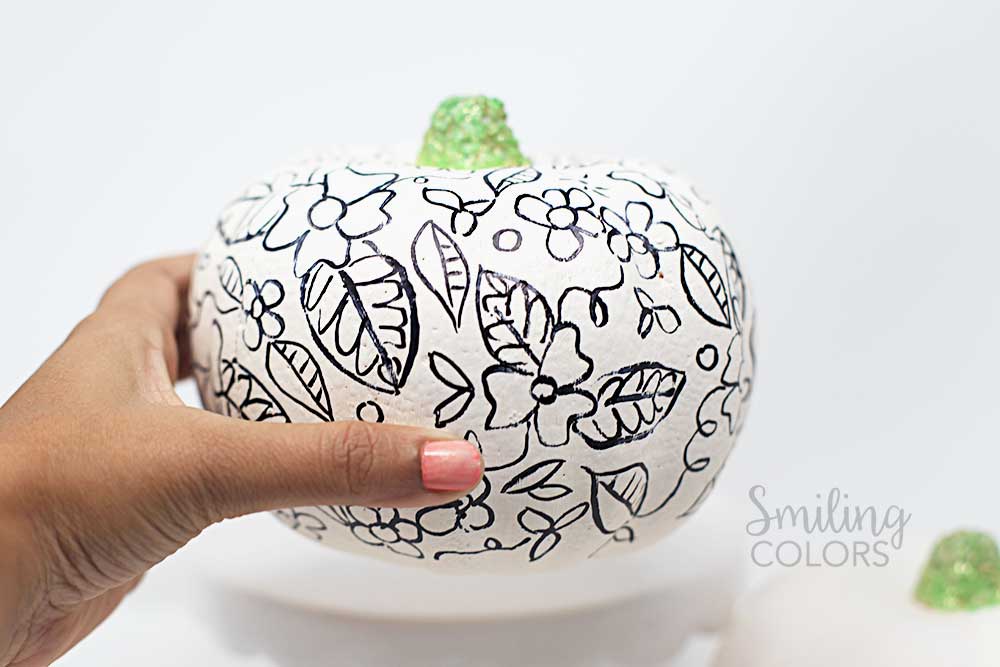
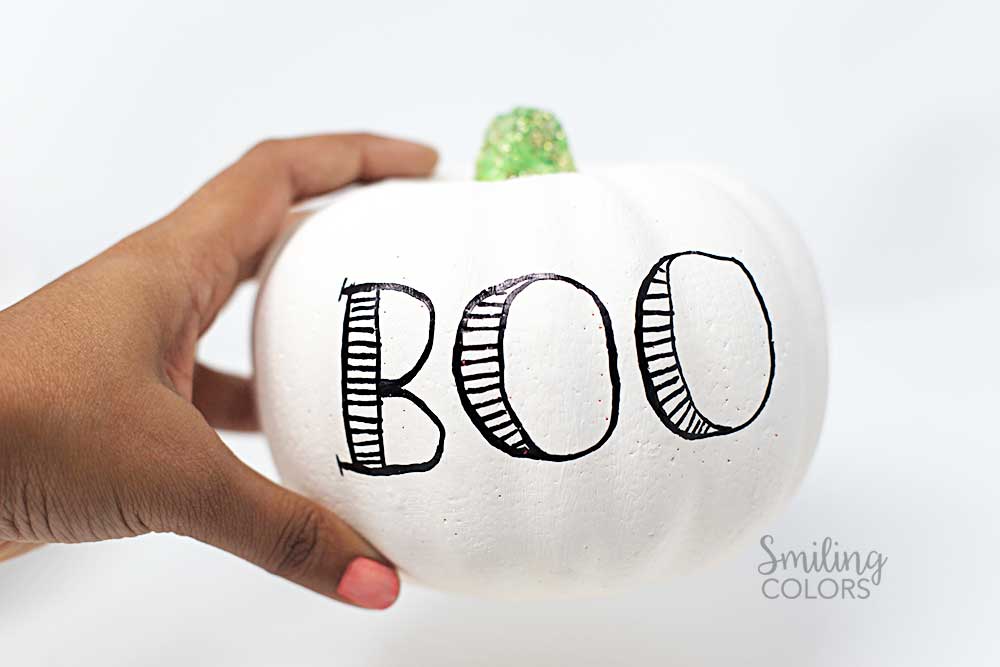
First, we paint the pumpkins. I used acrylic paint and it took about 2 to 3 coats to get a uniform color application. I totally love how the white pumpkin looks, that in itself is such a great transformation. Onto the white painted pumpkin, you can add a number of things and decorate it- think sequins, buttons, stickers, or even those plastic googly eyes. I plan to use my black marker to decorate this because I love drawing flowers 🙂
Drawing and hand lettering on this foam pumpkin are very simple. The foam is firm yet soft and has a little give that allows the marker to move easily. I have tried lettering on a real pumpkin, and that surface is smooth and the pen glides too quickly and it is a bit tougher to draw a smooth black line with your marker. I was pleasantly surprised at how much fun it was to draw on the foam pumpkins!
The end result was much more than I had hoped for those simple black flowers on the white pumpkin turned out neat. This was a fun project, took about an hour to make and since it is a no-carve decoration there was no real mess.
I love the clean and simple black and white look I was able to achieve. The pumpkins look like something you would find at a trendy store.
Click here to pin this tutorial
And another bonus? I can easily use and reuse these Dollar Tree pumpkins and paint over them again in the next few years!
dollar tree pumpkin craft ideas
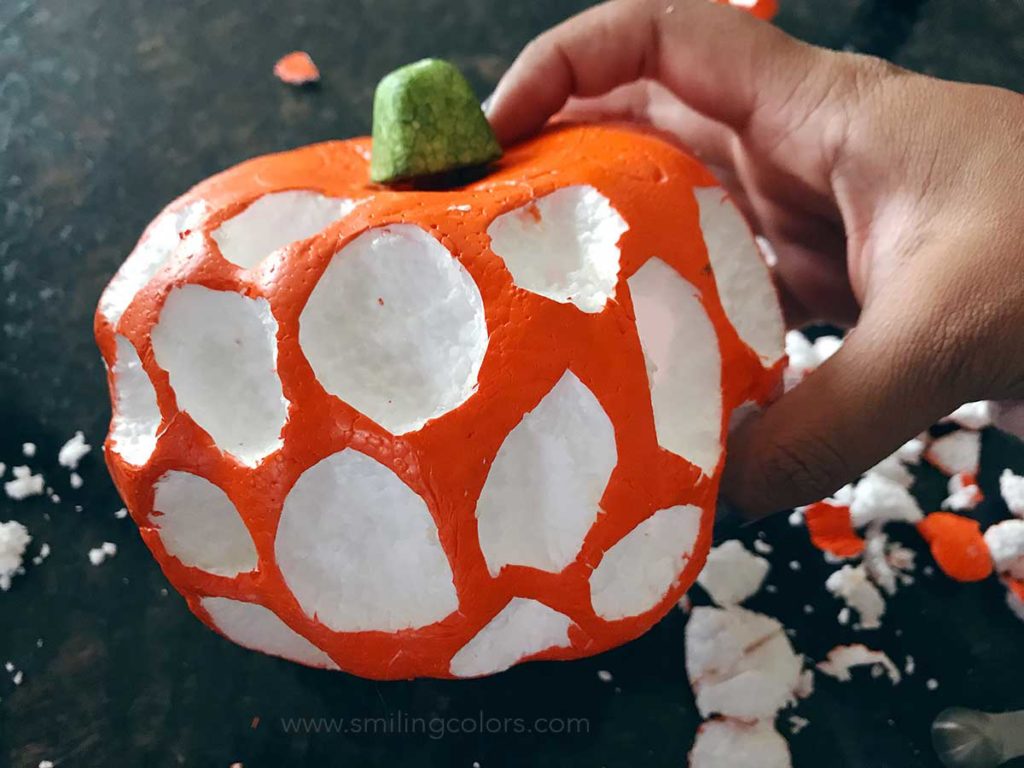
Here is another idea, I scooped out the foam of the pumpkin to create a black and white contrast idea!
Watch the Video: https://youtu.be/xWo5akUsvX8
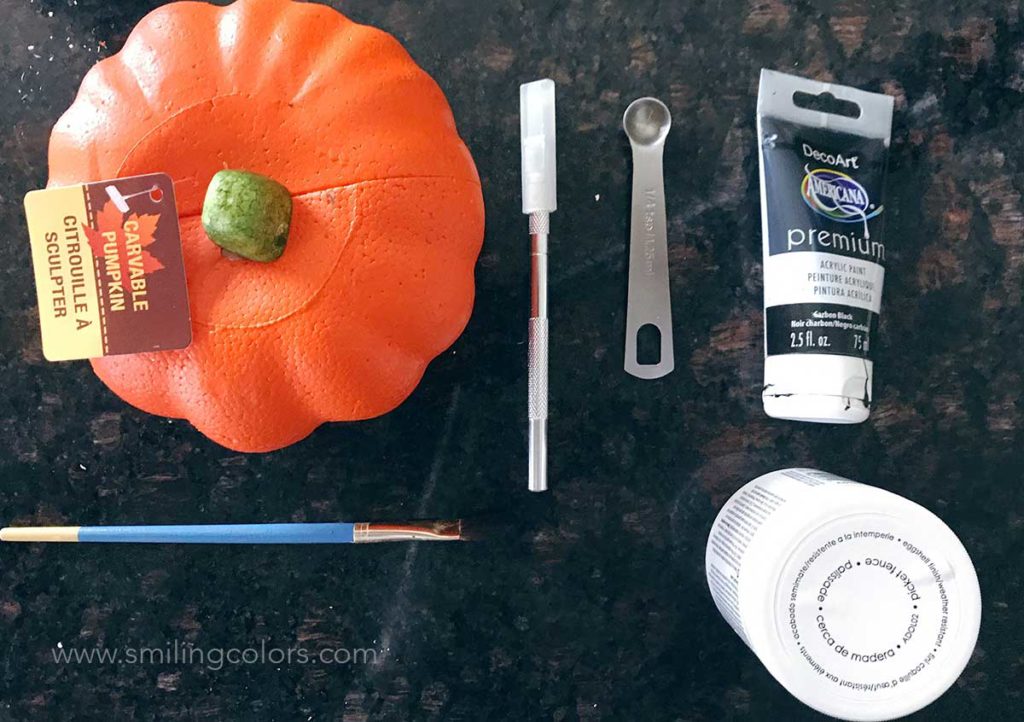
The Dollar Tree pumpkin is a foam carvable pumpkin. I have painted these cute pumpkins before but today I was in a mood to carve them.
Using an Exacto knife or sharp knife draw wonky circles all around the pumpkin and then scoop out the foam to create craters or dents into the pumpkin. Be careful to just remove some of the foam and not make holes into the pumpkin.
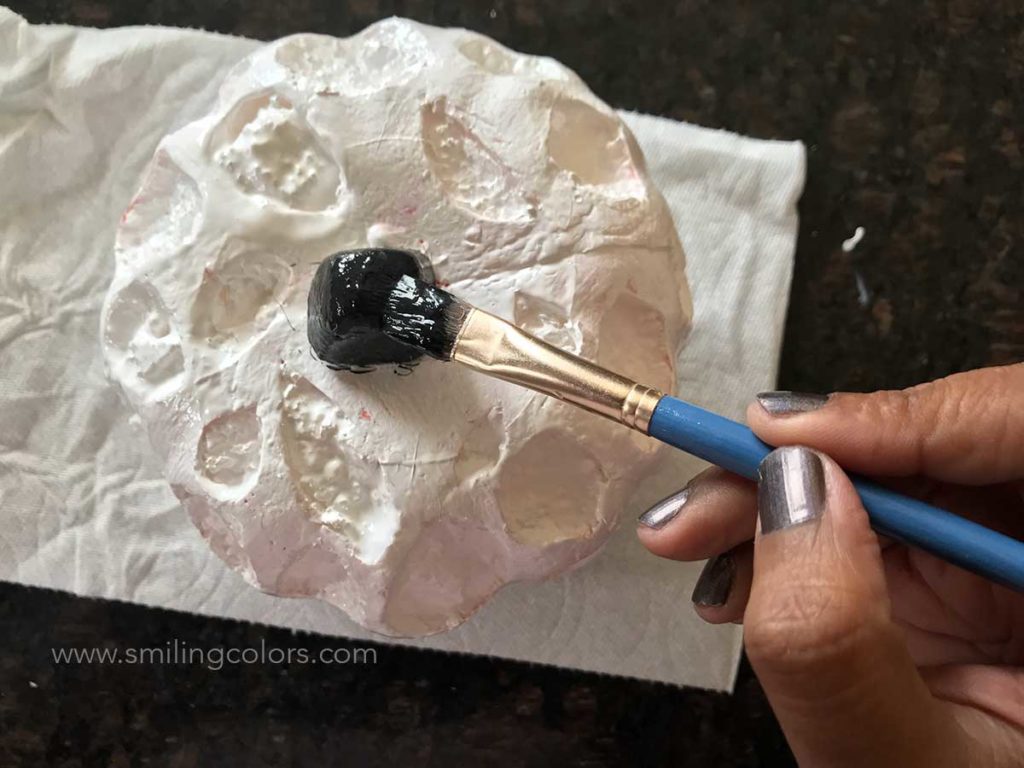
Paint the entire pumpkin white. I gave a nice thick coat of white acrylic paint. This will seal all the loose foam bits and give a nice finished look. Then paint the stalk black (or maybe gold if you want!)
Finally with a smaller brush paint the outside rims black. I love the black and white contrast and how unique and modern this looks. You can finish it off with a coat of varnish spray.

Hi I’m Smitha! I live in Minnesota with my husband and two daughters. You’ll always find me painting florals in my sketchbook. And I love the sheer joy of making something with just my hands! But my bigger love is capturing it all on camera Read more.
Thanks for stopping by today! If you learnt something from this tutorial, do share this post with a friend or on social media! Tag me @smithakatti #smithakatti I’d love to see what you create!

These are super cute! Visiting from the blog hop!
Absolutely creative and darling. Perfect for Halloween.
I love your informative video.
Happy Halloween
These are the best pumpkins. I love how you painted it white and drew on the design. It is so pretty.