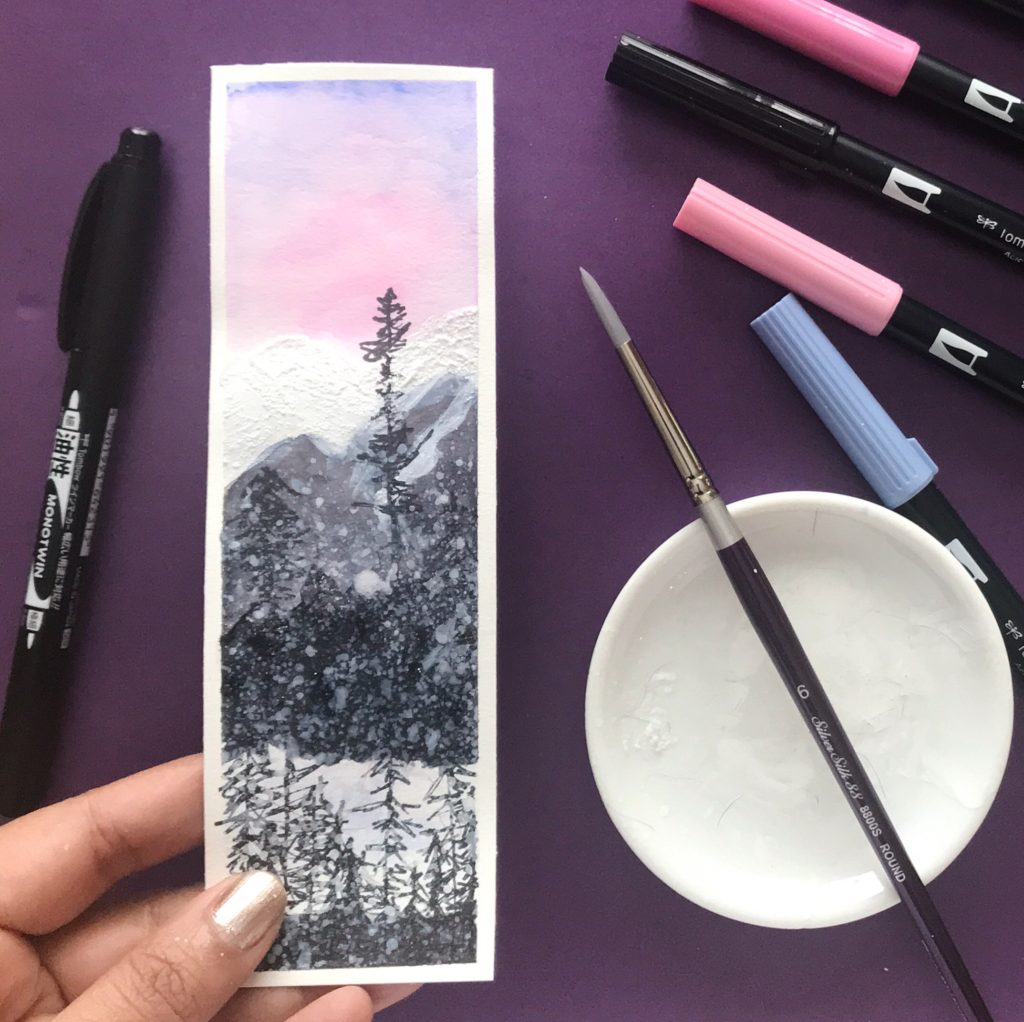
Capture winter’s snowy beauty onto paper by painting a winter scene that is super simple to create. A dreamy sky, dark mountain shapes all covered in a white paint splatter that mimics mother nature’s snow. The snow makes everything look natural and there is no going wrong with this painting.
Here are a few more Winter project ideas to try- Winter Watercolor Tutorial, and How to Draw a Snowflake 6 EASY ways VIDEO + Printable!

Winter can be cold and grey, but if you look around you will also see the beauty in it! Painting a winter scene can be easier than you think- because the snowy drops of paint will cover and forgive all of your imperfections. By adding a textured glaze you elevate the snow capped mountains in your painting.
Your next project can be to try this Winter Watercolor painting tutorial that uses a fan brush and adds a snowy texture.
This post contains affiliate links. When you purchase an item via these links, I receive a small commission at no extra cost to you.
8 steps to painting a winter scene
Painting a winter scene step by step tutorial
- Prep your Paper: Choose whether you are painting in a sketchbook, or making a DIY bookmark with watercolor paper. Trim your watercolor or mixed media paper to measure 2.25 by 7 inches. Tape the paper into place with some washi tape.
- Paint the sky: Start at the top, and add two to three colors to the sky with watercolor markers and blend the colors softly.
- Paint the mountain shapes: Build the mountain area with a diluted black/grey color first. Add some tree shapes to base of the mountain.
- Add texture: Add gesso to the top of the mountain to look like snow. Layer some crystal glaze on top to add dimension and shimmer!
- Add more layers of colors + details: Deepen the black color on the mountains and trees beneath. Add black watercolor marker directly to paper to darken the trees. Paint with water to give it a messy tree shape.
- Draw trees: Use an oil-based marker or pen to draw in focal trees at the bottom and on top of the mountain.
- Make it snow: Splatter watery gesso onto the landscape.
- Reveal your painting! Let the paint dry for a few minutes and peel off the masking tape carefully to reveal the painting of a winter scene!


list of supplies used:
- Canson XL Mix Media Paper (trimmed to 2.25 by 7 inches) https://amzn.to/2RTLObo
- Markers http://amzn.to/2BXneT0
- Silver Brush Round 6 paintbrush https://amzn.to/2BmvXfz
- Nuvo Crystal Glaze https://amzn.to/2t6ahzw
- Gesso https://amzn.to/2Bm9tuV
- MONO Twin Tip Permanent Marker, Black http://amzn.to/2D3LtvH
TIPS AND THINGS TO KEEP IN MIND:

The gesso splatter reacts with the Tombow Dual Brush Pens and creates shades of grey and in between and the result is so beautiful!
It’s important that the pen you use is oil-based that won’t bleed with water or the water splatters. Read more: How to use Watercolor and Pen together
If you do have dimensional white paint, use a masking fluid instead beforehand. By masking off the area you can preserve the white paper color to create a true watercolor effect.
If you prefer to just draw with your markers instead of painting, try creating this Easy Landscape Drawing instead.
Painting a Winter Scene YOUTUBE VIDEO:
Pull out your art supplies and paint along with me with this Painting a winter scene step by step tutorial VIDEO.
It’s a quiet snowy afternoon here in Minnesota, the perfect time for Painting a winter scene. I’m excited to try painting more of such scenes into my sketchbook in the future.

Hi I’m Smitha! I live in Minnesota with my husband and two daughters. You’ll always find me painting florals in my sketchbook. And I love the sheer joy of making something with just my hands! But my bigger love is capturing it all on camera Read more.
Thanks for stopping by today! If you learnt something from this tutorial, do share this post with a friend or on social media! Tag me @smithakatti #smithakatti I’d love to see what you create!


Gorgeous!