Watercoloring is such an enchanting medium, the water creates all the magic for you! Today, let’s explore How To Paint A Pond In Watercolor step by step with a Video Tutorial that you can follow along with.
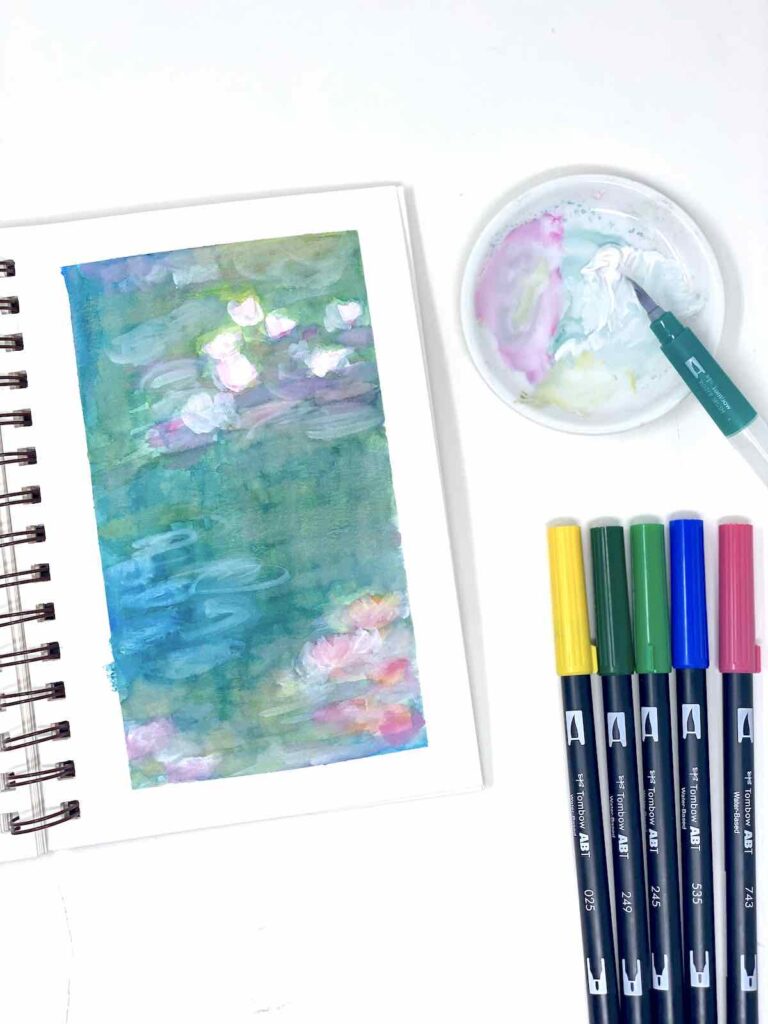
If you love painting, I think you will love this Watercolor Salt Technique. Today, to paint a pond in my sketchbook, I’m using Watercolor Markers again- these markers have water-based ink that creates beautiful airy paintings! You can use watercolor cakes with similar results as well.

Affiliate links have been used at no extra cost to the reader. You can read my full disclosure here.
Materials needed for watercolor painting:
- Watercolor Sketchbook– Choose a heavyweight watercolor paper that can withstand the wetness of the medium
- Watercolor Markers or cakes
- Water Brush or Paintbrush
- Watercolor Masking Tape
Now that you have your painting supplies ready, choose a reference image. Monet’s Water Lilies is one of the most amazing pond paintings!
How To Paint A Pond In Watercolor Step By Step Tutorial:
- Apply tape around the edges of your sketchbook page. This will create a neat edge to your painting as well as protect the pages beneath. Start by applying the marker color directly onto the paper. Apply a few different blues and greens to create a depth in color and interest.
- Using the Water brush, gently paint over the marker color. The water will react with the marker and the color will spread and create a watercolor look. Mix the colors lightly but not too much. You want a variation of colors, so try not to overmix and blend the colors into one.
- Add more marker color to the next corner of the paper. For the water lilies, I chose to leave a blank space and add the marker color around it. You can alternately, use a masking fluid to mask that area.
- Blend the colors with the Water brush again.
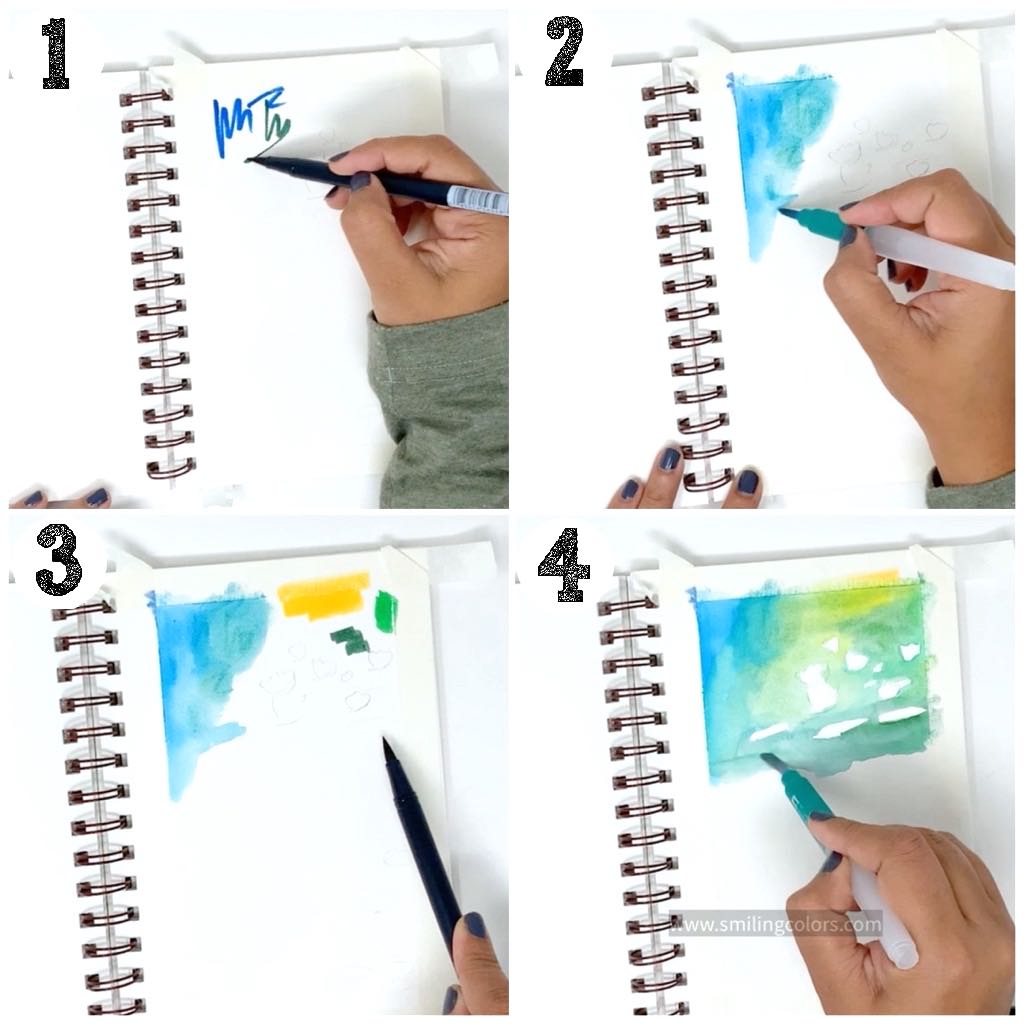
- Add more markers to the paper, always adding the marker color onto dry paper. If you add the marker color to wet paper, it will not spread nicely but remain marker-like. Use the marker application to create movement in the pond water.
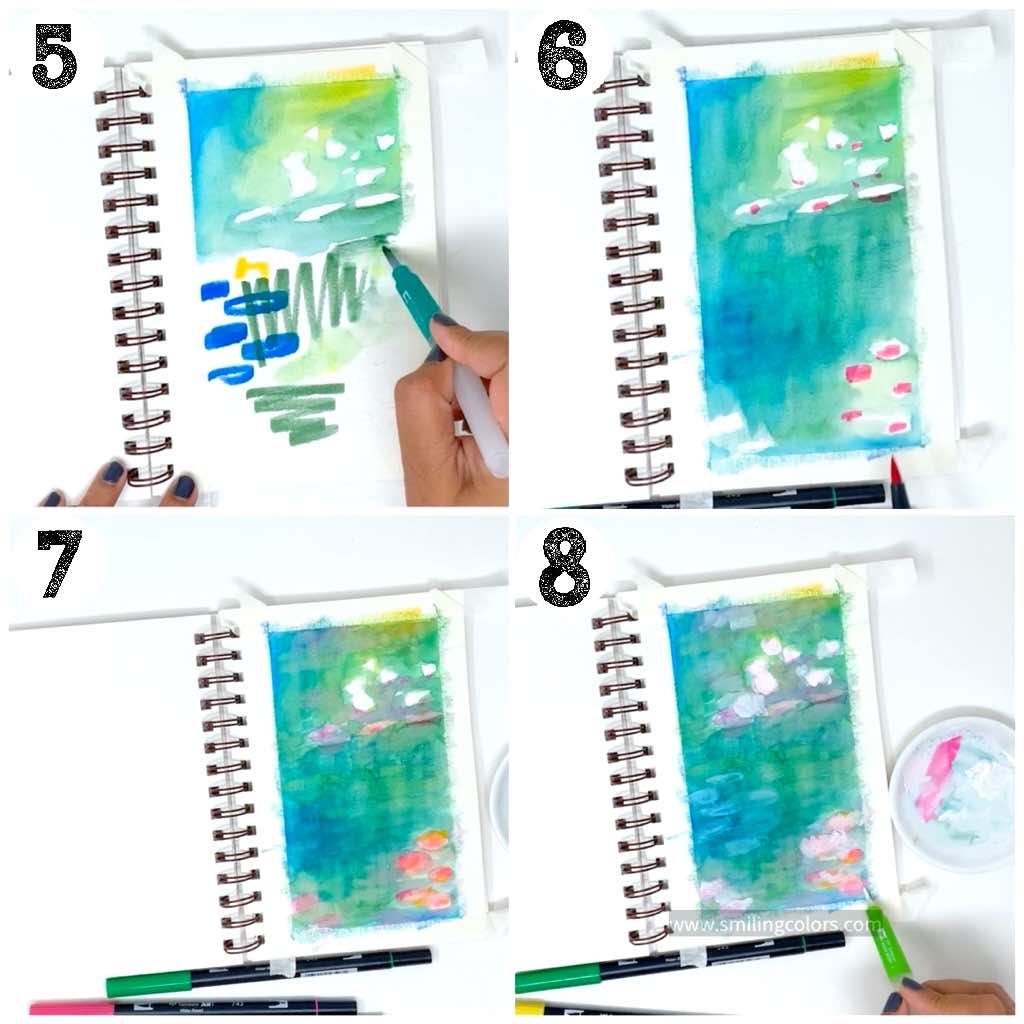
- Blend the colors using circular movements. Next, blend and move colors using an up-down stroke to make it appear like the water has some movement. Apply some pink, orange and yellow marker colors to the lilies.
- Using a smaller delicate Water Brush, paint in the water lilies. You can make these flowers abstract blobs of color or go detailed.
- I added a drop of gesso to the flowers to create a slightly whiter color. This is technically not a watercolor technique but more of a mixed media technique but the results are simply beautiful!
How To Paint A Pond In Watercolor Video
Stop by my YouTube Channel for a new video today friends! I am painting a pond and you can watch it come alive stroke by stroke.
Watch on YouTube: Painting a Pond in my Sketchbook Video
I hope you are inspired to paint a pond today friends! This was completely different for me, and the calmness of the pond feels very relatable. There is so much depth and layers you can add to this pond. Step back and assess the overall balance and composition of your painting. Make any necessary adjustments to ensure a pleasing and harmonious result.
More Watercolor Tutorials to Explore:
After you paint a pond, try one these next!
- How to Paint Beautiful Tulips in Watercolor
- How to use Watercolor and Pen together
- How to Paint a Watercolor Splash
- Watercolor Salt Technique: Easy Interesting Texture!
How To Paint a Pond In Watercolor For Beginners
In conclusion, watercolor is a beautiful and expressive medium that allows you to create relaxing art. I hope this How to Paint a Pond in Watercolor Tutorial helped you bring a pond to life on paper. So grab your brushes, mix your colors, and let your creativity flow as you embark on this magical journey of artistic expression. Happy painting!